Home › BODY › SEAT › FRONT SEAT ASSEMBLY (for Manual Seat)REASSEMBLY
Removal / installation · Vehicles built Nov 2005 – Dec 2006
Versions by build date: Nov 2005 – Dec 2006 Jan 2007 – Jul 2008 from Aug 2008
CAUTION:
Wear protective gloves. Sharp areas on the seat frame (with adjuster) may injure your hands.
HINT:
Use the same procedures for the RH side and LH side.
The procedures listed below are for the LH side.
1.
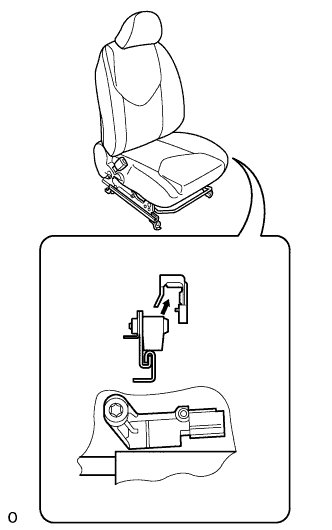
INSTALL SEAT POSITION AIRBAG SENSOR (for Driver Side)
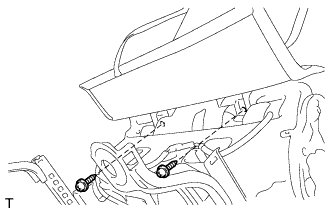
Using a 1 mm (0.039 in.) feeler gauge, install the seat position sensor.
NOTICE:
If the seat position sensor has been dropped, or there are any cracks, dents or other defects in the case or connector, replace the seat position sensor with a new one.
When installing the seat position sensor, be careful that the SRS wiring does not interfere with other parts and that it is not pinched between other parts.
HINT:
Be sure that the clearance between the seat position sensor and the seat rail is within 0.6 mm to 1.4 mm (0.023 to 0.055 in.).
Using a T30 "torx" socket, tighten the "torx" screw to install the seat position sensor.
Torque:
8.0 N*m{
82 kgf*cm
, 71 in.*lbf
}
Make sure that the clearance between the seat position sensor and the seat rail is within 0.6 mm to 1.4 mm (0.023 to 0.055 in.).
Connect the connector.
Install the seat slide position sensor protector to the seat position sensor.
2.
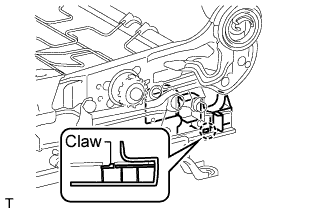
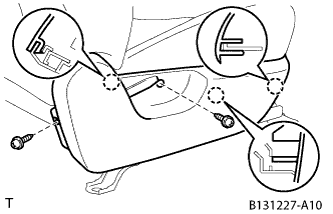
INSTALL FRONT SEAT CUSHION LOWER SHIELD LH
Attach the claw to install the lower shield.
3.
INSTALL FRONT SEAT CUSHION LOWER SHIELD RH
HINT:
Use the same procedures described for the LH side.
4.
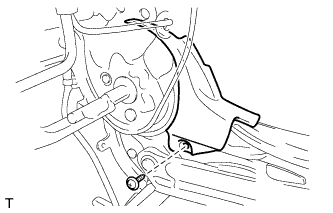
INSTALL RECLINING ADJUSTER UPPER INSIDE COVER LH
Install the inside cover with the screw.
5.
INSTALL RECLINING ADJUSTER UPPER INSIDE COVER RH
Install the inside cover with the screw.
6.
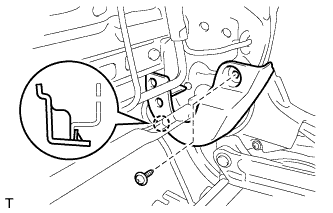
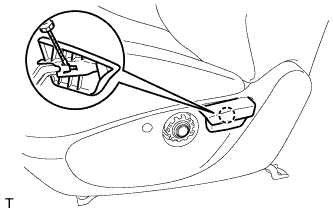
INSTALL RECLINING ADJUSTER LOWER INSIDE COVER LH
Attach the claw to install the inside cover. Install the screw.
7.
INSTALL RECLINING ADJUSTER LOWER INSIDE COVER RH
HINT:
Use the same procedures described for the LH side.
8.
INSTALL FRONT SEATBACK HEATER (w/ Seat Heater System)
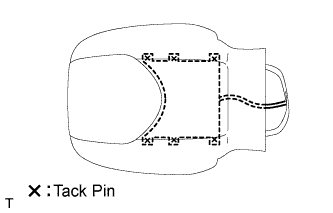
Using a tacker, install the seatback heater to the end of the seat cover with 6 new tack pins.
NOTICE:
Do not substitute other metal parts for tack pins.
9.
INSTALL FRONT SEATBACK COVER
NOTICE:
Be careful not to damage the cover.
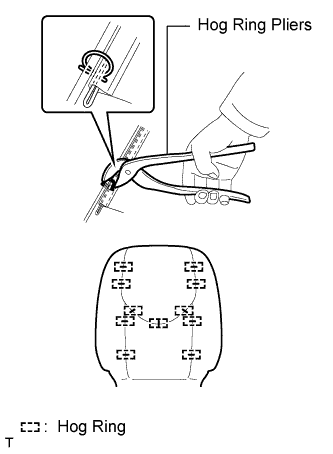
When installing the hog rings, avoid wrinkling the cover.
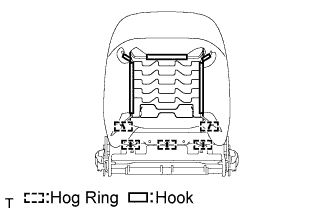
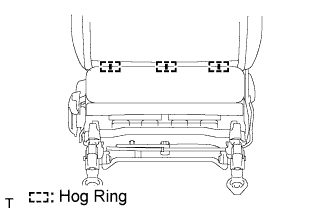
Using hog ring pliers, install the seatback cover to the seatback pad with 11 new hog rings.
Install the seatback cover (with pad) to the seat frame (with adjuster).
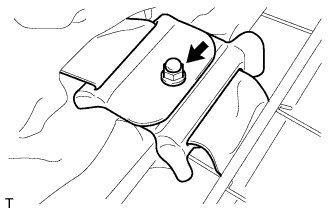
Fully cover the airbag with the 2 seatback cover brackets and install the nut.
Torque:
5.5 N*m{
56 kgf*cm
, 49 in.*lbf
}
CAUTION:
For vehicles with side airbags, the seatback cover must be securely installed. Otherwise, the side airbags may not deploy properly.
Make sure that the strap is not twisted after installing the bracket.
Install the bracket securely.
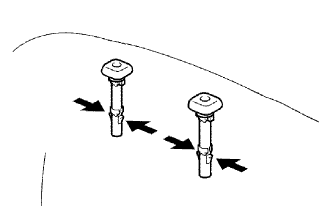
Attach the 4 claws to install the 2 headrest supports.
w/ Seatback Board: Attach the hooks. w/ Seatback Board: Using hog ring pliers, install 5 new hog rings.
w/o Seatback Board: Using hog ring pliers, install 3 new hog rings.
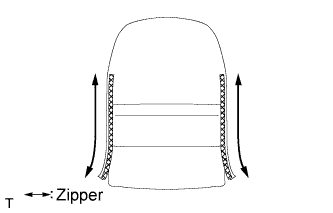
w/o Seatback Board: Close the 2 zippers.
10.
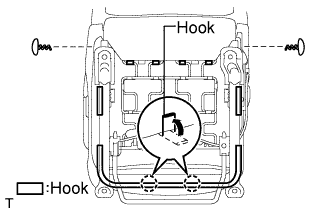
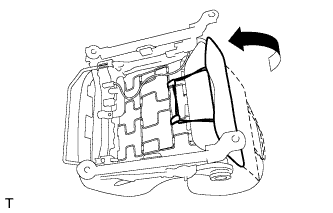
INSTALL FRONT SEATBACK BOARD SUB-ASSEMBLY LH (w/ Seatback Board)
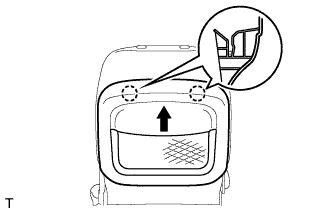
Push the seatback board in the direction indicated by the arrow in the illustration to attach the 2 claws.
Open the lower part of the seatback board. Then install the seatback board with the 2 screws.
11.
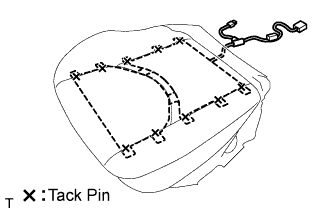
INSTALL FRONT SEAT CUSHION HEATER (w/ Seat Heater System)
Using a tacker, install the seat cushion heater to the end of the seat cover with 10 new tack pins.
NOTICE:
Do not substitute other metal parts for tack pins.
12.
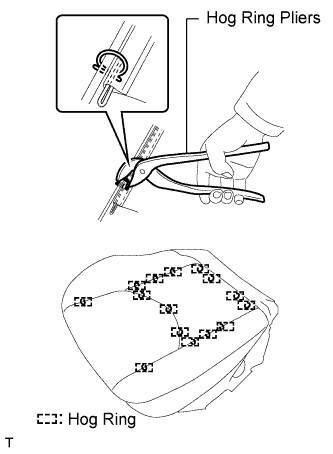
INSTALL FRONT SEAT CUSHION COVER
Using hog ring pliers, install the seat cushion cover to the seat cushion pad with 15 new hog rings.
NOTICE:
Be careful not to damage the cover.
When installing the hog rings, avoid wrinkling the cover.
Install the seat cushion cover (with pad) to the seat frame (with adjuster).
Attach the hooks and install the 2 clips. w/ Seat Heater System and Occupant Detection Sensor: Connect the connector.
13.
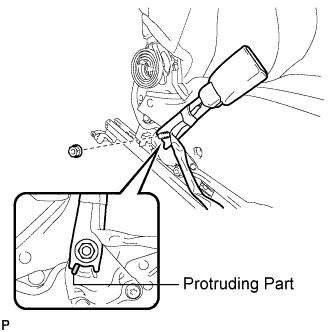
INSTALL FRONT SEAT INNER BELT ASSEMBLY
Install the front seat inner belt with the nut.
Torque:
42 N*m{
428 kgf*cm
, 31 ft.*lbf
}
NOTICE:
Do not overlap the anchor part of the seat belt and protruding part of the seat adjuster.
for Driver Seat: Attach the 2 clamps and connect the 2 connectors.
for Passenger Seat: Attach the 3 clamps and connect the 2 connectors.
14.
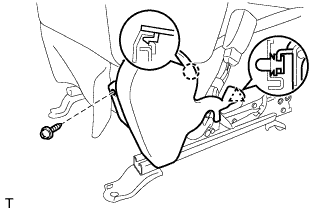
INSTALL FRONT SEAT CUSHION INNER SHIELD LH
Attach the clip and claw to install the inner shield. Install the screw.
15.
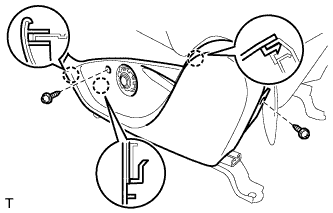
INSTALL FRONT SEAT CUSHION SHIELD LH (for Driver Side)
Attach the 3 claws to install the cushion shield. Install the 2 screws.
Connect the 2 rubber bands of the front seatback board or front seatback cover to the seat frame (with adjuster).
16.
INSTALL FRONT SEAT CUSHION SHIELD RH (for Front Passenger Side)
Attach the 3 claws to install the cushion shield. Install the 2 screws.
Connect the 2 rubber bands of the front seatback board or front seatback cover to the seat frame (with adjuster).
17.
INSTALL RECLINING ADJUSTER RELEASE HANDLE LH (for Driver Side)
Attach the claw to install the release handle.
18.
INSTALL RECLINING ADJUSTER RELEASE HANDLE RH (for Front Passenger Side)
HINT:
Use the same procedures described for the driver side.
19.
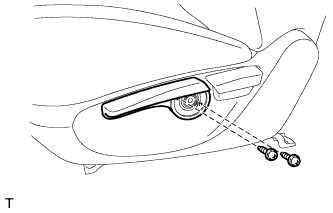
INSTALL VERTICAL ADJUSTING HANDLE (for Driver Side)
Install the handle with the 2 screws.
20.
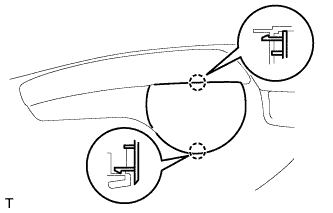
INSTALL VERTICAL ADJUSTER COVER LH (for Driver Side)
Attach the 2 claws to install the cover.