INSTALLATION
Removal / installation · Vehicles built from Aug 2008
Versions by build date: Nov 2005 – Jul 2008 from Aug 2008
| 1.
INSTALL OUTER MIRROR COVER LOWER LH |
 |
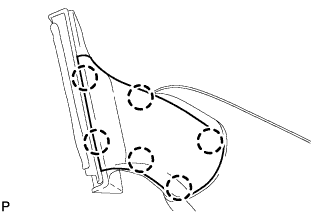
Attach the 6 claws to install the mirror cover lower.
| 2.
INSTALL OUTER MIRROR COVER LH |
|
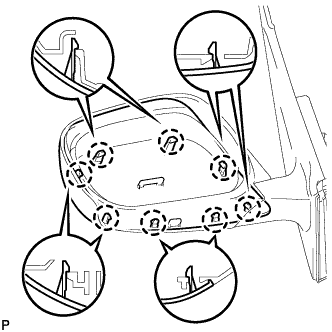
Attach the 8 claws to install the mirror cover.
Check that there is no gap between the cover and mirror body.
- HINT:
- If there is a gap between the cover and body, noise will occur during driving.
| 3.
INSTALL OUTER REAR VIEW MIRROR SUB-ASSEMBLY LH |
|
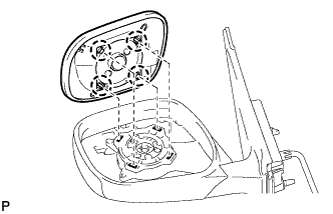
- Attach the 4 claws to install the mirror.
| 4.
INSTALL OUTER REAR VIEW MIRROR ASSEMBLY LH |
|
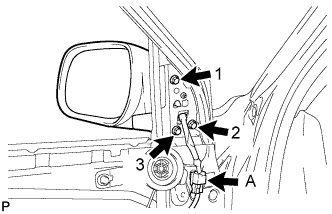
Pass the connector labeled A and wire harness of the mirror through the wire harness hole.
Temporarily install the mirror by inserting the bosses on the mirror into the holes on the vehicle and temporarily installing the 3 screws.
Tighten the 3 screws in the sequence shown in the illustration to install the mirror.
-
Torque:
- 9.0 N*m{
92 kgf*cm
, 80 in.*lbf
}
Connect the connector labeled A.
| 5.
INSTALL FRONT DOOR TRIM BOARD SUB-ASSEMBLY LH
|
|
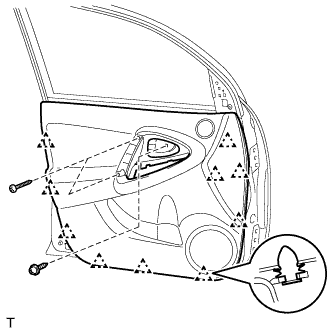
Attach the 4 claws to install the speaker door grille.
Attach the 7 claws to install the weatherstrip inner.
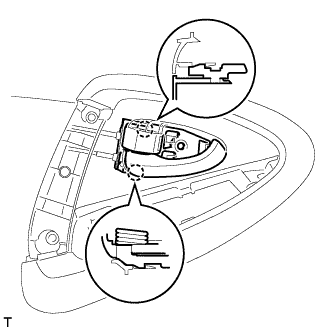
- Attach the 2 claws to install the inside handle.
- Attach the 10 clips to install the trim board.
Install the 3 screws.
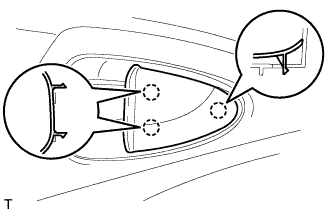
- Attach the 3 claws to install the door inside handle bezel plug.
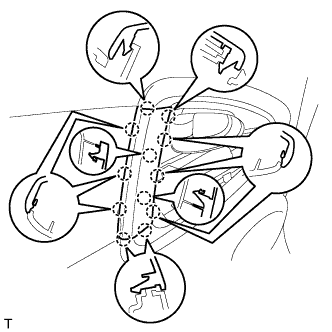
- Attach the 12 claws to install the door assist grip.
| 6.
INSTALL FRONT UPPER ARMREST BASE PANEL LH
|
|
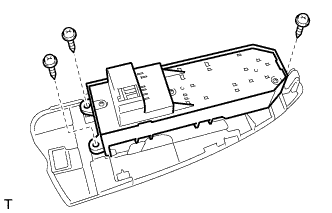
for Driver Side:
Install the power window regulator master switch to the panel with the 3 screws.
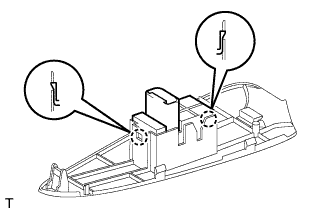
- for Passenger Side:
Attach the 2 claws and install the power window regulator switch to the panel.
Connect the switch connectors.
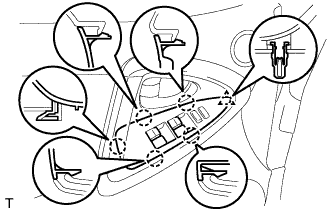
- Attach the clip and 5 claws to install the panel (with the switch).
| 7.
INSTALL FRONT DOOR LOWER FRAME BRACKET GARNISH LH
|
|
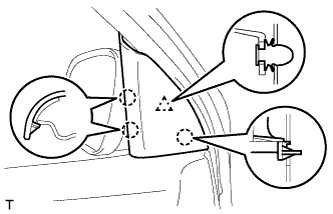
Attach the clip and 3 claws to install the garnish.