INSTALLATION
Removal / installation · Vehicles built Nov 2005 – Jul 2008
Versions by build date: Nov 2005 – Jul 2008 from Aug 2008
| 1.
INSTALL UPPER BACK DOOR OUTSIDE GARNISH SUB-ASSEMBLY RH |
 |
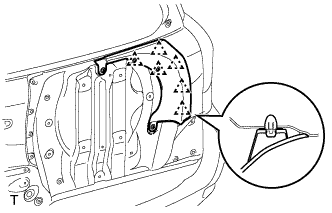
- Attach the 6 clips to install the back door outside garnish.
| 2.
INSTALL LOWER BACK DOOR OUTSIDE GARNISH SUB-ASSEMBLY RH |
|
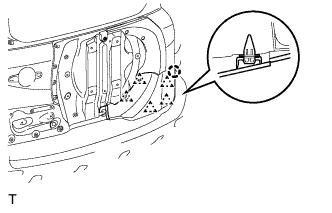
- Install the back door outside garnish.
Attach the claw and the 5 clips.
| 3.
INSTALL UPPER BACK DOOR OUTSIDE GARNISH SUB-ASSEMBLY LH |
|
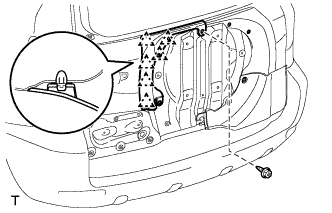
- Attach the 6 clips to install the back door outside garnish.
Install the screw.
| 4.
INSTALL LOWER BACK DOOR OUTSIDE GARNISH SUB-ASSEMBLY LH |
|
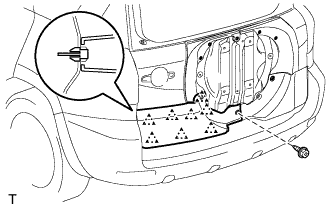
- Attach the 8 clips to install the back door outside garnish.
Install the screw.
| 5.
INSTALL LOWER BACK DOOR OUTSIDE GARNISH SUB-ASSEMBLY LH (w/ License Plate Light) |
|
for 1 piece type:
Install the 1 piece type license plate light (Click here).
for 2 piece type:
Install the 2 piece type license plate lights (Click here).
Connect the connector.
Attach the 7 clips to install the back door outside garnish.
| 6.
INSTALL LOWER BACK DOOR OUTSIDE GARNISH SUB-ASSEMBLY LH (w/ Rear Fog Light) |
|
Install the rear fog light (Click here).
Connect the connector.
Attach the 8 clips to install the back door outside garnish.
| 7.
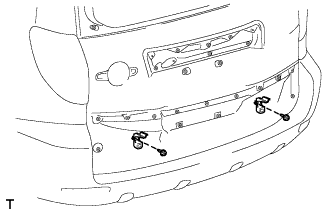
INSTALL BACK DOOR OUTSIDE GARNISH CLIP (w/o Tire Carrier) |
|
- Install the 2 clips with 2 screws.
| 8.
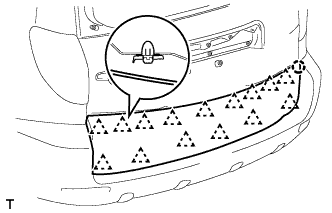
INSTALL LOWER BACK DOOR OUTSIDE GARNISH SUB-ASSEMBLY (w/o Tire Carrier) |
|
- Attach the claw and the 15 clips.
Install the back door outside garnish.
| 9.
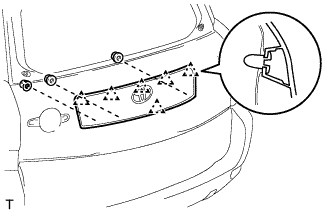
INSTALL BACK DOOR OUTSIDE GARNISH SUB-ASSEMBLY (w/o Tire Carrier) |
|
Install the 2 license plate lights (Click here).
- Connect the connector.
Attach the 6 clips and 3 nuts.
install the back door outside garnish.
| 10.
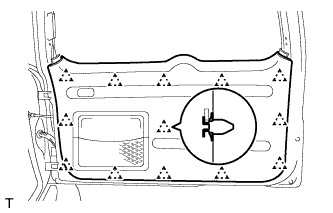
INSTALL BACK DOOR TRIM BOARD
|
|
Install the back door trim pocket with the 5 screws.
- Attach the 13 clips to install the trim board.
| 11.
INSTALL BACK DOOR COURTESY LIGHT SWITCH ASSEMBLY
|
|
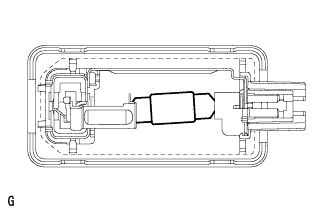
- Install the bulb to the light.
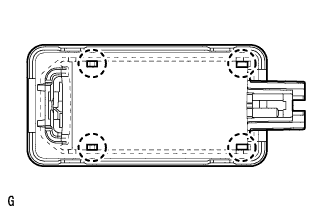
- Attach the 4 claws to install the light shade.
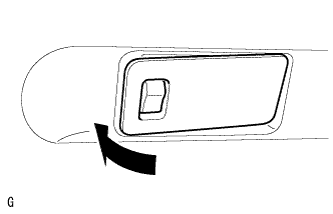
- Install the light as shown in the illustration.
| 12.
INSTALL BACK DOOR SIDE GARNISH LH
|
|
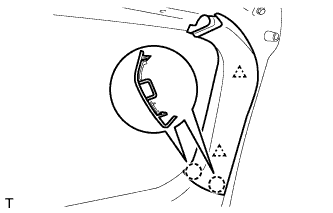
- Attach the 2 claws and 2 clips to install the garnish.
| 13.
INSTALL BACK DOOR SIDE GARNISH RH
|
|
- HINT:
- Use the same procedures described for the LH side.
| 14.
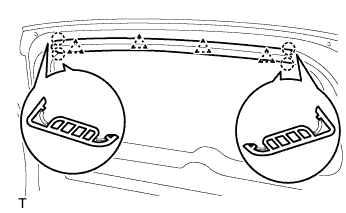
INSTALL BACK DOOR CENTER GARNISH
|
|
- Attach the 4 claws and 4 clips to install the garnish.
| 15.
CONNECT CABLE TO NEGATIVE BATTERY TERMINAL |
|