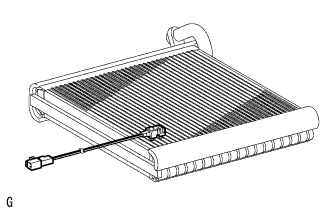
DISASSEMBLY
Removal / installation · Vehicles built from Nov 2005
| 1. REMOVE NO. 3 HEATER TO REGISTER DUCT |

Detach the 6 claws and remove the heater to register duct.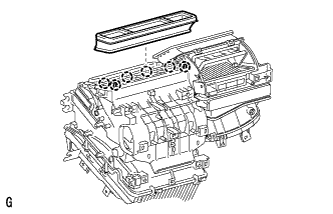

| 2. REMOVE AIR DUCT |
Detach the 2 claws and remove the air duct.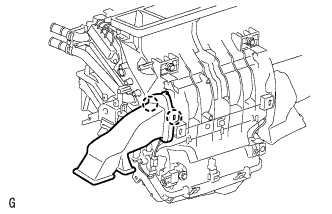
| 3. REMOVE AIR OUTLET CONTROL SERVO MOTOR |
Remove the 3 screws.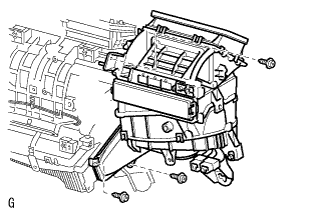
Detach the evaporator case from the blower case.
Remove the 3 screws and disconnect the connector.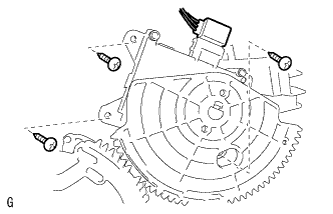
Remove the air outlet control servo motor.
| 4. REMOVE AIR MIX CONTROL SERVO MOTOR |
Remove the 3 screws and disconnect the connector.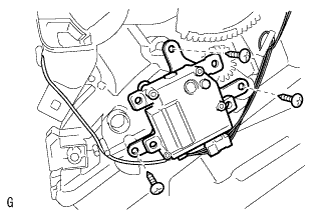
Remove the air mix control servo motor.
| 5. REMOVE MODE CONTROL CABLE ASSEMBLY (for Manual Air Conditioning System) |
Remove the 3 screws.
Detach the evaporator case from the blower case.
Detach the 3 claws and remove the cable.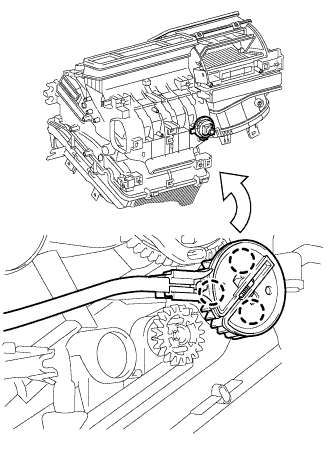
| 6. REPAIR AIRMIX DAMPER CONTROL CABLE SUB-ASSEMBLY (for Manual Air Conditioning System) |
Detach the 3 claws and remove the cable.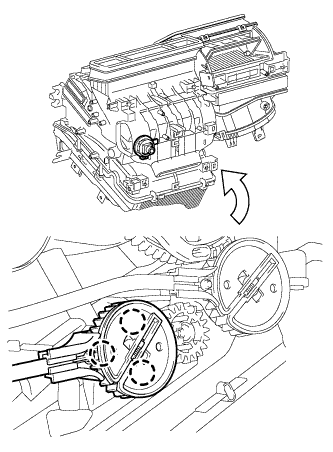
| 7. REMOVE HEATER RADIATOR UNIT SUB-ASSEMBLY |
Detach the screw and remove the clamp.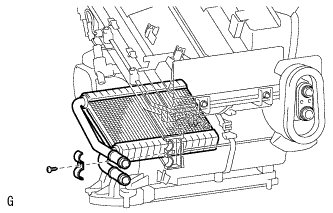
Remove the heater radiator unit.
| 8. REMOVE COOLER EXPANSION VALVE |
Using a 4 mm hexagon wrench, remove the 2 hexagon bolts.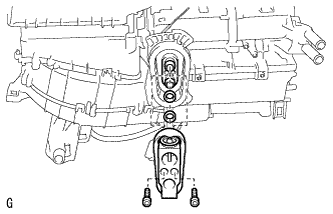
Remove the cooler expansion valve and 2 O-rings from the cooler evaporator.
| 9. REMOVE NO. 1 COOLER EVAPORATOR SUB-ASSEMBLY |
Remove the 4 screws.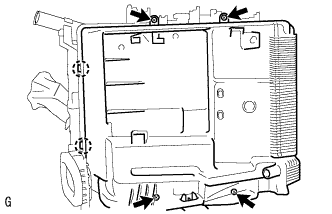
Detach the 2 claws and remove the cover.
Detach the cooler thermistor clamp.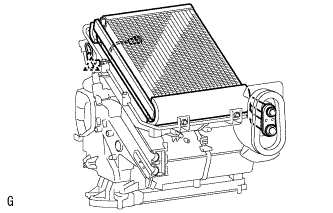
Remove the cooler thermistor and cooler evaporator from the case.
| 10. REMOVE EVAPORATOR TEMPERATURE SENSOR |
Disconnect the cooler thermistor clamp from the cooler evaporator.