INSTALLATION
Removal / installation · Vehicles built Jan 2007 – Jul 2007
Versions by build date: Nov 2005 – Dec 2006 Jan 2007 – Jul 2007 from Aug 2007
| 1.
INSTALL PARKING BRAKE SWITCH ASSEMBLY |
 |
Install the parking brake switch with the screw.
-
Torque:
- 0.88 N*m{
9.0 kgf*cm
, 7.8 in.*lbf
}
| 2.
INSTALL NO. 1 PARKING BRAKE CABLE ASSEMBLY |
|
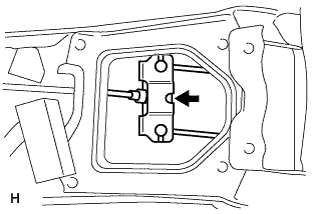
Connect the cable to the lever.
| 3.
INSTALL PARKING BRAKE LEVER SUB-ASSEMBLY |
|
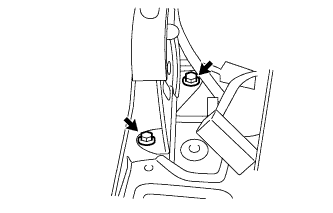
- Install the parking brake lever (with the No. 1 parking brake cable) with the 2 bolts.
-
Torque:
- 14.5 N*m{
148 kgf*cm
, 11 ft.*lbf
}
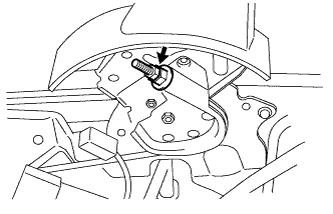
- Connect the No. 1 parking brake cable to the parking brake equalizer.
- Temporarily install the wire adjusting nut and lock nut.
Connect the parking brake switch connector.
| 4.
CHECK PARKING BRAKE LEVER TRAVEL
|
|
Pull the lever upward with a force of approximately 200 N (20 kgf, 44 lbf) and count the number of clicks.
- OK:
- 7 to 9 clicks (without rear brake dragging)
| 5.
ADJUST PARKING BRAKE LEVER TRAVEL
|
|
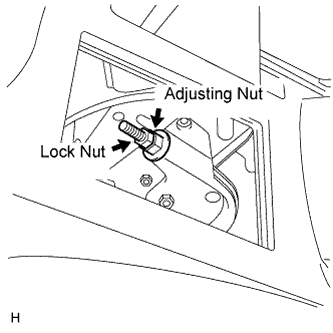
- Turn the No. 1 wire adjusting nut until the lever travel is correct.
- OK:
- 7 to 9 clicks (without rear brake dragging)
<Lever pulling force: approximately 200 N (20 kgf, 44 lbf)>
Tighten the lock nut.
-
Torque:
- 6.0 N*m{
61 kgf*cm
, 53 in.*lbf
}
Operate the parking brake lever 3 to 4 times, and check the parking brake lever travel.
- OK:
- 7 to 9 clicks (without rear brake dragging)
<Lever pulling force: approximately 200 N (20 kgf, 44 lbf)>
When operating the parking brake lever, check that the brake warning light illuminates at the first click.
- Standard condition:
- Brake warning light always illuminates at the first click.
| 6.
INSTALL REAR CONSOLE BOX SUB-ASSEMBLY |
|
Install the rear console box (Click here).
- HINT:
- Refer to the procedures from the installation of the rear console box sub-assembly up until the installation of the No. 1 console upper panel garnish.
| 7.
CONNECT CABLE TO NEGATIVE BATTERY TERMINAL |
|