Home › TRANSMISSION › EA64F MANUAL TRANSAXLE › MANUAL TRANSAXLE ASSEMBLYREMOVAL
Removal / installation · Vehicles built Nov 2005 – Dec 2006
Versions by build date: Nov 2005 – Dec 2006 Jan 2007 – Jul 2007 from Aug 2007
1.
PLACE FRONT WHEELS FACING STRAIGHT AHEAD
3.
DISCHARGE FUEL SYSTEM PRESSURE
CAUTION:
DISCHARGE FUEL SYSTEM PRESSURE procedures must be performed before disconnecting any part of the fuel system.
After performing the DISCHARGE FUEL SYSTEM PRESSURE procedures, pressure will remain in the fuel line. When disconnecting the fuel line, place a cloth or equivalent over fittings to reduce the risk of fuel spray.
Remove the console box (Click here ).
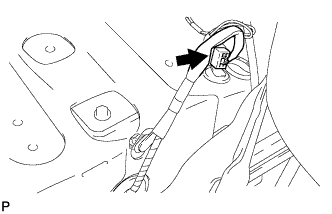
Disconnect the connector. Start the engine. After the engine has stopped, turn the ignition switch off.
HINT:
DTC P0171 (system too lean) may be set.
Check that the engine does not start.
Remove the fuel tank cap, and let the air out of the fuel tank.
Connect the connector. Install the console box (Click here ).
4.
DISCONNECT CABLE FROM NEGATIVE BATTERY TERMINAL
CAUTION:
Wait at least 90 seconds after disconnecting the cable from the negative (-) battery terminal to prevent airbag and seat belt pretensioner activation.
5.
DRAIN TRANSAXLE OIL
Remove the filler plug and gasket.
Remove the drain plug and gasket, and drain the oil.
Install a new gasket and the drain plug.
Torque:
49 N*m{
500 kgf*cm
, 36 ft.*lbf
}
6.
DRAIN TRANSFER OIL
Remove the drain plug and gasket, and drain the oil.
Install a new gasket and the drain plug.
Torque:
49 N*m{
500 kgf*cm
, 36 ft.*lbf
}
7.
REMOVE BACK-UP LIGHT SWITCH
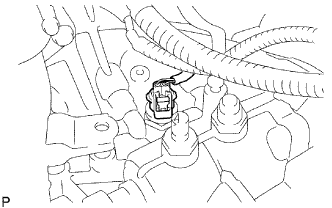
Disconnect the back-up light switch connector.
Remove the back up light switch and gasket from the manual transaxle case.
8.
DISCONNECT CLUTCH RELEASE CYLINDER
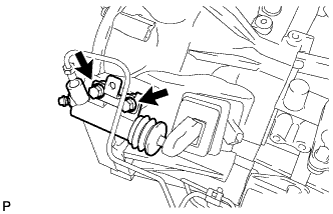
Remove the 2 bolts and clutch release cylinder.
9.
REMOVE STARTER ASSEMBLY
for 2AD-FTV: Remove the starter (Click here ).
for 2AD-FHV: Remove the starter (Click here ).
10.
DISCONNECT TRANSAXLE CONTROL CABLE ASSEMBLY
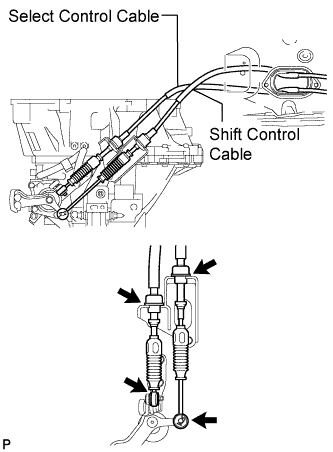
Remove the 2 clips and 2 washers, and disconnect the 2 cables from the transaxle.
Remove the 2 clips, and disconnect the 2 cables from the bracket.
11.
REMOVE ENGINE ASSEMBLY WITH MANUAL TRANSAXLE
for 2AD-FTV: Remove the engine with transaxle (Click here ).
for 2AD-FHV: Remove the engine with transaxle (Click here ).
12.
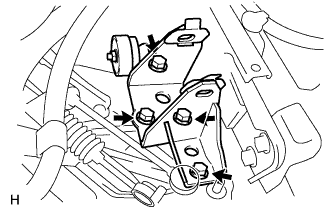
REMOVE ENGINE MOUNTING BRACKET LH
Remove the 4 bolts and mounting bracket.
13.
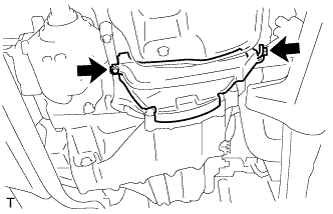
REMOVE OIL PAN INSULATOR
Remove the 2 bolts and insulator from the stiffener plate.
14.
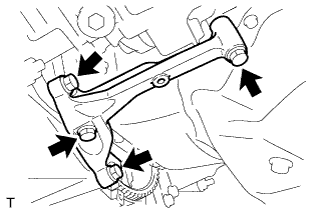
REMOVE STIFFENER PLATE LH
Remove the 4 bolts and stiffener plate from the engine and transaxle assembly.
15.
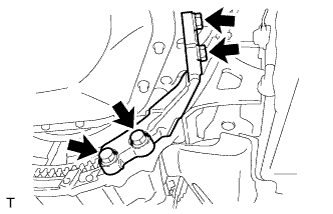
REMOVE STIFFENER PLATE RH
Remove the 4 bolts and stiffener plate from the engine and transaxle assembly.
16.
REMOVE MANUAL TRANSAXLE ASSEMBLY
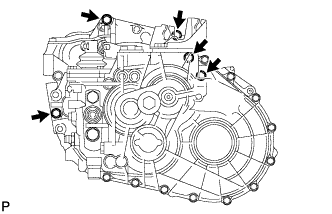
Remove the 5 bolts.
Separate and remove the transaxle from the engine.
17.
REMOVE FRONT ENGINE MOUNTING BRACKET
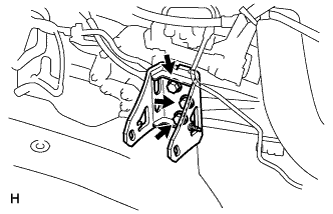
Remove the 3 bolts and mounting bracket.
18.
REMOVE REAR ENGINE MOUNTING BRACKET
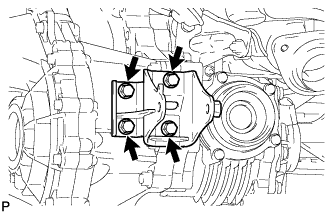
Remove the 4 bolts and mounting bracket.
19.
REMOVE TRANSFER ASSEMBLY
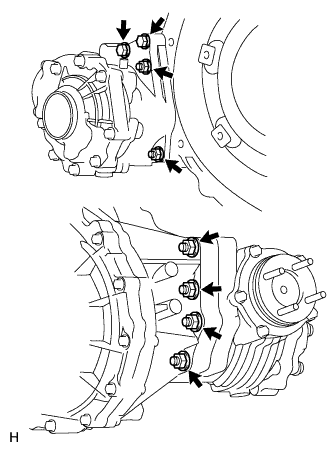
Remove the 6 nuts, 2 bolts and transfer from the transaxle.