REMOVAL
Removal / installation · Vehicles built Nov 2005 – Dec 2006
Versions by build date: Nov 2005 – Dec 2006 Jan 2007 – Jul 2007 from Aug 2007
| 1. DRAIN DIFFERENTIAL OIL |

Using a 10 mm socket hexagon wrench, remove the rear differential drain plug and gasket, and drain the oil.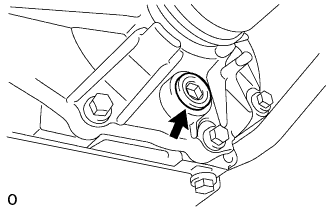

Install a new gasket to the rear differential drain plug.
Using a 10 mm socket hexagon wrench, install the rear differential drain plug and gasket.
| 2. REMOVE TAILPIPE ASSEMBLY |
Remove the tailpipe for 1AZ-FE (Click here).
Remove the tailpipe for 2AD-FTV (Click here).
Remove the tailpipe for 2AD-FHV (Click here).
Remove the tailpipe for 2AZ-FE (Click here).
| 3. REMOVE CENTER EXHAUST PIPE ASSEMBLY |
Remove the center pipe for 1AZ-FE (Click here).
Remove the center pipe for 2AZ-FE (Click here).
| 4. REMOVE FRONT EXHAUST PIPE ASSEMBLY |
Remove the front pipe for 2AD-FTV (Click here).
Remove the front pipe for 2AD-FHV (Click here).
| 5. REMOVE PROPELLER WITH CENTER BEARING SHAFT ASSEMBLY |
Remove the 2 bolts and 2 adjusting washers, and disconnect the propeller with center bearing shaft.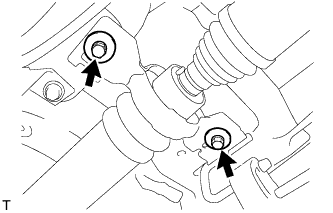
- NOTICE:
- During the removal, do not exert excessive force on the universal joint.
- When removing, transporting or storing the propeller with center bearing shaft assembly, do not allow the No. 2 joint angle to exceed 20°.
- During the removal, do not exert excessive force on the universal joint.
Place matchmarks on the differential carrier and propeller shaft.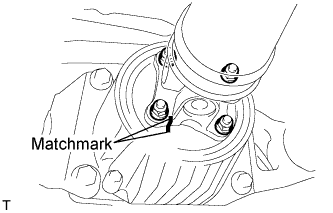
Remove the 4 nuts and 4 washers, and disconnect the propeller shaft and differential carrier.
Place matchmarks on the transfer and propeller shaft.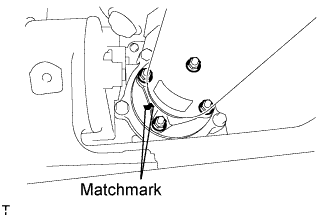
Remove the 4 nuts and 4 washers, and disconnect the propeller shaft from the transfer.
| 6. REMOVE DIFFERENTIAL CARRIER SUB-ASSEMBLY |
Disconnect the harness clamp.
Remove the breather tube.
Disconnect the connector.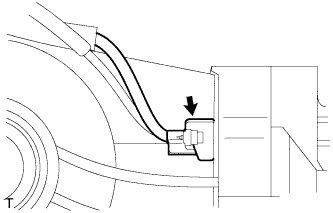
Support the rear differential carrier with a transmission jack or equivalent.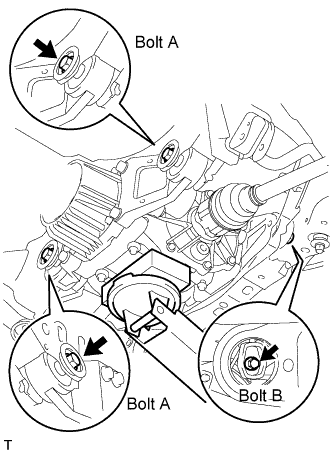
Remove the bolt labeled A and bolt labeled B.
Slowly lower the jack and then tilt the rear differential carrier.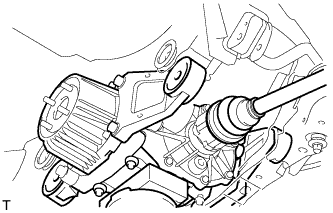
Set the tip of the tire lever to the position on the rear drive shaft inboard joint shown in the illustration. Then, using the ribbed part of the rear differential carrier as a fulcrum, disconnect the left and right rear drive shafts.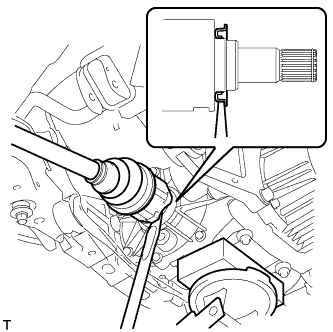
- NOTICE:
- Do not scratch the rear drive shaft dust cover.
| 7. REMOVE REAR DIFFERENTIAL SIDE GEAR SHAFT OIL SEAL |
Using SST, tap out the 2 oil seals.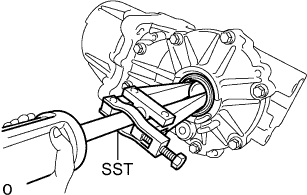
- SST
- 09308-00010