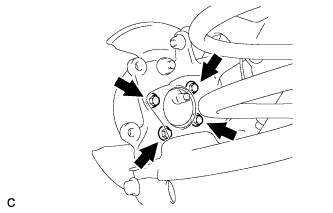
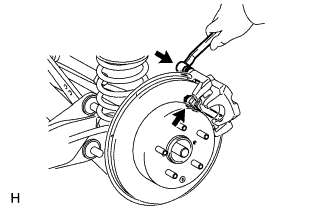
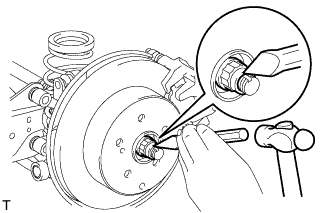
Install the axle hub and bearing to the axle carrier with the 4 bolts.
Torque:
90 N*m{
918 kgf*cm
, 66 ft.*lbf
}
NOTICE:
Do not place the hub and bearing's magnet rotor side so that it is facing downward, and do not allow the magnet rotor side to become damaged or contact foreign matter.
for 4WD:
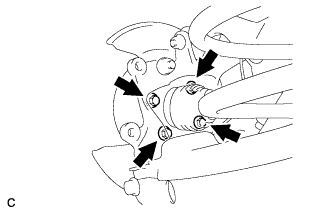
Align the shaft splines and drive in the drive shaft to the axle hub and bearing.
Install the axle hub and bearing to the axle carrier with the 4 bolts.
Torque:
90 N*m{
918 kgf*cm
, 66 ft.*lbf
}
NOTICE:
Do not place the hub and bearing's magnet rotor side so that it is facing downward, and do not allow the magnet rotor side to become damaged or contact foreign matter.
2.
CONNECT REAR SHOCK ABSORBER ASSEMBLY LH
Install the shock absorber with bracket to the axle carrier with the 2 bolts.
3.
TEMPORARILY INSTALL REAR SUSPENSION NO. 1 ARM ASSEMBLY LH
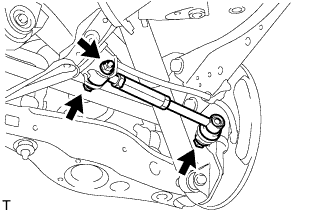
Temporarily install the suspension arm with the bolt and 2 nuts to the suspension member and axle carrier.
4.
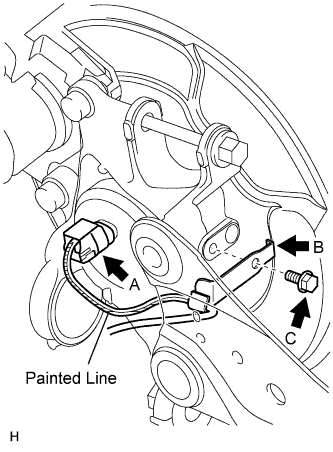
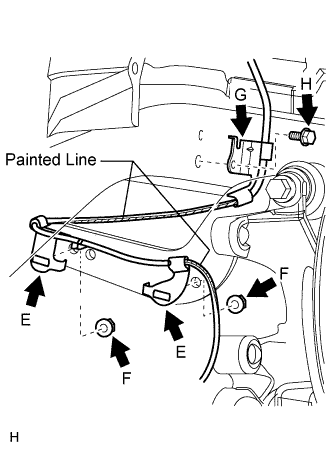
INSTALL SKID CONTROL SENSOR WIRE (for 2WD)
NOTICE:
To prevent interference with other parts, do not twist the sensor wire's painted line areas when installing it.
Connect the skid control sensor wire connector (labeled A) to the speed sensor.
Install the sensor clamp (labeled B) with the bolt (labeled C).
Torque:
8.5 N*m{
87 kgf*cm
, 75 in.*lbf
}
NOTICE:
Do not twist the sensor wire when installing the clamp.
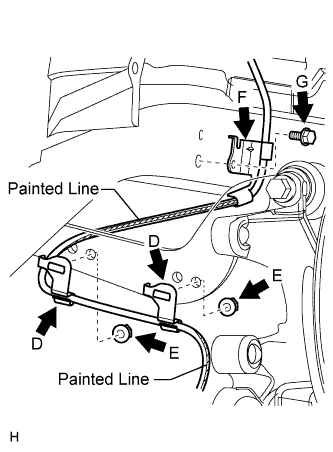
Install the sensor clamps (labeled D) with the 2 nuts (labeled E).
Torque:
5.0 N*m{
51 kgf*cm
, 44 in.*lbf
}
NOTICE:
Do not twist the sensor wire when installing the clamps.
Install the sensor clamp (labeled F) with the bolt (labeled G).
Torque:
8.5 N*m{
87 kgf*cm
, 75 in.*lbf
}
NOTICE:
Do not twist the sensor wire when installing the clamp.
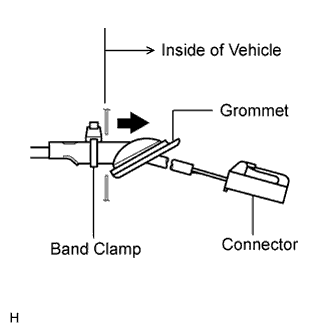
Insert the connector and grommet to the inside of the vehicle through the passage hole in the wheel house.
NOTICE:
Make sure the grommet's band clamp remains on the outside of the vehicle.
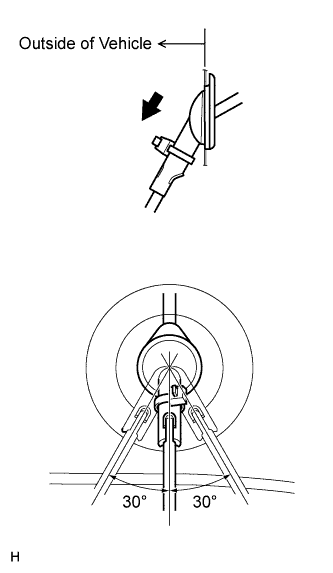
Hold the grommet and pull it from the inside of the vehicle to the outside of the vehicle. Then fix it in place so that it is not tilted.
NOTICE:
When pulling out the grommet, do not grip the sensor wire.
Fix the grommet in place within the range shown in the illustration.
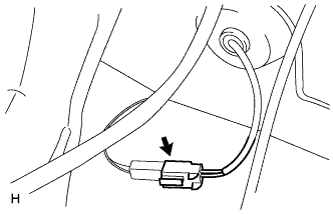
Connect the skid control sensor wire connector.
5.
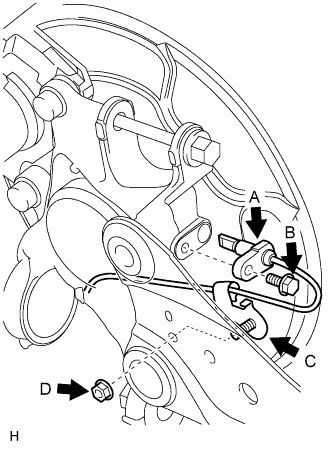
INSTALL REAR SPEED SENSOR LH (for 4WD)
NOTICE:
To prevent interference with other parts, do not twist the sensor wire's painted line areas when installing it.
Install the sensor (labeled A) with the bolt (labeled B).
Torque:
8.5 N*m{
87 kgf*cm
, 75 in.*lbf
}
NOTICE:
Keep the sensor tip and sensor installation hole free from foreign matter.
To prevent interference with the bearing rotor, do not rotate the sensor body when inserting the sensor body or after inserting the sensor body.
Install the sensor clamp (labeled C) with the nut (labeled D).
Torque:
5.0 N*m{
51 kgf*cm
, 44 in.*lbf
}
Install the sensor clamps (labeled E) with the 2 nuts (labeled F).
Torque:
5.0 N*m{
51 kgf*cm
, 44 in.*lbf
}
NOTICE:
Do not twist the sensor wire when installing the clamps.
Install the sensor clamp (labeled G) with the bolt (labeled H).
Torque:
8.5 N*m{
87 kgf*cm
, 75 in.*lbf
}
NOTICE:
Do not twist the sensor wire when installing the clamp.
Insert the connector and grommet to the inside of the vehicle through the passage hole in the wheel house.
NOTICE:
Make sure the grommet's band clamp remains on the outside of the vehicle.
Hold the grommet and pull it from the inside of the vehicle to the outside of the vehicle. Then fix it in place so that it is not tilted.
NOTICE:
When pulling out the grommet, do not grip the sensor wire.
Fix the grommet in place within the range shown in the illustration.
Connect the speed sensor connector.
6.
INSTALL REAR DISC
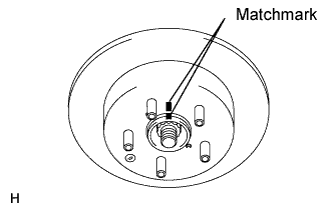
Align the matchmarks and install the disc.
HINT:
When replacing the disc with a new one, select the installation position where the disc has the minimum runout.
7.
INSTALL REAR DISC BRAKE CYLINDER ASSEMBLY LH
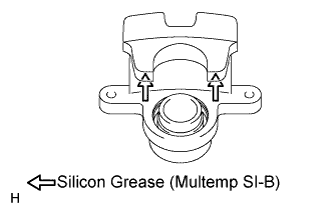
Apply silicon grease (Multemp SI-B) on the contact surfaces of the cylinder parts indicated by the arrows.