REAR CRANKSHAFT OIL SEAL > INSTALLATION |
| 1. INSTALL REAR CRANKSHAFT OIL SEAL |
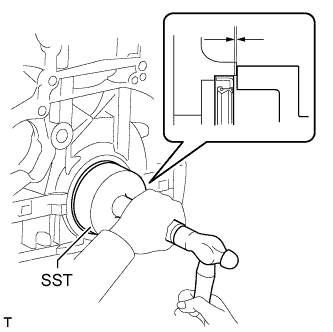
Apply MP grease to the lip of a new oil seal.
![]() |
Using SST and a hammer, tap in the oil seal as shown in the illustration.
| 2. INSTALL FLYWHEEL SUB-ASSEMBLY (for Manual Transaxle) |
![]() |
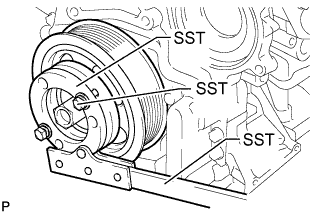
Using SST, hold the crankshaft pulley.
![]() |
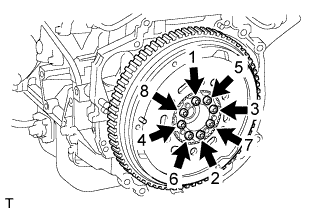
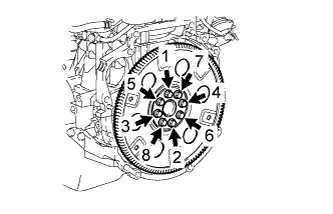
Using a T55 "TORX" socket wrench, install the flywheel with 8 new bolts and uniformly tighten the bolts in several steps in the sequence shown in the illustration.
| 3. INSTALL DRIVE PLATE AND RING GEAR SUB-ASSEMBLY (for Automatic Transaxle) |
![]() |
Using SST, hold the crankshaft pulley.
![]() |
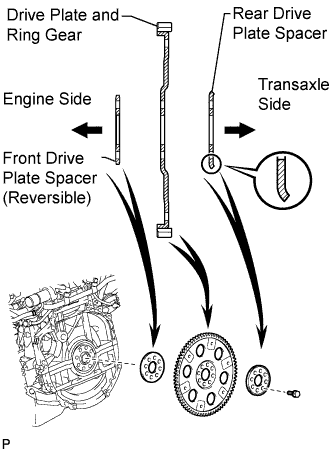
Install the front drive plate spacer, drive plate and ring gear and rear drive plate spacer to the crankshaft.
![]() |
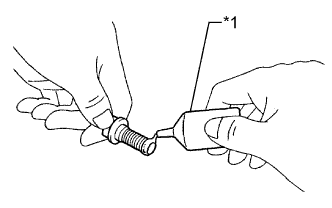
Apply adhesive to 2 or 3 threads of the end of each bolt.
| *1 | Adhesive |
![]() |
Uniformly install and tighten the 8 bolts in several passes, in the sequence shown in the illustration.
| 4. INSTALL CLUTCH DISC ASSEMBLY (for Manual Transaxle) |
![]() |
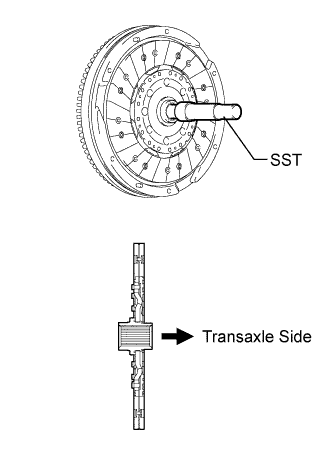
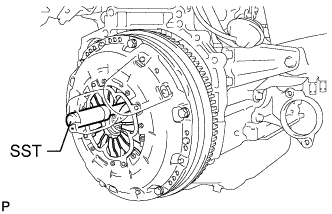
Insert SST into the clutch disc, and then insert them into the flywheel.
| 5. INSTALL CLUTCH COVER ASSEMBLY (for Manual Transaxle) |
![]() |
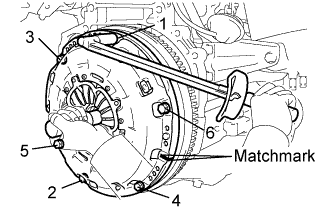
Align the matchmarks on the clutch cover with the one on the flywheel.
Tighten the 6 bolts uniformly in the order shown in the illustration, starting with the bolt located near the knock pin on the top.
| 6. INSPECT AND ADJUST CLUTCH COVER ASSEMBLY (for Manual Transaxle) |
![]() ![]() |
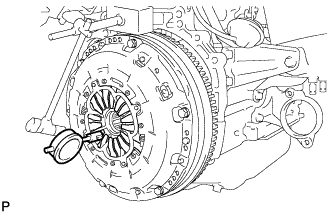
Using a dial indicator with a roller instrument, measure the diaphragm spring tip alignment.
| 7. INSTALL MANUAL TRANSAXLE ASSEMBLY (for Manual Transaxle) |
Install the manual transaxle (Click here).
| 8. INSTALL AUTOMATIC TRANSAXLE ASSEMBLY (for Automatic Transaxle) |
Install the automatic transaxle (Click here).
| 9. CONNECT CABLE TO NEGATIVE BATTERY TERMINAL |