MANUAL TRANSAXLE ASSEMBLY > INSTALLATION |
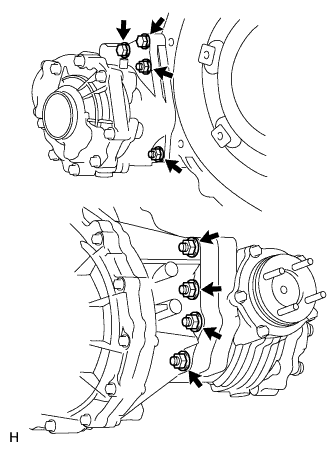
| 1. INSTALL TRANSFER ASSEMBLY |
|
Install the transfer to the transaxle with the 6 nuts and 2 bolts.
| 2. INSTALL REAR ENGINE MOUNTING BRACKET |
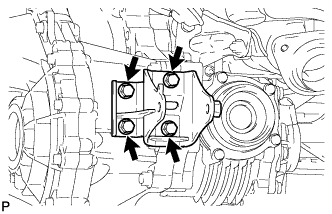 |
Install the mounting bracket to the transaxle with the 4 bolts.
| 3. INSTALL FRONT ENGINE MOUNTING BRACKET |
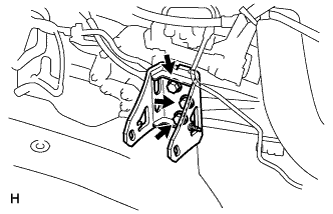 |
Install the mounting bracket to the transaxle with the 3 bolts.
| 4. INSTALL MANUAL TRANSAXLE ASSEMBLY |
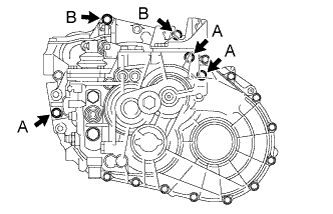 |
Align the input shaft with the clutch disc and install the transaxle to the engine.
Install the 10 bolts.
| 5. INSTALL STIFFENER PLATE RH |
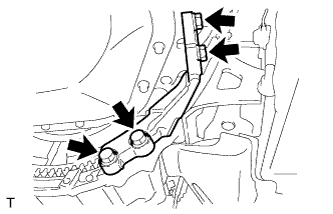 |
Install the stiffener plate with the 4 bolts.
| 6. INSTALL STIFFENER PLATE LH |
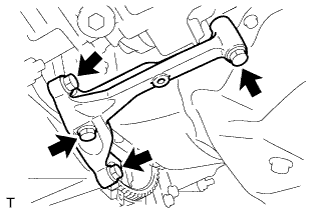 |
Install the stiffener plate with the 4 bolts.
| 7. INSTALL OIL PAN INSULATOR |
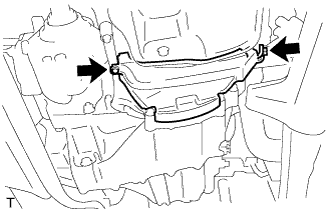 |
Install the insulator with the 2 bolts.
| 8. INSTALL ENGINE MOUNTING BRACKET LH |
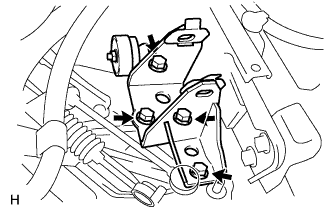 |
Install the mounting bracket to the transaxle with the 4 bolts.
| 9. INSTALL ENGINE ASSEMBLY WITH MANUAL TRANSAXLE |
for 2AD-FTV:
Install the engine with manual transaxle (Click here).
for 2AD-FHV:
Install the engine with manual transaxle (Click here).
| 10. INSTALL TRANSAXLE CONTROL CABLE ASSEMBLY |
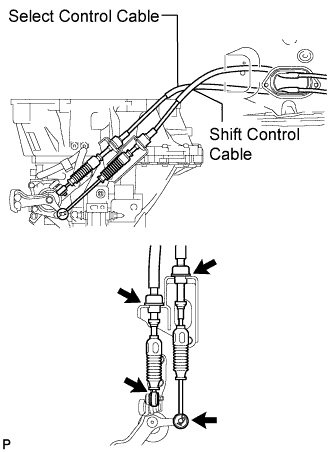 |
Connect the 2 cable ends with the 2 washers and 2 clips.
Install 2 new clips to the control cable bracket.
| 11. INSTALL STARTER ASSEMBLY |
for 2AD-FTV:
Install the starter (Click here).
for 2AD-FHV:
Install the starter (Click here).
| 12. INSTALL CLUTCH RELEASE CYLINDER ASSEMBLY |
Install the starter (Click here).
| 13. INSTALL BACK-UP LIGHT SWITCH ASSEMBLY |
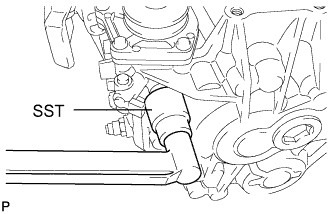 |
Using SST, install the back-up light switch with a new gasket onto the transmission case.
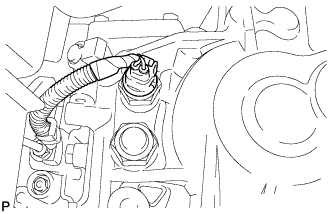 |
Connect the back-up light switch connector.
| 14. ADD TRANSAXLE OIL |
| 15. INSPECT TRANSAXLE OIL |
Stop the vehicle in a level place.
Remove the transmission filler plug and the gasket.
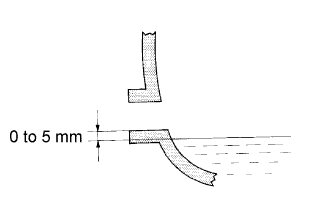 |
Check that the oil level is between 0 to 5 mm (0 to 0.20 in.) from the bottom lip of the filler plug opening. If the result is not as specified, add transmission oil.
Check for oil leakage if the oil level is low.
Install the transmission filler plug and a new gasket.
| 16. ADD TRANSFER OIL |
| 17. INSPECT TRANSFER OIL |
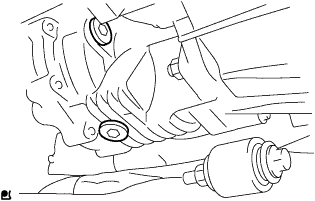 |
Remove the transfer case plug No. 2 (for filler) and gasket.
Check that the oil level is between 0 to 5.0 mm (0 to 0.20 in.) from the bottom lip of the case plug (for filler) hole.
If the result is not as specified, add transfer oil.
When the oil level is too low, check for oil leakage.
Install a new gasket into the case plug (for filler) and then install the plug.
| 18. INSTALL FRONT WHEEL |
| 19. CONNECT CABLE TO NEGATIVE BATTERY TERMINAL |