 |
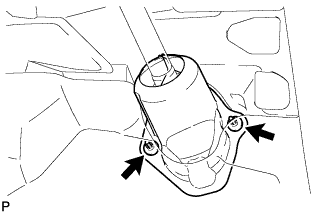
Turn back the floor carpet and remove the 2 clips and silencer sheet.
STEERING GEAR > REMOVAL |
| 1. FRONT WHEELS FACING STRAIGHT AHEAD |
| 2. DISCONNECT CABLE FROM NEGATIVE BATTERY TERMINAL |
| 3. REMOVE COLUMN HOLE COVER SILENCER SHEET |
|
Turn back the floor carpet and remove the 2 clips and silencer sheet.
| 4. DISCONNECT NO. 2 STEERING INTERMEDIATE SHAFT ASSEMBLY |
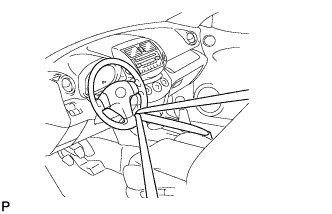 |
Use a seat belt to fix the steering wheel in place to avoid breakage of the spiral cable.
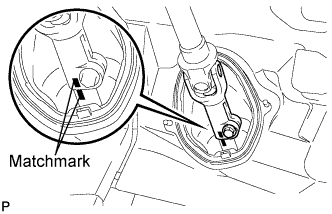 |
Place matchmarks on the No. 2 steering intermediate shaft and steering intermediate shaft.
Remove the bolt and disconnect the No. 2 steering intermediate shaft.
| 5. DISCONNECT NO. 1 STEERING COLUMN HOLE COVER SUB-ASSEMBLY |
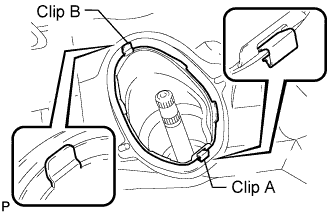 |
Remove the clip A, detach the clip B from the body and disconnect the No. 1 steering column hole cover.
| 6. REMOVE FRONT WHEELS |
| 7. DISCONNECT TIE ROD END SUB-ASSEMBLY LH |
Remove the cotter pin and castle nut.
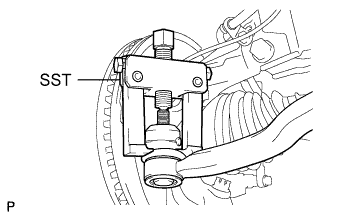 |
Using SST, disconnect the tie rod end from the steering knuckle.
| 8. DISCONNECT TIE ROD END SUB-ASSEMBLY RH |
| 9. REMOVE ENGINE ASSEMBLY WITH TRANSAXLE |
for 1AZ-FE:
Remove the engine with transaxle (Click here).
for 2AZ-FE:
Remove the engine with transaxle (Click here).
for 2GR-FE:
Remove the engine with transaxle (Click here).
for 3ZR-FAE:
Remove the engine with transaxle (Click here).
| 10. REMOVE NO. 1 STEERING COLUMN HOLE COVER SUB-ASSEMBLY |
Remove the clamp and disconnect the steering column hole cover from the steering gear.
| 11. REMOVE STEERING GEAR HEAT INSULATOR (w/ Heat Insulator) |
Remove the bolt and heat insulator from the steering gear.
| 12. REMOVE STEERING INTERMEDIATE SHAFT |
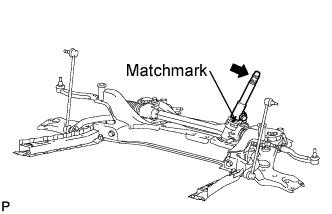 |
Place matchmarks on the steering intermediate shaft and steering gear.
Remove the bolt and steering intermediate shaft from the steering gear.
| 13. REMOVE STEERING GEAR ASSEMBLY |
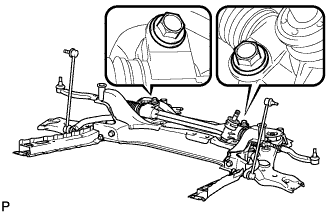 |
Remove the 2 bolts, 2 nuts and steering gear from the front suspension crossmember.
| 14. SECURE STEERING GEAR ASSEMBLY |
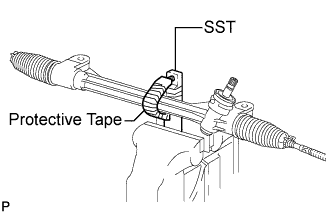 |
Using SST wrapped with protective tape, secure the steering gear in a vise.
| 15. REMOVE TIE ROD END SUB-ASSEMBLY LH |
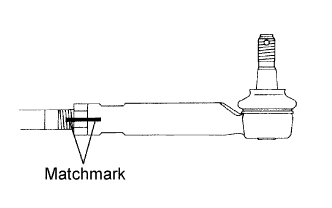 |
Put matchmarks on the tie rod end and rack end.
Remove the tie rod end and lock nut.
| 16. REMOVE TIE ROD END SUB-ASSEMBLY RH |