FRONT SUSPENSION FRONT LOWER SUSPENSION ARM REMOVAL
CAUTION / NOTICE / HINT
- HINT:
- ·
Use the same procedure for the RH and LH sides.
·The procedure listed below is for the LH side.
PROCEDURE

 1. FRONT WHEELS FACING STRAIGHT AHEAD
2.REMOVE FRONT WHEELS
3.REMOVE NO. 1 ENGINE UNDER COVER
4.REMOVE FRONT FLOOR COVER
5.REMOVE REAR ENGINE UNDER COVER RH
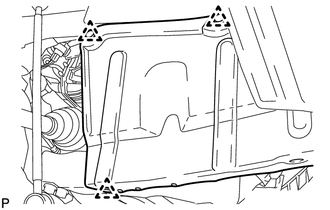
Remove the 3 clips and under cover.
6.REMOVE REAR ENGINE UNDER COVER LH
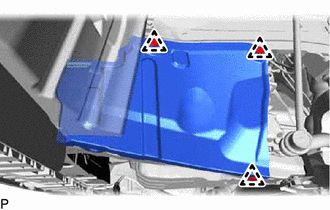
Remove the 3 clips and under cover.
7.SECURE STEERING WHEEL
8.REMOVE COLUMN HOLE COVER SILENCER SHEET
9.DISCONNECT NO. 2 STEERING INTERMEDIATE SHAFT ASSEMBLY
10.REMOVE NO. 1 STEERING COLUMN HOLE COVER SUB-ASSEMBLY
11.DISCONNECT FRONT STABILIZER LINK ASSEMBLY LH
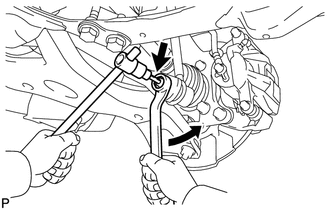
| *a | Turn |
| *b | Hold |
Remove the nut and disconnect the front stabilizer link assembly LH from the front stabilizer bar.
- HINT:
-
If the ball joint turns together with the nut, use a 6 mm hexagon wrench to hold the stud bolt.
12.DISCONNECT FRONT STABILIZER LINK ASSEMBLY RH
- HINT:
-
Use the same procedure described for the LH side.
13.DISCONNECT TIE ROD END SUB-ASSEMBLY LH
14.DISCONNECT TIE ROD END SUB-ASSEMBLY RH
- HINT:
-
Use the same procedure described for the LH side.
15.DISCONNECT FRONT LOWER NO. 1 SUSPENSION ARM SUB-ASSEMBLY LH
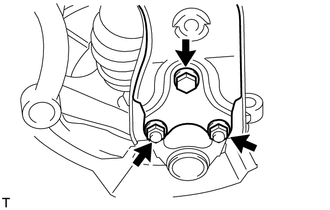
Remove the bolt and 2 nuts.
Disconnect the front lower No. 1 suspension arm from the lower ball joint.
16.DISCONNECT FRONT LOWER NO. 1 SUSPENSION ARM SUB-ASSEMBLY RH
- HINT:
-
Use the same procedure described for the LH side.
17.REMOVE FRONT SUSPENSION MEMBER REINFORCEMENT LH
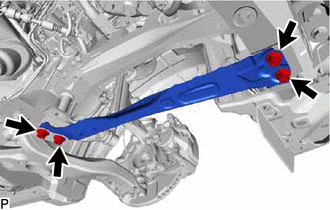
Remove the 4 bolts and front suspension member reinforcement LH.
18.REMOVE FRONT SUSPENSION MEMBER REINFORCEMENT RH
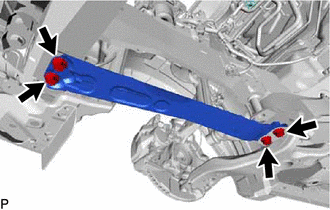
Remove the 4 bolts and front suspension member reinforcement RH.
19.REMOVE FRONT SUSPENSION MEMBER REAR BRACE LH
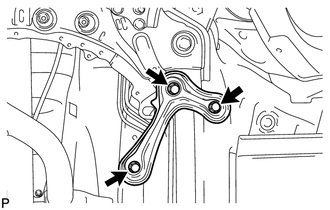
Remove the 3 bolts and front suspension member rear brace LH.
20.REMOVE FRONT SUSPENSION MEMBER REAR BRACE RH
- HINT:
-
Use the same procedure described for the LH side.
21.REMOVE FRONT SUSPENSION CROSSMEMBER SUB-ASSEMBLY
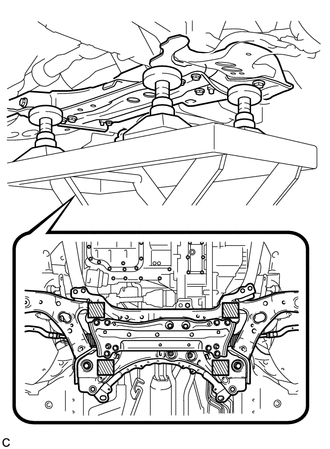
Remove the 2 bolts and 2 nuts, and disconnect the front suspension crossmember sub-assembly from the rear engine mounting insulator.
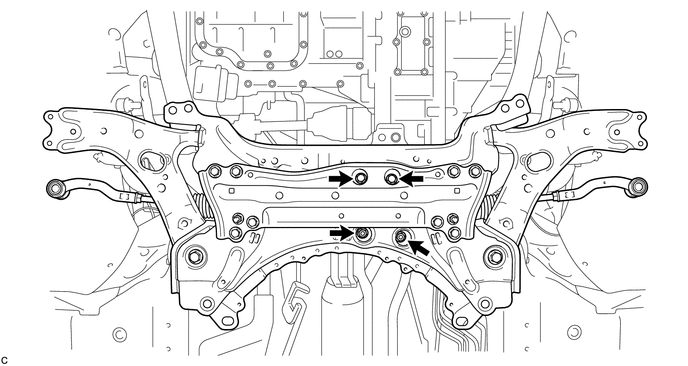
| *a | Engine Lifter |
| *b | Attachment |

|
Attachment placement location |
Support the front suspension crossmember sub-assembly with an engine lifter using 4 attachments or equivalent tools as shown in the illustration.
- NOTICE:
- ·
Make sure to secure the front suspension crossmember sub-assembly to prevent it from dropping.
·Use the attachments to keep the front suspension crossmember sub-assembly level.
·The front suspension crossmember sub-assembly is a heavy component. Make sure that it is supported securely.
Remove the 2 bolts and front suspension crossmember sub-assembly.
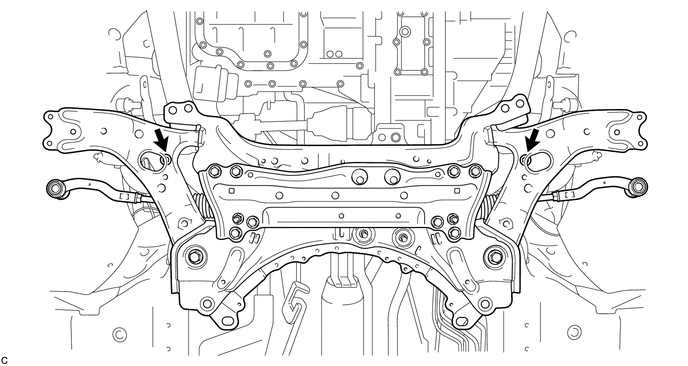
Slowly lower the front suspension crossmember sub-assembly.
- NOTICE:
-
When lowering the front suspension crossmember sub-assembly, be careful not to damage the vehicle body or other components installed on the vehicle.
22.REMOVE FRONT LOWER NO. 1 SUSPENSION ARM SUB-ASSEMBLY LH
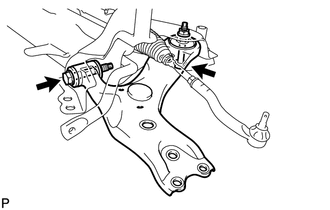
Remove the 2 bolts, nut and front lower No. 1 suspension arm sub-assembly LH from the front suspension crossmember sub-assembly.
- NOTICE:
-
Because the nut has its own stopper, do not turn the nut. Loosen the bolt with the nut secured.