STEERING GEAR / LINKAGE STEERING GEAR REMOVAL
PROCEDURE

 1.PLACE FRONT WHEELS FACING STRAIGHT AHEAD
2.REMOVE FRONT WHEELS
3.REMOVE NO. 1 ENGINE UNDER COVER
4.REMOVE FRONT FLOOR COVER
5.REMOVE REAR ENGINE UNDER COVER LH
6.REMOVE REAR ENGINE UNDER COVER RH
7.DISCONNECT TIE ROD END SUB-ASSEMBLY LH
Remove the cotter pin and castle nut.
Install 2 spacers (SST spacer B) to the tie rod end sub-assembly LH so that there is a space of approximately 1 mm (0.0397 in.) between the arm and spacers.
- SST
- 09960-20010 (09961-02060)
- NOTICE:
- ·
Be sure to install the spacers (SST spacer B) as the steering knuckle spacer may shift.
·As SST may become damaged, make sure the space between the arm and spacers is not 1 mm (0.0397 in.) or less.
Using SST, separate the tie rod end sub-assembly LH from the steering knuckle.
- SST
- 09960-20010 (09961-02010)
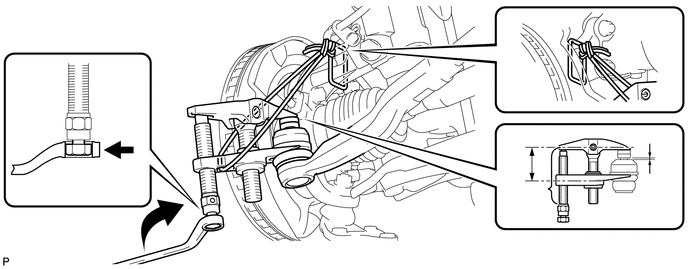
| *1 | Body | *2 | Claw |
| *3 | Nut | *4 | Spacer B |
| *a | Parallel | *b | 1 mm (0.0397 in.) |
| *c | Molybdenum Grease Application Area | *d | String |
| *e | Place the wrench here | - | - |
Using SST, disconnect the tie rod end sub-assembly LH from the steering knuckle.
- NOTICE:
- ·
Apply molybdenum grease to the threads and the tip of SST.
·Do not damage the dust cover.
·Do not damage the ball joint dust cover.
·Do not damage the steering knuckle.
·As the dust cover may be damaged, adjust SST with the center nut so that the body and claw are parallel.
·Make sure to tie the string of SST to the vehicle to prevent SST from dropping.
8.DISCONNECT TIE ROD END SUB-ASSEMBLY RH
- HINT:
-
Use the same procedure described for the LH side.
9.REMOVE COLUMN HOLE COVER SILENCER SHEET
10.DISCONNECT NO. 2 STEERING INTERMEDIATE SHAFT ASSEMBLY
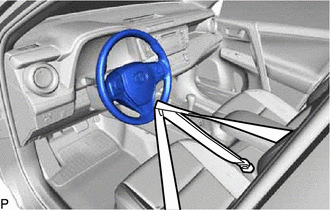
Secure the steering wheel with the seat belt in order to prevent rotation.
- HINT:
-
This operation is useful to prevent damage to the spiral cable.
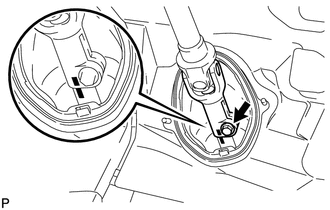
| *a | Matchmark |
Place matchmarks on the sliding yoke of the steering intermediate shaft.
Remove the bolt and disconnect the No. 2 steering intermediate shaft assembly.
11.DISCONNECT FRONT STABILIZER LINK ASSEMBLY LH
12.DISCONNECT FRONT STABILIZER LINK ASSEMBLY RH
- HINT:
-
Use the same procedure described for the LH side.
13.REMOVE FRONT SUSPENSION MEMBER REINFORCEMENT LH
14.REMOVE FRONT SUSPENSION MEMBER REINFORCEMENT RH
- HINT:
-
Use the same procedure described for the LH side.
15.REMOVE FRONT SUSPENSION MEMBER REAR BRACE LH
16.REMOVE FRONT SUSPENSION MEMBER REAR BRACE RH
- HINT:
-
Use the same procedure described for the LH side.
17.REMOVE FRONT SUSPENSION CROSSMEMBER SUB-ASSEMBLY
18.REMOVE NO. 1 STEERING COLUMN HOLE COVER SUB-ASSEMBLY
Remove the clamp.
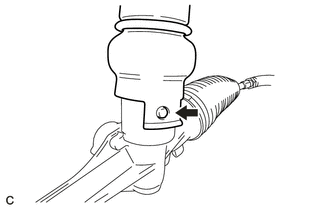
Remove the No. 1 steering column sub-assembly from the steering gear hole cover.
19.REMOVE STEERING INTERMEDIATE SHAFT
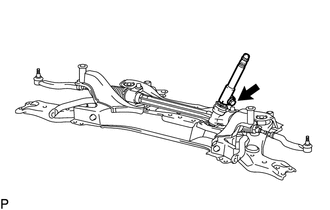
| *a | Matchmark |
Place matchmarks on the steering intermediate shaft and steering gear assembly.
Remove the bolt and steering intermediate shaft from the steering gear assembly.
20.REMOVE STEERING GEAR ASSEMBLY
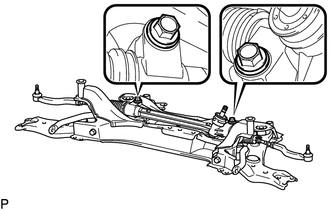
Remove the 2 bolts, 2 nuts and steering gear assembly from the front suspension crossmember sub-assembly.
- NOTICE:
-
Because the nut has its own stopper, do not turn the nut. Loosen the bolt with the nut fixed in place.