FRONT SUSPENSION FRONT STABILIZER BAR REMOVAL
PROCEDURE

 1. FRONT WHEELS FACING STRAIGHT AHEAD
2.REMOVE FRONT WHEELS
3.REMOVE NO. 1 ENGINE UNDER COVER
4.REMOVE FRONT FLOOR COVER
5.REMOVE REAR ENGINE UNDER COVER RH
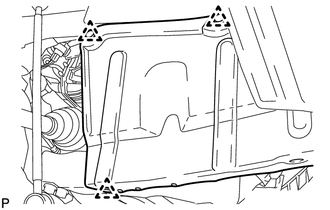
Remove the 3 clips and under cover.
6.REMOVE REAR ENGINE UNDER COVER LH
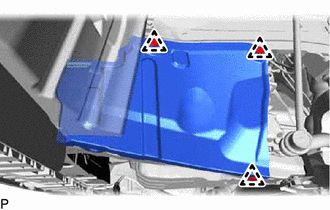
Remove the 3 clips and under cover.
7.SECURE STEERING WHEEL
8.REMOVE COLUMN HOLE COVER SILENCER SHEET
9.DISCONNECT NO. 2 STEERING INTERMEDIATE SHAFT ASSEMBLY
10.REMOVE NO. 1 STEERING COLUMN HOLE COVER SUB-ASSEMBLY
11.REMOVE FRONT STABILIZER LINK ASSEMBLY LH
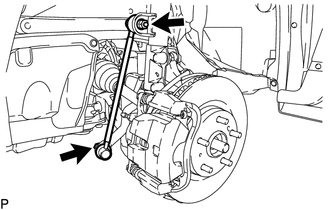
Remove the 2 nuts and front stabilizer link assembly LH.
- HINT:
-
If the ball joint turns together with the nut, use a 6 mm hexagon wrench to hold the stud bolt.
12.REMOVE FRONT STABILIZER LINK ASSEMBLY RH
- HINT:
-
Use the same procedure described for the LH side.
13.DISCONNECT TIE ROD END SUB-ASSEMBLY LH
14.DISCONNECT TIE ROD END SUB-ASSEMBLY RH
- HINT:
-
Use the same procedure described for the LH side.
15.DISCONNECT FRONT LOWER NO. 1 SUSPENSION ARM SUB-ASSEMBLY LH
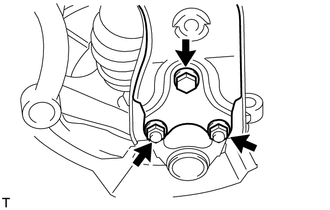
Remove the bolt and 2 nuts.
Disconnect the front lower No. 1 suspension arm from the lower ball joint.
16.DISCONNECT FRONT LOWER NO. 1 SUSPENSION ARM SUB-ASSEMBLY RH
- HINT:
-
Use the same procedure described for the LH side.
17.REMOVE FRONT SUSPENSION MEMBER REINFORCEMENT LH
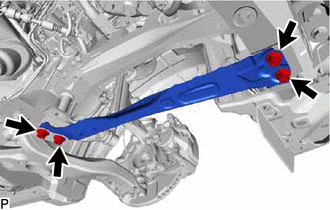
Remove the 4 bolts and front suspension member reinforcement LH.
18.REMOVE FRONT SUSPENSION MEMBER REINFORCEMENT RH
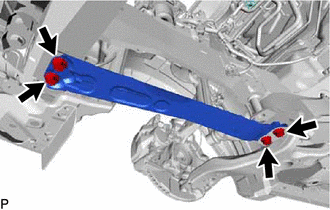
Remove the 4 bolts and front suspension member reinforcement RH.
19.REMOVE FRONT SUSPENSION MEMBER REAR BRACE LH
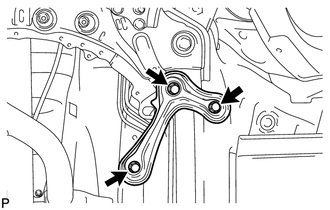
Remove the 3 bolts and front suspension member rear brace LH.
20.REMOVE FRONT SUSPENSION MEMBER REAR BRACE RH
- HINT:
-
Use the same procedure described for the LH side.
21.REMOVE FRONT SUSPENSION CROSSMEMBER SUB-ASSEMBLY
Remove the 2 bolts and 2 nuts, and disconnect the front suspension crossmember sub-assembly from the rear engine mounting insulator.
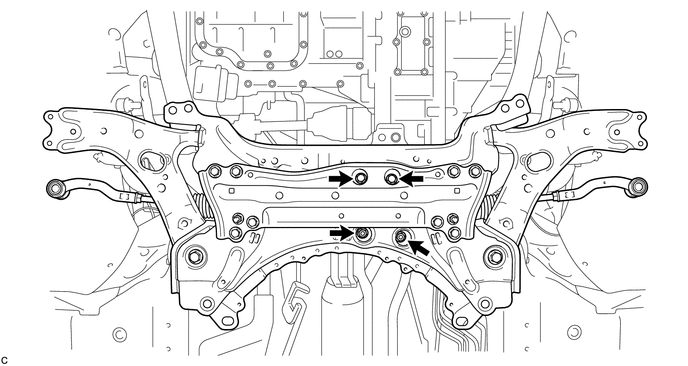
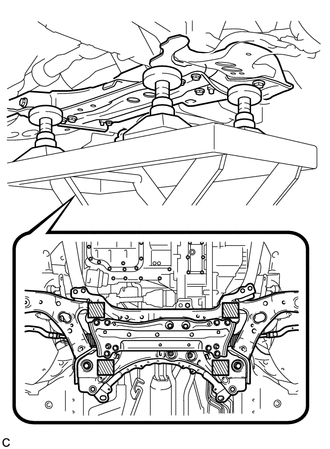
| *a | Engine Lifter |
| *b | Attachment |

|
Attachment placement location |
Support the front suspension crossmember sub-assembly with an engine lifter using 4 attachments or equivalent tools as shown in the illustration.
- NOTICE:
- ·
Make sure to secure the front suspension crossmember sub-assembly to prevent it from dropping.
·Use the attachments to keep the front suspension crossmember sub-assembly level.
·The front suspension crossmember sub-assembly is a heavy component. Make sure that it is supported securely.
Remove the 2 bolts and front suspension crossmember sub-assembly.
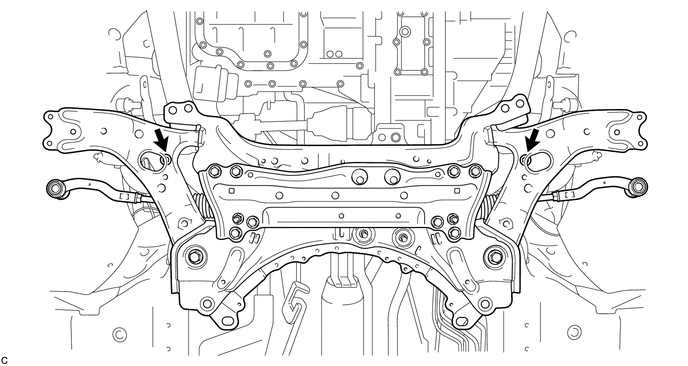
Slowly lower the front suspension crossmember sub-assembly.
- NOTICE:
-
When lowering the front suspension crossmember sub-assembly, be careful not to damage the vehicle body or other components installed on the vehicle.
22.REMOVE FRONT LOWER NO. 1 SUSPENSION ARM SUB-ASSEMBLY LH
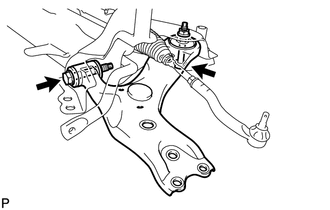
Remove the 2 bolts, nut and front lower No. 1 suspension arm sub-assembly LH from the front suspension crossmember sub-assembly.
- NOTICE:
-
Because the nut has its own stopper, do not turn the nut. Loosen the bolt with the nut secured.
23.REMOVE FRONT SUSPENSION MEMBER BRACE
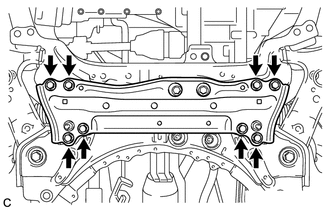
Remove the 8 bolts and front suspension member brace from the front suspension crossmember sub-assembly.
24.REMOVE FRONT STABILIZER BAR
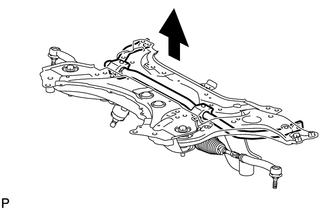
Remove the front stabilizer bar from the front suspension crossmember sub-assembly.
25.REMOVE FRONT STABILIZER BAR BUSHING LH
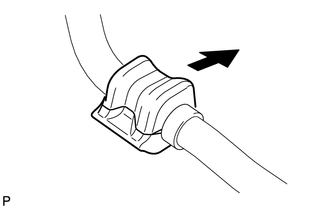
Remove the front stabilizer bar bushing from the front stabilizer bar.
26.REMOVE FRONT STABILIZER BAR BUSHING RH
- HINT:
-
Use the same procedure described for the LH side.