HEATING / AIR CONDITIONING BLOWER UNIT REMOVAL
CAUTION / NOTICE / HINT
- HINT:
- ·
Use the same procedure as for the LHD and RHD vehicles.
·The procedure listed below is for the LHD vehicles.
·Before removing the blower assembly, set the air conditioning to recirculation mode.
PROCEDURE

 1.REMOVE AIR CONDITIONING UNIT ASSEMBLY
for A25A-FXS:
Click hereVehicle Interior>HEATING / AIR CONDITIONING>AIR CONDITIONING UNIT (for A25A-FXS)>REMOVAL
for A25A-FKS:
Click hereVehicle Interior>HEATING / AIR CONDITIONING>AIR CONDITIONING UNIT (for A25A-FKS)>REMOVAL
for M20A-FKS:
Click hereVehicle Interior>HEATING / AIR CONDITIONING>AIR CONDITIONING UNIT (for M20A-FKS)>REMOVAL
87211A
2.REMOVE NO. 2 AIR DUCT (for LHD)
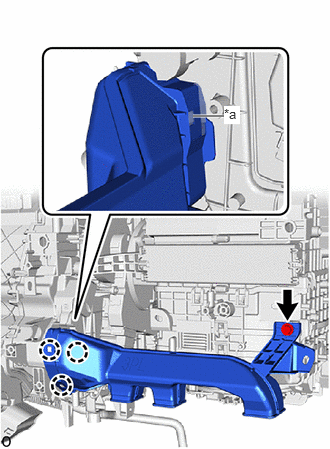
| *a | Hidden Claw |
Remove the screw.
Detach the claw to remove the No. 2 air duct.
- NOTICE:
- ·
Be careful not to deform or damage the lower heater case of the air conditioner unit assembly when removing the No. 2 air duct.
·If the fitting part of the No. 2 air duct has been cracked or deformed during removal, make sure to replace the air duct with a new one. Failure to do so may cause the No. 2 air duct to fall off or noise to occur.
87211
3.REMOVE NO. 1 AIR DUCT (for RHD)
- HINT:
-
Use the same procedure described as for the No. 2 air duct.
87130D
4.REMOVE BLOWER ASSEMBLY
Disconnect the connector.
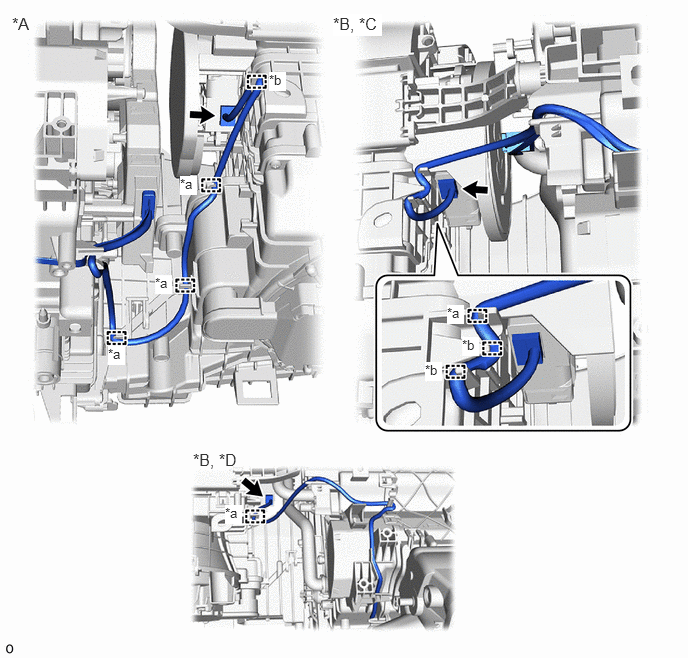
| *A | for LHD | *B | for RHD |
| *C | for Two Layer Blower Type | *D | for Single Layer Blower Type |
| *a | Clamp | *b | Guide |
Detach the clamp and guide.
Remove the 2 screws.
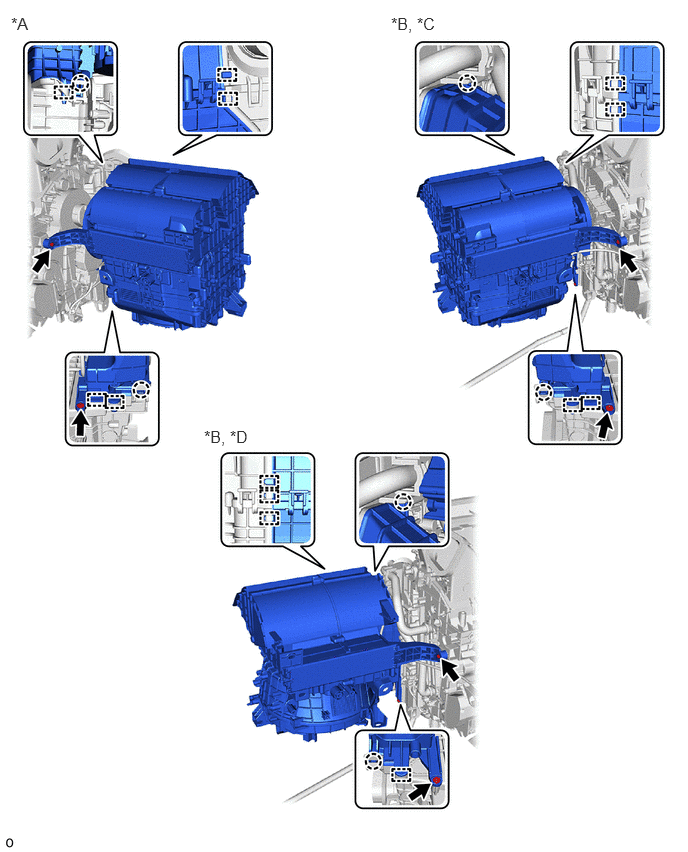
| *A | for LHD | *B | for RHD |
| *C | for Two Layer Blower Type | *D | for Single Layer Blower Type |
Detach the claw and guide and remove the blower assembly.