TELEMATICS MAYDAY BATTERY INSTALLATION
PROCEDURE

 86725
1.INSTALL MOBILEPHONE BATTERY (for eCall)

|
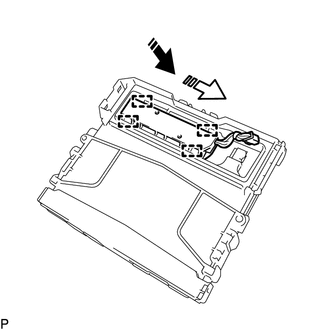
Install in this Direction (1) |

|
Install in this Direction (2) |
Move the mobilephone battery in the direction indicated by the arrow (1) shown in the illustration to temporarily install it.
Push the mobilephone battery in the direction indicated by the arrow (2) shown in the illustration to attach the guide to install the mobile phone battery.
- NOTICE:
-
Make sure that the mobilephone battery is securely installed.
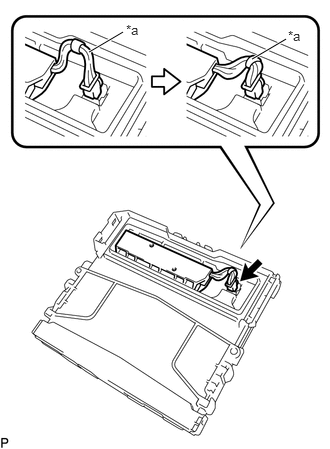
| *a | Wire Harness |
Connect the connector.
- NOTICE:
-
Make sure that the connector is connected securely.
Tuck in the wire harness as shown in the illustration.
- NOTICE:
-
Make sure that the wire harness does not interfere with the battery cover.
|
|
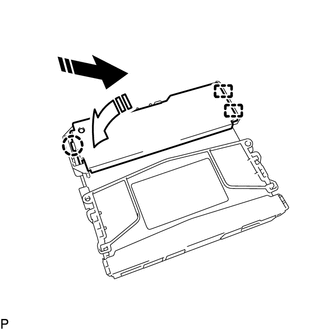
Install in this Direction (1) |
|
|
Install in this Direction (2) |
Attach the guide and claw to install the transceiver cover as shown in the illustration.
- NOTICE:
-
Make sure that the transceiver cover is securely installed.
86725
2.INSTALL MOBILEPHONE BATTERY (for ERA-GLONASS)
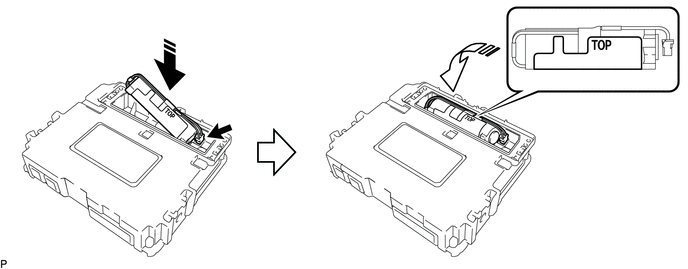
Connect the connector and install a new battery with the "TOP" mark facing upward as shown in the illustration.
|
|
Install in this Direction (1) |
|
Install in this Direction (2) |
- NOTICE:
-
Make sure that the connector is connected securely.
|
|
Install in this Direction (1) |
|
|
Install in this Direction (2) |
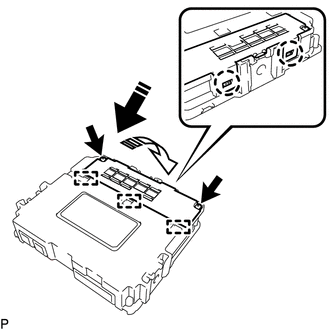
Attach the guide and claw as shown in the illustration.
Install a new battery cover sub-assembly with the 2 screws.
- NOTICE:
-
Make sure that the battery cover sub-assembly is securely installed.
86740
3.INSTALL TELEPHONE TRANSCEIVER ASSEMBLY
4.PERFORM REGISTRATION
for eCall:
Click hereAudio / Visual / Telematics>TELEMATICS>TELEMATICS SYSTEM (for eCall)>REGISTRATION
for ERA-GLONASS:
Click hereAudio / Visual / Telematics>TELEMATICS>TELEMATICS SYSTEM (for ERA-GLONASS)>REGISTRATION