EXTERIOR PANELS / TRIM FRONT BUMPER(except Off Road Package) INSTALLATION
CAUTION / NOTICE / HINT
- HINT:
- ·
A bolt without a torque specification is shown in the standard bolt chart.
Click hereGeneral>SPECIFICATIONS>STANDARD BOLT>SPECIFIED TORQUE FOR STANDARD BOLTS
PROCEDURE

 52103C
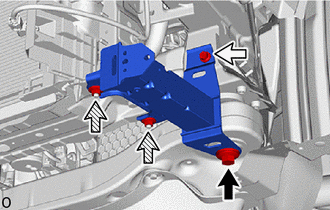
1.INSTALL FRONT BUMPER EXTENSION SUB-ASSEMBLY LH

|
Bolt A |

|
Bolt B |

|
Nut |
Install the front bumper extension sub-assembly LH with the 2 nuts and 2 bolts.
- Torque:
- for Bolt A : 135 N*m (1377 kgf*cm, 100 ft.*lbf)
- for Bolt B : 9.5 N*m (97 kgf*cm, 84 in.*lbf)
- for Nut : 12.5 N*m (127 kgf*cm, 9 ft.*lbf)
52102F
2.INSTALL FRONT BUMPER EXTENSION SUB-ASSEMBLY RH
- HINT:
-
Use the same procedure as for the RH and LH sides.
52618
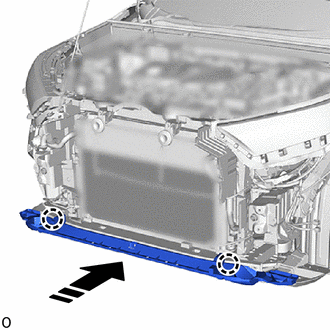
3.INSTALL FRONT BUMPER LOWER ABSORBER (for HV Model)

|
Install in this Direction |
Attach the claw to install the front bumper lower absorber.
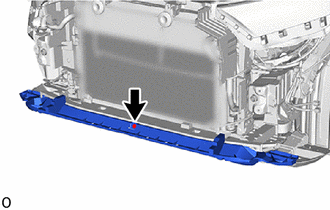
Install the clip.
52618
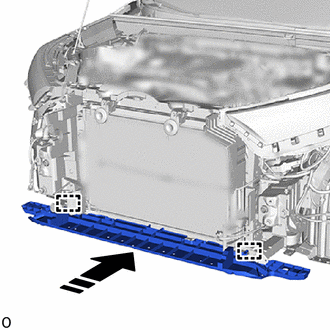
4.INSTALL FRONT BUMPER LOWER ABSORBER (for Gasoline Model)
|
|
Install in this Direction |
Attach the guide and install the front bumper lower absorber as shown in the illustration.
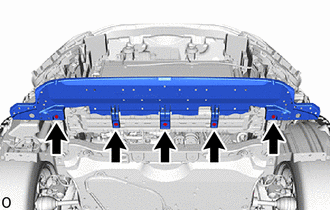
Install the 5 bolts.
51441
5.INSTALL NO. 1 ENGINE UNDER COVER
|
|
Install in this Direction |
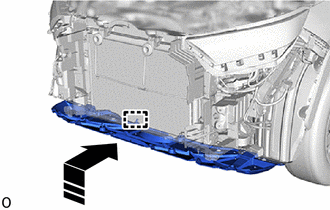
Attach the guide to install the No. 1 engine under cover.
Install the 2 bolts.
- Torque:
- for Bolt : 7.5 N*m (76 kgf*cm, 66 in.*lbf)
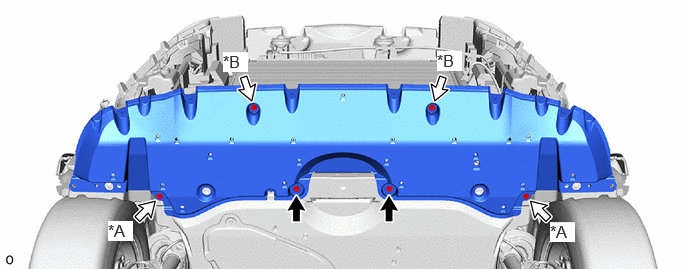
| *A | for Short Front Fender Front Splash Shield | *B | for Gasoline Model |
|
|
Bolt |
|
Screw |
for Short Front Fender Front Splash Shield:
Install the 2screws.
for Gasoline Model:
Install the 2screws.
52132A
6.INSTALL FRONT BUMPER NO. 2 REINFORCEMENT (for HV Model)
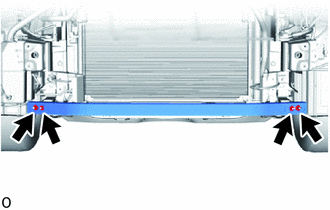
Install the front bumper No. 2 reinforcement with the 4 nuts.
- Torque:
- 18 N*m (184 kgf*cm, 13 ft.*lbf)
52021
7.INSTALL FRONT BUMPER REINFORCEMENT SUB-ASSEMBLY
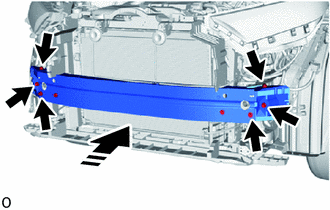
|
|
Install in this Direction |
Install the front bumper reinforcement sub-assembly with the 6 bolts as shown in the illustration.
- Torque:
- 43 N*m (438 kgf*cm, 32 ft.*lbf)
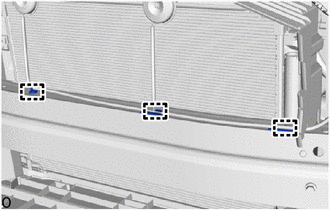
Attach the wire harness clamp.
16561C
8.INSTALL NO. 1 RADIATOR TO SUPPORT SEAL (w/ No. 1 Radiator To Support Seal)
52614
9.INSTALL FRONT BUMPER NO. 2 ENERGY ABSORBER
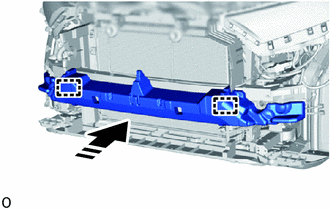
|
|
Install in this Direction |
Attach the guide and install the front bumper No. 2 energy absorber.
52536
10.INSTALL FRONT BUMPER SIDE RETAINER LH
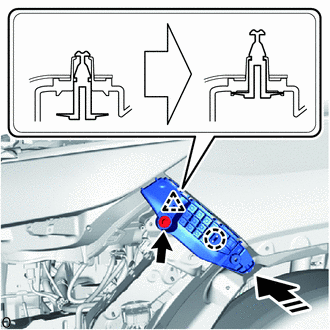
|
|
Install in this Direction |
Attach the clip and claw to install the front bumper side retainer LH as shown in the illustration.
Install the bolt.
52535
11.INSTALL FRONT BUMPER SIDE RETAINER RH
- HINT:
-
Use the same procedure as for the RH and LH sides.
12.INSTALL FRONT BUMPER ASSEMBLY
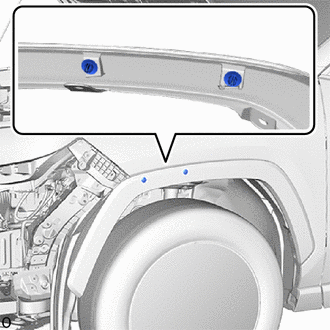
Install 2 new clips to the front fender moulding sub-assembly LH.
- NOTICE:
-
If the front bumper assembly has been removed, replace the clip with a new one.
- HINT:
-
Use the same procedure as for the RH and LH sides.
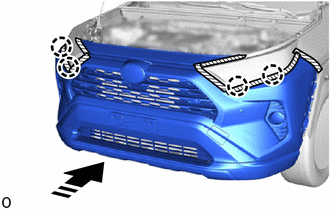
|
|
Install in this Direction |
Attach the claw to temporarily install the front bumper assembly.
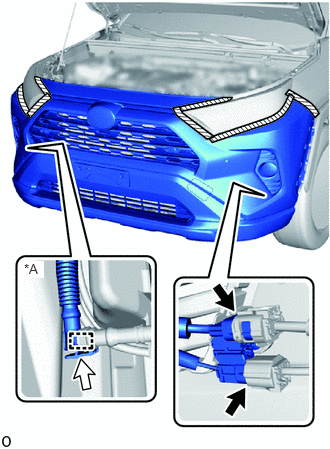
| *A | w/ Headlight Cleaner System |
|
|
Connector |
|
|
Headlight Cleaner Hose |
Connect the 2 connectors.
w/ Headlight Cleaner System:
Connect the headlight cleaner hose.
Attach the headlight cleaner hose clamp.
Install the front bumper assembly to the front bumper side retainer LH.
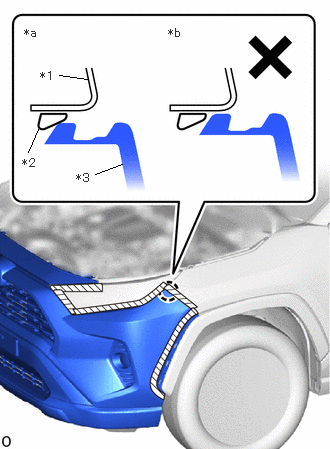
| *a | Correct |
| *b | Incorrect |
| *1 | Front Fender Panel |
| *2 | Front Bumper Side Retainer LH |
| *3 | Front Bumper Assembly |
Make sure that the front bumper assembly claw contacts the front bumper side retainer LH as shown in the illustration.
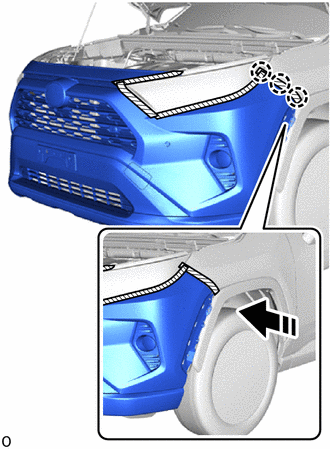
|
|
Install in this Direction |
Attach the claw to install the front bumper assembly as shown in the illustration.
- HINT:
-
Use the same procedure as for the RH and LH sides.
After installation, if there is a clearance and the front bumper assembly claw can be seen as shown in the illustration, the installation condition is incorrect. Perform the procedure from step 1 again.
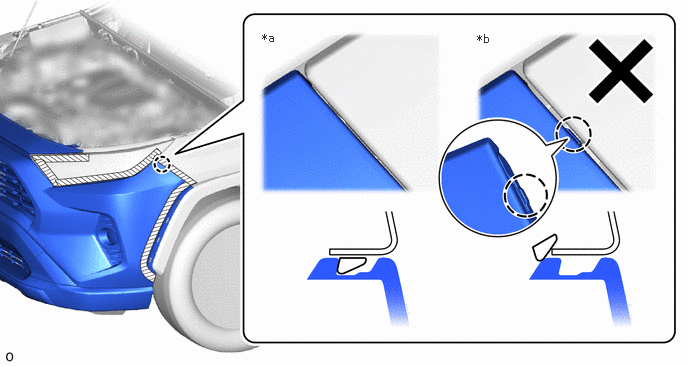
| *a | Correct | *b | Incorrect |
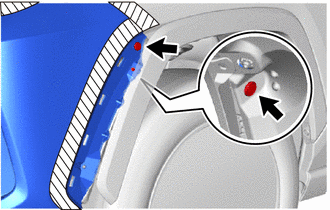
Install the 2 clips.
- HINT:
-
Use the same procedure as for the RH and LH sides.
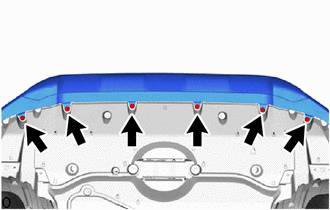
Install the 6 screws.
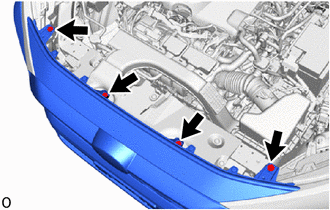
Install the 4 bolts.
Remove the protective tape.
75602A
13.INSTALL FRONT FENDER MOULDING SUB-ASSEMBLY LH
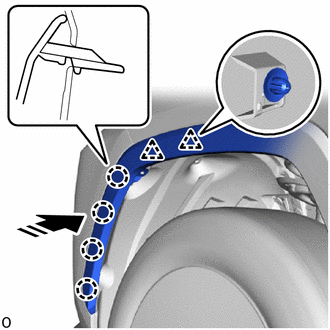
|
|
Install in this Direction |
Attach the clip and claw to install the front fender moulding sub-assembly LH.
Remove the protective tape.
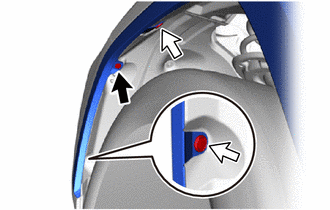
|
|
Screw |
|
|
Clip |
Install the 2 clips.
Install the screw.
75601A
14.INSTALL FRONT FENDER MOULDING SUB-ASSEMBLY RH
- HINT:
-
Use the same procedure as for the LH side.
53896B
15.INSTALL FRONT FENDER FRONT SPLASH SHIELD LH
- HINT:
-
Use the same procedure described for the RH side.
for Short Type:
Click hereVehicle Exterior>WIPER / WASHER>WASHER MOTOR>INSTALLATION
for Long Type:
Click hereVehicle Exterior>WIPER / WASHER>WASHER MOTOR>INSTALLATION
53895B
16.INSTALL FRONT FENDER FRONT SPLASH SHIELD RH
- HINT:
-
Use the same procedure as for the LH side.
17.ADD WINDSHIELD WASHER FLUID (w/ Headlight Cleaner System)
Add washer fluid to the washer jar.
18.ADJUST FOG LIGHT ASSEMBLY (w/ Fog Light)
86790
19.ADJUST FRONT TELEVISION CAMERA ASSEMBLY (w/ Panoramic View Monitor System)
for Gasoline Model:
20.PERFORM CALIBRATION (w/ Parking Support Brake System)
for Gasoline Model: