AXLE AND DIFFERENTIAL REAR DIFFERENTIAL CARRIER ASSEMBLY REMOVAL
CAUTION / NOTICE / HINT
The necessary procedures (adjustment, calibration, initialization, or registration) that must be performed after parts are removed and installed, or replaced during rear differential carrier assembly removal/installation are shown below.
| Replaced Part or Performed Procedure | Necessary Procedure | Effect/Inoperative Function when Necessary Procedure not Performed | Link |
|---|---|---|---|
| Rear wheel alignment adjustment | ·
Perform reset memory ·
Perform acceleration sensor zero point calibration and store system information memorization. |
·
VSC is disabled or malfunctions ·
DTCs are output ·
Slip indicator light illuminates ·
ABS warning light illuminates |
( ) |
| Suspension, tires, etc.
(The vehicle height changes because of suspension or tire replacement.) |
·
Ultrasonic sensor detection angle ·
Ultrasonic sensor detection angle registration |
Parking Support Brake System (for Gasoline model) | ()
|
| Television camera assembly optical axis (Back camera position setting) | Parking Assist Monitor System | ()
|
|
·
Parking assist ECU initialization ·
Adjust steering angle |
Panoramic View Monitor System (for Gasoline model) | ()
|
|
| Perform headlight ECU sub-assembly LH initialization | Lighting System (EXT) | ()
|
|
| Gas leak from exhaust system is repaired | Inspection After Repair | ·
Poor idle, etc. ·
Engine start function, etc. |
·
for A25A-FKS w/ Canister Pump Module: ( ·
for A25A-FKS w/o Canister Pump Module: ( ·
for M20A-FKS: ( |
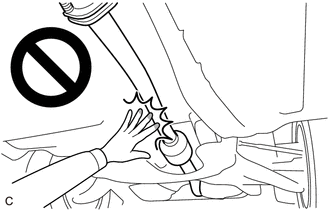
- CAUTION:
-
-
To prevent burns, do not touch the engine, exhaust pipe or other high temperature components while the engine is hot.
PROCEDURE

 1.DRAIN DIFFERENTIAL OIL
37110
2.REMOVE PROPELLER SHAFT ASSEMBLY
3.REMOVE REAR STABILIZER BAR
77606
4.REMOVE NO. 1 FUEL TANK PROTECTOR
5.REMOVE REAR DRIVE SHAFT ASSEMBLY LH
42330
6.REMOVE REAR DRIVE SHAFT ASSEMBLY RH
- HINT:
-
Use the same procedure described for the LH side.
41110
7.REMOVE REAR DIFFERENTIAL CARRIER ASSEMBLY
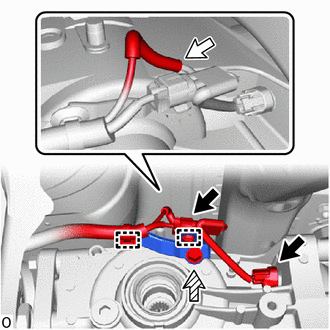

|
Connector |

|
Breather Tube |

|
Bolt |
Disengage the 2 wire harness clamps to separate the wire harness.
Disconnect the 2 connectors.
Remove the bolt and wire harness clamp bracket.
Remove the breather tube.
Support the rear differential carrier assembly with a transmission jack.
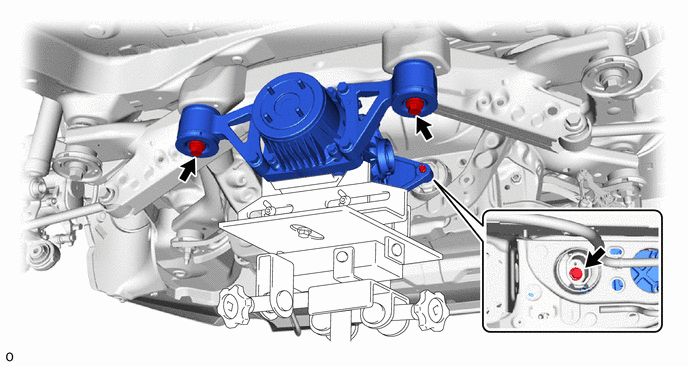
Remove the 3 bolts and 2 rear lower differential mount stoppers.
Slowly lower the jack and then tilt the rear differential carrier assembly.
8.REMOVE REAR NO. 1 DIFFERENTIAL SUPPORT
Remove the upper rear differential mount stopper from the rear No. 1 differential support.
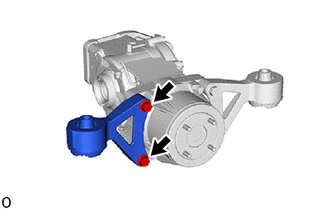
Remove the 2 bolts and rear No. 1 differential support from the rear differential carrier assembly.
9.REMOVE REAR NO. 2 DIFFERENTIAL SUPPORT
Remove the upper rear differential mount stopper from the rear No. 2 differential support.
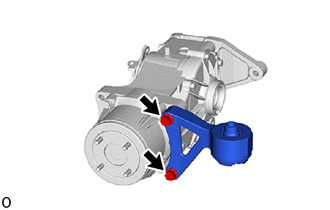
Remove the 2 bolts and rear No. 2 differential support from the rear differential carrier assembly.
52391A
10.REMOVE REAR DIFFERENTIAL SUPPORT
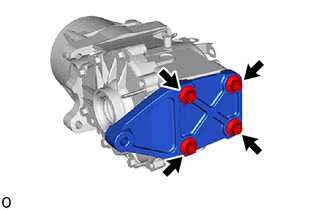
Remove the 4 bolts and rear differential support from the rear differential carrier assembly.