 |
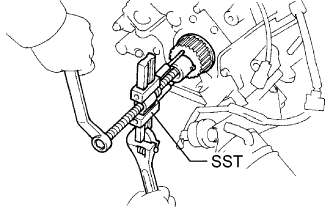
Using SST, remove the timing pulley.
- SST
- 09950-50013
(09951-05010, 09952-05010, 09953-05010, 09953-05020, 09954-05010)
- NOTICE:
- Do not turn the timing pulley.
OIL PUMP > REMOVAL |
| 1. DISCHARGE FUEL SYSTEM PRESSURE |
| 2. DISCONNECT CABLE FROM NEGATIVE BATTERY TERMINAL |
| 3. REMOVE ENGINE ASSEMBLY |
Remove the engine assembly (Click here).
| 4. REMOVE TIMING BELT |
Remove the timing belt (Click here).
| 5. REMOVE CRANKSHAFT TIMING PULLEY |
|
Using SST, remove the timing pulley.
| 6. REMOVE CRANKSHAFT POSITION SENSOR |
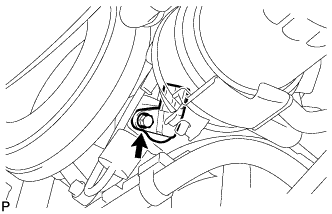 |
Disconnect the crankshaft position sensor connector.
Remove the bolt and crankshaft position sensor.
| 7. REMOVE ENGINE OIL LEVEL DIPSTICK GUIDE |
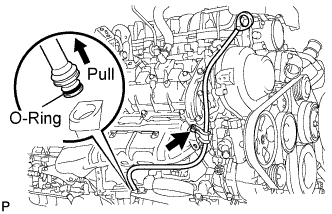 |
Remove the dipstick.
Remove the bolt and dipstick guide.
Remove the O-ring from the dipstick guide.
| 8. REMOVE OIL FILTER ASSEMBLY |
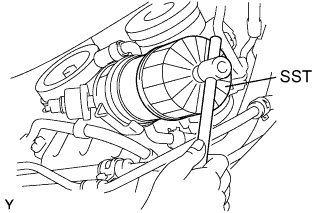 |
Using SST, remove the oil filter.
| 9. REMOVE OIL FILTER BRACKET SUB-ASSEMBLY |
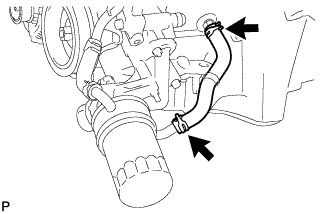 |
Disconnect the oil pressure sender gauge connector.
Disconnect the oil cooler hoses from the oil cooler.
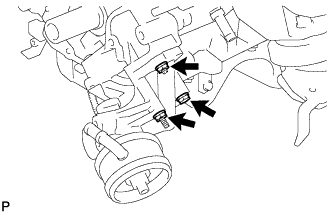 |
Remove the 2 bolts, nut and oil filter bracket.
| 10. REMOVE NO. 2 OIL PAN SUB-ASSEMBLY |
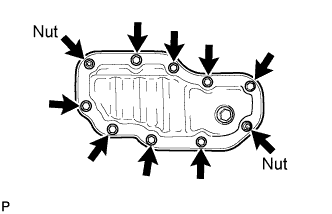 |
Remove the 8 bolts and 2 nuts.
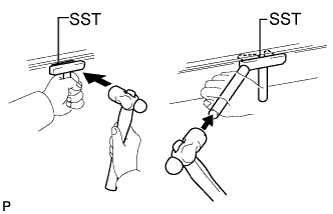 |
Insert the blade of SST between the oil pans, cut off applied sealer and remove the No. 2 oil pan.
| 11. REMOVE OIL PAN SUB-ASSEMBLY |
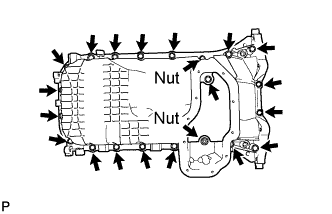 |
Remove the 18 bolts and 2 nuts.
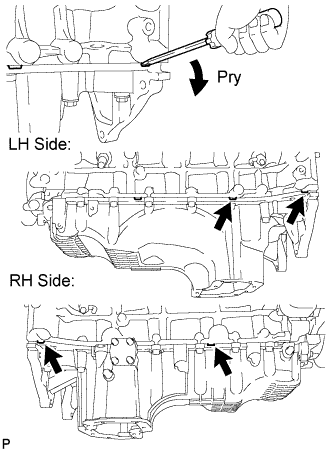 |
Using a screwdriver, remove the No. 1 oil pan by prying between the oil pan and cylinder block as shown in the illustration.
| 12. REMOVE OIL STRAINER SUB-ASSEMBLY |
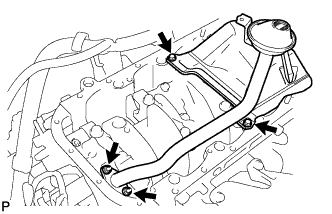 |
Remove the 2 bolts, 2 nuts, oil strainer and gasket.
| 13. REMOVE OIL PUMP ASSEMBLY |
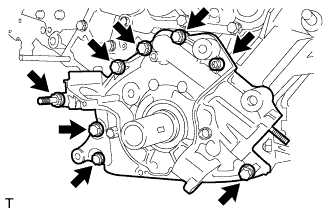 |
Remove the 7 bolts and 6 mm hexagon bolt.
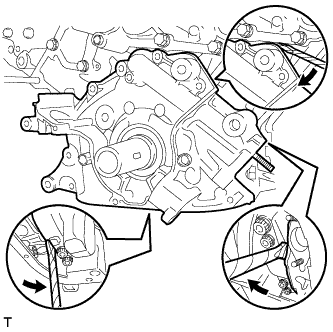 |
Using a screwdriver, remove the oil pump by prying the portions between the oil pump and cylinder block shown in the illustration.
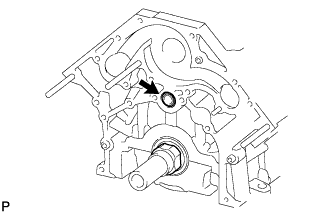 |
Remove the O-ring from the cylinder block.