Tighten the 2 cylinder block drain cock plugs.
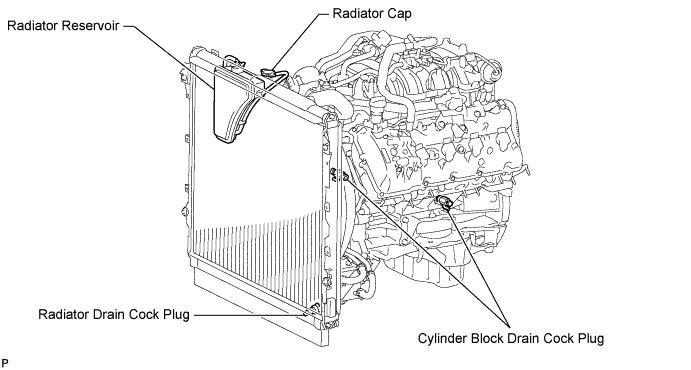
- Torque:
- 13 N*m{ 130 kgf*cm , 9 ft.*lbf }
ENGINE OIL COOLER > REMOVAL |
| 1. PRECAUTION |
| 2. DISCONNECT CABLE FROM NEGATIVE BATTERY TERMINAL |
| 3. DRAIN ENGINE OIL |
Remove the oil filler cap.
Remove the oil pan drain plug and gasket, and drain the engine oil into a container.
Install a new gasket and the oil pan drain plug.
| 4. DRAIN ENGINE COOLANT |
Loosen the radiator drain cock plug.
Remove the radiator cap. Then drain the coolant from the radiator.
Loosen the 2 cylinder block drain cock plugs. Then drain the coolant from the engine.
Tighten the 2 cylinder block drain cock plugs.
Tighten the radiator drain cock plug by hand.
| 5. REMOVE NO. 1 ENGINE UNDER COVER |
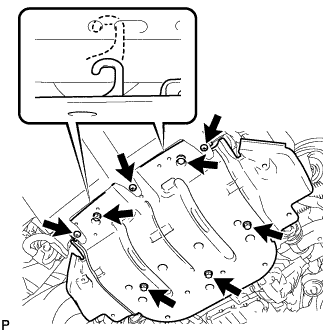 |
Remove the 3 screws and 5 bolts.
Unhook the engine under cover from the vehicle body as shown in the illustration.
| 6. REMOVE FAN AND GENERATOR V BELT |
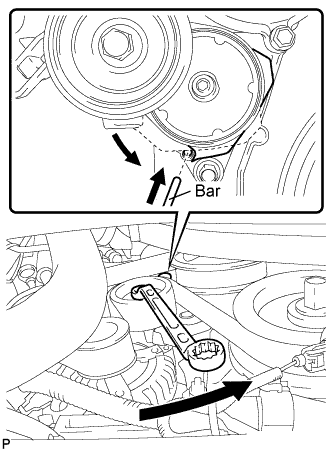 |
While turning the belt tensioner counterclockwise, align the service hole for the belt tensioner and the belt tensioner fixing position, and then insert a bar of φ 5 mm (0.197 in.) into the service hole to fix the belt tensioner in place.
Remove the V belt.
| 7. REMOVE OIL FILTER ELEMENT |
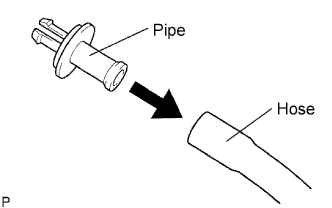 |
Connect a hose with an inside diameter of 15 mm (0.591 in.) to the pipe.
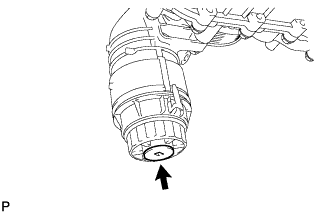 |
Remove the oil filter drain plug.
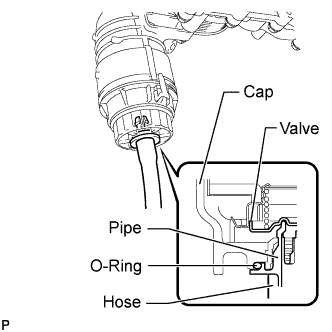 |
Install the pipe to the oil filter cap.
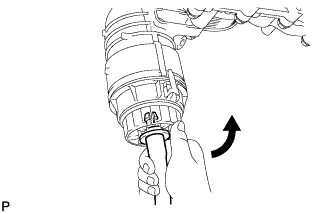 |
Check that oil is drained from the oil filter. Then disconnect the pipe and remove the O-ring, as shown in the illustration.
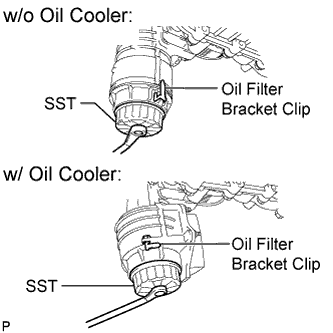 |
Using SST, remove the oil filter cap.
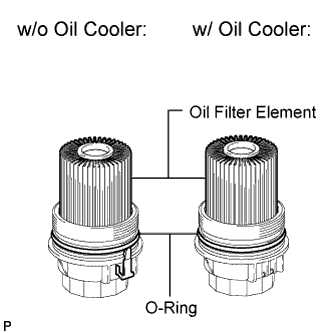 |
Remove the oil filter element and O-ring from the oil filter cap.
| 8. REMOVE OIL PRESSURE SENDER GAUGE ASSEMBLY |
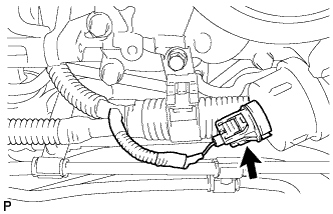 |
Disconnect the sender gauge connector.
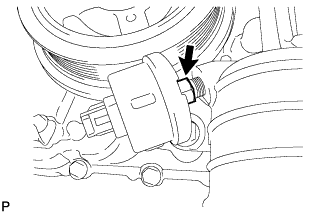 |
Remove the oil pressure sender gauge.
| 9. DISCONNECT COOLER COMPRESSOR ASSEMBLY |
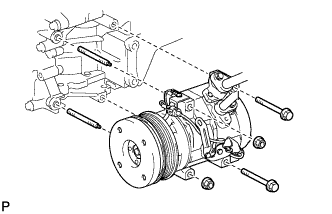 |
Remove the 2 bolts, 2 nuts and 2 stud bolts, and disconnect the cooler compressor.
| 10. REMOVE WATER BY-PASS PIPE |
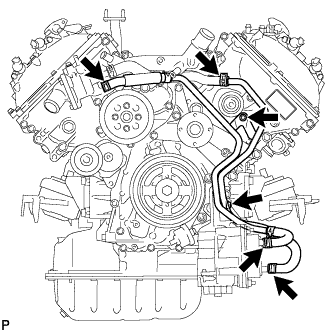 |
Remove the 2 bolts.
Disconnect the 4 water hoses and remove the water by-pass pipe.
| 11. REMOVE NO. 1 OIL COOLER BRACKET |
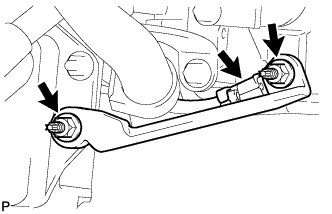 |
Remove the 2 nuts and bracket.
Disconnect the ground wire from the cylinder block.
| 12. REMOVE OIL FILTER BRACKET |
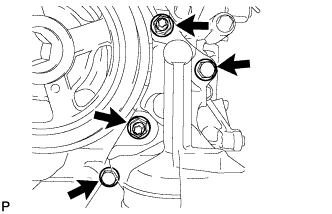 |
Remove the 2 bolts, 2 nuts and filter bracket.
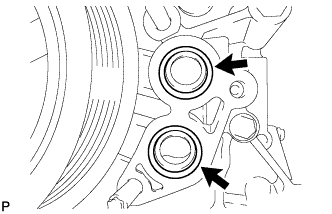 |
Remove the 2 O-rings.
| 13. REMOVE OIL COOLER ASSEMBLY |
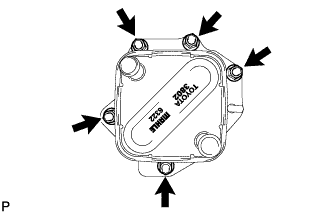 |
Remove the 5 nuts and oil cooler from the oil filter bracket.
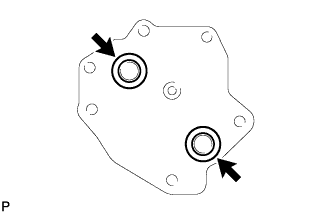 |
Remove the 2 O-rings.
| 14. REMOVE OIL COOLER SPACER |
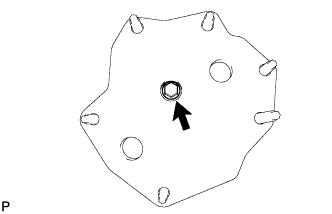 |
Remove the bolt and oil cooler spacer from the oil filter bracket.
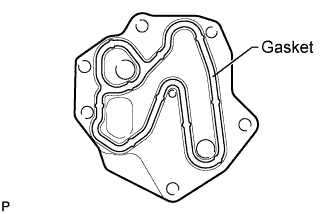 |
Remove the gasket.