STEERING COLUMN STEERING COLUMN ASSEMBLY(for Manual Tilt and Manual Telescopic Steering Column) REASSEMBLY
PROCEDURE

 45877A
1.INSTALL STEERING COLUMN BRACKET SPACER
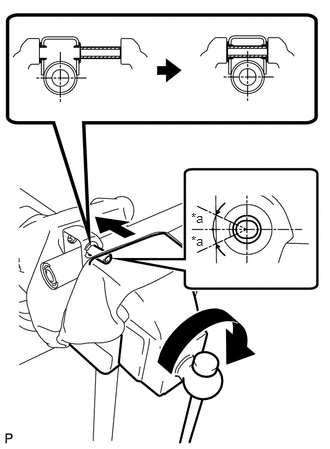
Fix the steering column in a vise between aluminum plates or a cloth. Then install the steering column bracket spacer to the steering column.
| *a | 15° |
- NOTICE:
- ·
Install the steering column bracket spacer so that it is facing in the direction shown in the illustration.
·When using a vise, do not overtighten it.
84450
2.INSTALL IGNITION SWITCH ASSEMBLY
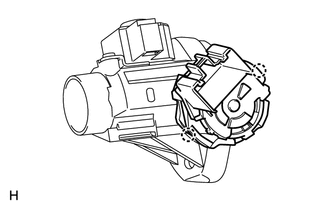
Attach the 2 claws to install the ignition switch to the switch bracket.
85432
3.INSTALL KEY INTERLOCK SOLENOID
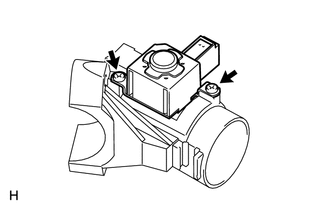
Install the key interlock solenoid to the switch bracket with the 2 screws.
84052
4.INSTALL UNLOCK WARNING SWITCH ASSEMBLY
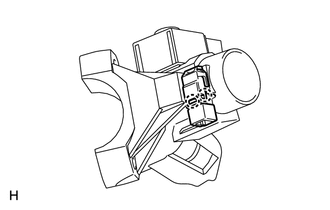
Attach the 2 claws to install the unlock warning switch to the switch bracket.
69057A
5.INSTALL IGNITION SWITCH LOCK CYLINDER
Check that the ignition switch lock cylinder is in the ACC position.
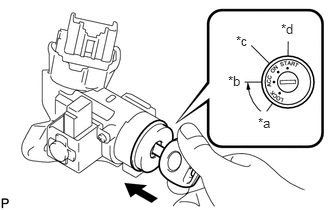
Install the ignition switch lock cylinder to the steering lock sub-assembly.
| *a | LOCK |
| *b | ACC |
| *c | ON |
| *d | START |
Check that the ignition switch lock cylinder assembly is securely installed.
6.INSPECT STEERING LOCK OPERATION
45271
7.INSTALL UPPER STEERING COLUMN WITH SWITCH BRACKET ASSEMBLY
Temporarily install the upper steering column with switch bracket and steering lock bracket with 2 new tapered-head bolts.
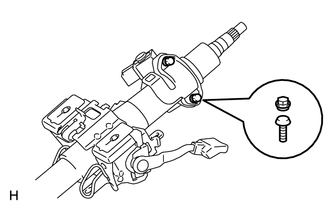
Tighten the 2 tapered-head bolts until the bolt heads break off.
89783
8.INSTALL TRANSPONDER KEY COIL
Align the transponder key coil with the installation position of the switch bracket with the coil inclined.
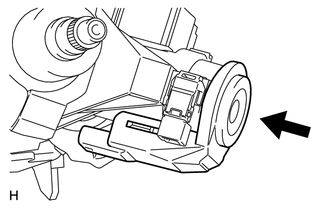
Push the transponder key coil upward and install it to the switch bracket.
- NOTICE:
-
Do not push the transponder key coil up with excessive force.