SEAT BELT FRONT SEAT INNER BELT ASSEMBLY REMOVAL
CAUTION / NOTICE / HINT
- CAUTION:
- ·
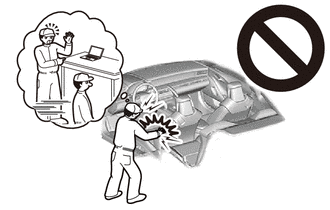
·Airbag unit.
Danger! Life-threatening injuries!
-Before performing any work on the airbag, always disconnect the battery earth lead from the battery.
-Airbag unit may only be set down with the cushion (airbag itself) facing upwards.
-All work on pyrotechnic parts may be carried out by technically experienced and appropriately trained personnel only.
-Replace any damaged part or ones that have been dropped.
-For additional information see:
Click hereVehicle Interior>SUPPLEMENTAL RESTRAINT SYSTEMS>AIRBAG SYSTEM>PRECAUTION
- ·
Wear protective gloves. Sharp areas on the parts may injure your hands.
- NOTICE:
- ·
Before performing work on electronic components, disconnect the cable from the negative (-) battery terminal to prevent damage to the electrical system or components.
·When disconnecting the cable, turn the START-STOP button (engine switch) and headlight switch off and loosen the cable nut completely. Perform these operations without twisting or prying on the cable. Then disconnect the cable.
·Clock settings, radio settings, audio system memory, DTCs and other data will be cleared when the cable is disconnected from the negative (-) battery terminal. Write down any necessary data before disconnecting the cable.
- HINT:
- ·
Use the same procedure for RHD and LHD vehicles.
·The procedure listed below is for LHD vehicles.
·Use the same procedure for the driver side and front passenger side.
·The procedure listed below is for the driver side.
PROCEDURE

 1.REMOVE FRONT SEAT ASSEMBLY (for Manual Seat)
2.REMOVE FRONT SEAT ASSEMBLY (for Power Seat)
73240
3.REMOVE FRONT SEAT INNER BELT ASSEMBLY
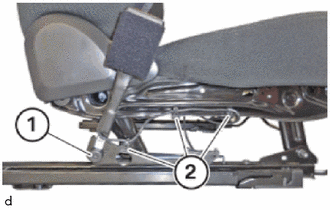
Loosen the T50 bolt (1).
Detach the clamps (2).
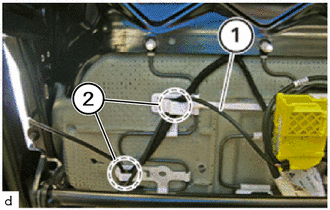
Detach the cable (1) from the holder (2).
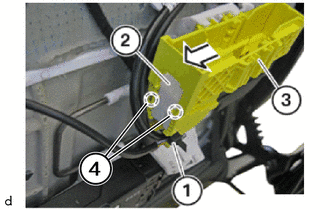

|
Remove in this Direction |
Remove the tie band (1).
Detach the claws (4) carefully to remove the connector (2) from the connector housing (3) in the direction of the arrow.