B48 ENGINE CONTROL HEATED OXYGEN SENSOR INSTALLATION
PROCEDURE

 89465
1.INSTALL OXYGEN SENSOR
- CAUTION:
- ·
Hot surfaces.
Risk of burning!
-Perform all work only on components that have cooled down.
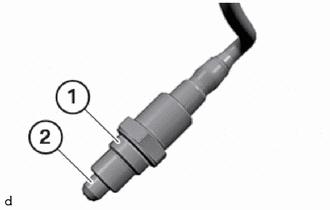
Check the thread (1) and sensor ceramics (2) for damage and replace the oxygen sensor, if necessary.
- NOTICE:
- ·
For oxygen sensors that are reused, the following should be observed.
-Do not clean the part of the oxygen sensor that does not protrude into the exhaust branch (sensor ceramics).
Position the oxygen sensor.
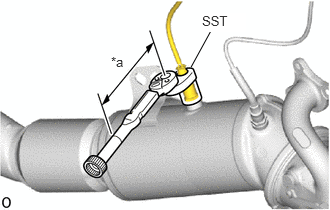
| *a | Torque Wrench Fulcrum Length |
Using SST, tighten the oxygen sensor.
- SST
- 09224-00012
- Torque:
- Specified tightening torque : 50 N*m (510 kgf*cm, 37 ft.*lbf)
- HINT:
- ·
Calculate the torque wrench reading when changing the fulcrum length of the torque wrench.
Click hereGeneral>INTRODUCTION>REPAIR INSTRUCTION>PRECAUTION
·When using SST (fulcrum length of 30 mm (1.18 in.)) + torque wrench (fulcrum length of 180 mm (7.09 in.)):
42.9 N*m (437 kgf*cm, 32 ft.*lbf)
25051
2.INSTALL EXHAUST MANIFOLD CONVERTER SUB-ASSEMBLY