AXLE AND DIFFERENTIAL REAR DIFFERENTIAL CARRIER OIL SEAL REPLACEMENT
PROCEDURE

 37100
1.REMOVE PROPELLER SHAFT WITH CENTER BEARING ASSEMBLY
2.REMOVE REAR DIFFERENTIAL CARRIER OIL SEAL
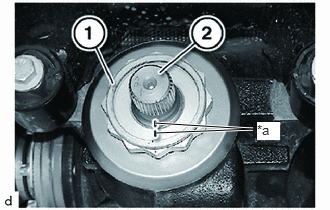
| *a | Match Mark |
Mark the position of the flange nut (1) for the bevel pinion (2).
Warm up flange nut using a hair dryer.
- CAUTION:
- ·
Do not touch the hair dryer and heated parts, touching the hair dryer may result in burns.
·Touching heated parts for a long time may result in burns.
- NOTICE:
- ·
Do not heat beyond the dimension required to open the flange nut.
·Do not use open flames for heating.
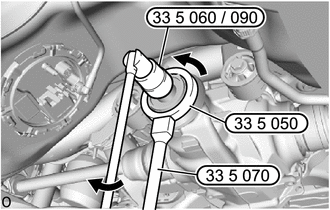
Unscrew the flange nut with the special tools 0 495 552 (33 5 050) and 0 495 554 (33 5 070) counterclockwise. Provide counter support at the bevel pinion with special tools 0 495 553 (33 5 060) and 0 495 554 (33 5 070).
- SST
- 09500-WA040
09500-WA050
09900-WA040
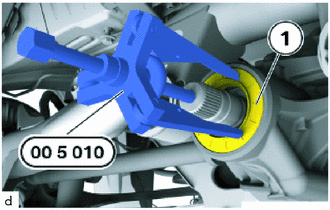
Pull the rear differential carrier oil seal out with the special tool 0 490 466 (00 5 010).
- SST
- 09500-WA090
3.INSTALL REAR DIFFERENTIAL CARRIER OIL SEAL
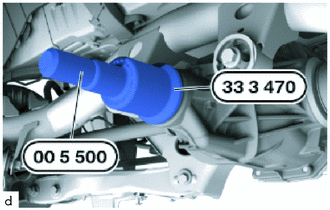
Coat the sealing lip of the new rear differential carrier oil seal and sealing surface of the bevel pinion with differential oil.
Drive in the rear differential carrier oil seal with special tool 0 490 475 (00 5 500) or 0 492 343 (33 3 470).
- SST
- 09500-WA070
09500-WA180
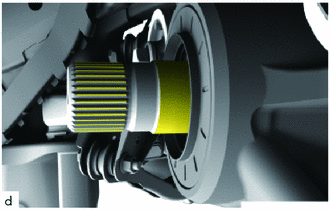
Clean bevel pinion thoroughly to remove remnants of screw locking agent.
Check dust plate for damage, replace if necessary.
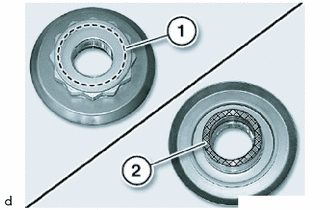
Clean the flange nut thoroughly to remove remnants of grease and screw locking agent.
Top up the collar insert (1) of the flange nut with grease.
Apply a thin coating of grease to shaded area (2) of the flange nut.
| *a | Match Mark |
Tighten the flange nut (1) up to the marker point of the bevel pinion (2).
- NOTICE:
-
To avoid damage to the rear differential carrier assembly, the flange nut must not be applied beyond the mark!
37100
4.INSTALL PROPELLER SHAFT WITH CENTER BEARING ASSEMBLY
5.INSPECT DIFFERENTIAL OIL