AXLE AND DIFFERENTIAL REAR DIFFERENTIAL CARRIER ASSEMBLY REMOVAL
CAUTION / NOTICE / HINT
- CAUTION:
- ·
Vehicle may slip off the vehicle hoist if the vehicle hoist is handled incorrectly.
Danger! Life-threatening injuries!
-Observe safety information on raising the vehicle using a vehicle hoist.
-For additional information see:
Click hereGeneral>INTRODUCTION>REPAIR INSTRUCTION>VEHICLE LIFT AND SUPPORT LOCATIONS
- NOTICE:
- ·
Damage to rear differential carrier assembly.
Failure to comply with the oil specifications can result in serious damage to the rear differential carrier assembly.
-After completion of repair work, check the transmission oil level in the rear differential carrier assembly.
-Use only the approved differential oil.
PROCEDURE

 37100
1.REMOVE PROPELLER SHAFT WITH CENTER BEARING ASSEMBLY
48738
2.REMOVE REAR SUSPENSION ARM COVER LH
48737
3.REMOVE REAR SUSPENSION ARM COVER RH
- HINT:
-
Use the same procedure as for the LH side.
41110
4.REMOVE REAR DIFFERENTIAL CARRIER ASSEMBLY
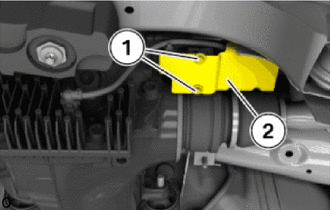
w/ LSD:
Loosen bolts (1).
Remove rear differential protector (2).
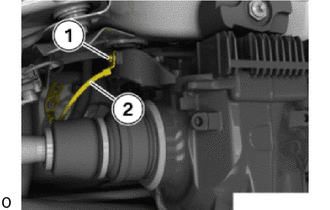
Remove the bolt (1) to disconnect the ground wire (2).
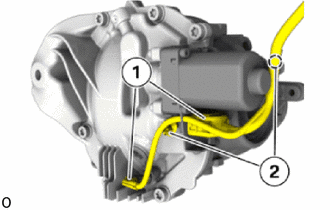
Unlock and disconnect plug connections (1).
Loosen the cable clips (2).
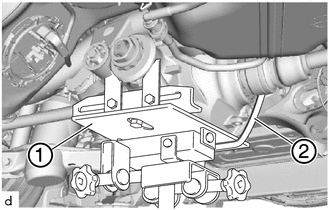
Support the rear differential carrier assembly with the transmission jack (1).
Secure the rear differential carrier assembly with the lashing belt (2) on the transmission jack (1).
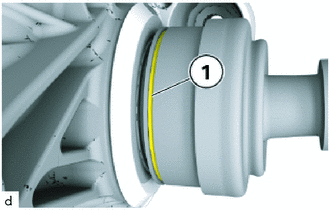
Make sure that the special tool 0 495 856 (33 5 124) or 2 240 465 is inserted in the circumferential slot (1) of the rear drive shaft assembly.
- SST
- 09500-WA020
09500-WA030
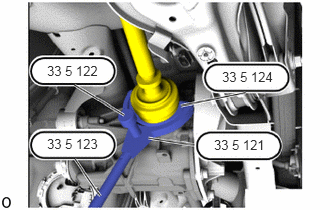
Use special tools 0 495 854 (33 5 122), 0 495 855 (33 5 123), 0 495 856 (33 5 124) / 0 495 853 (33 5 121) to push the rear drive shaft assembly out of the rear differential carrier assembly by jerking.
- SST
- 09500-WA020
09500-WA030
- HINT:
-
Use the same procedures for the opositeside.
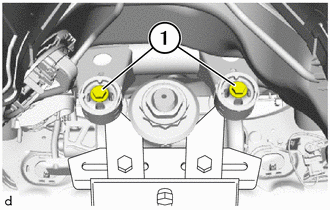
Loosen 18 mm bolts (1).
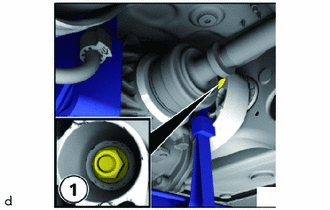
Loosen nut (1).
Slide bolt backwards up to the limit position.
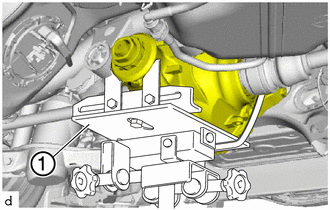
Lower the rear differential carrier assembly with the transmission jack (1).
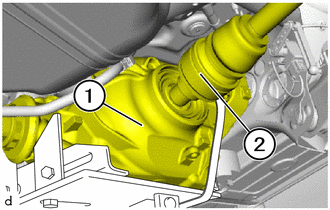
Press (tilt) the right rear differential carrier assembly (1) upwards.
Feed out the left rear drive shaft assembly (2) downwards and tie up.
Swing the rear differential carrier assembly (1) towards the left side.
Remove rear differential carrier assembly.