AUTOMATIC TRANSMISSION ASSEMBLY > INSTALLATION |
| 1. INSPECT TORQUE CONVERTER CLUTCH ASSEMBLY |
|
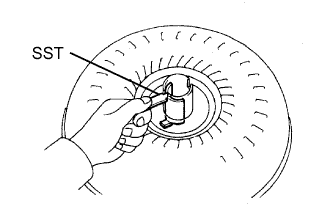
Inspect the one-way clutch.
Install SST so that it fits in the notch of the converter hub and outer race of the one-way clutch.
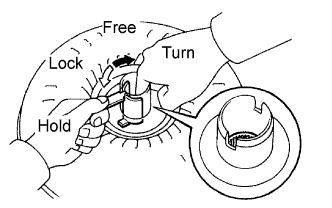 |
Press on the serrations of the starter with a finger and rotate it.
Check if it rotates smoothly when turned clockwise and locks up when turned counterclockwise.
If necessary, clean the converter and check the one-way clutch again.
Replace the converter if the one-way clutch still won't operate as specified.
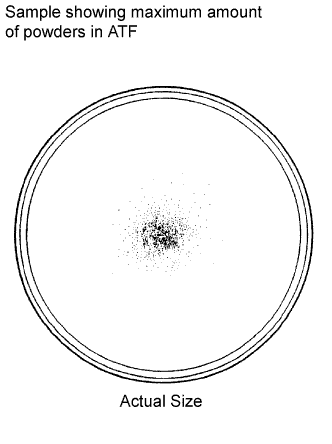 |
Check the condition of the torque converter clutch assembly.
If the inspection result of the torque converter clutch assembly meets any of the cases mentioned below, replace the torque converter clutch.
Replace the ATF in the torque converter clutch.
If the ATF is discolored and/or has a foul odor, completely stir the ATF in the torque converter clutch and drain it with the installation surface facing up.
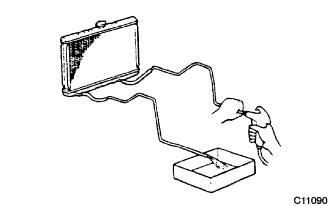 |
Clean and then check the oil cooler and oil pipe line.
If inspecting the torque converter clutch or exchanging the ATF, clean the oil cooler and oil pipe line.
If the ATF is cloudy, inspect the oil cooler (radiator).
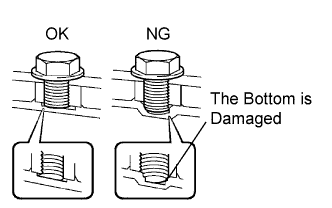 |
Be careful not to deform the torque converter clutch or damage the oil pump gear.
When any marks due to interference are found on the end of the bolt to the torque converter clutch or on the bottom of the bolt hole, replace the bolt and the torque converter clutch.
All the bolts should be the same length.
Do not lose any spring washers.
| 2. INSTALL TORQUE CONVERTER CLUTCH ASSEMBLY |
Install the torque converter clutch onto the automatic transmission.
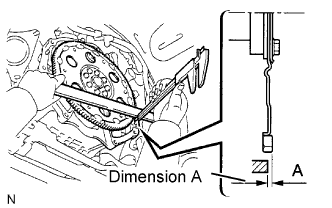 |
Using calipers and a straight edge, measure dimension A, between the engine and the end surface of the drive plate, as shown in the illustration.
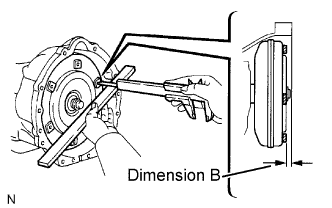 |
Using calipers and a straight edge, measure dimension B shown in the illustration and check that B is greater than A measured in (b).
| 3. INSTALL REAR NO.1 ENGINE MOUNTING INSULATOR |
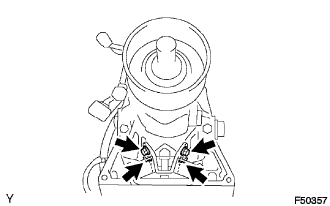 |
Install the engine mounting insulator rear onto the automatic transmission with the 4 bolts.
| 4. INSTALL AUTOMATIC TRANSMISSION ASSEMBLY |
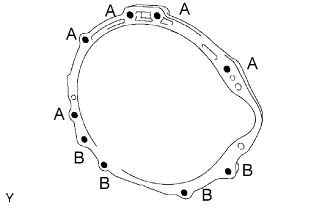 |
Install the automatic transmission onto the engine with the 9 bolts.
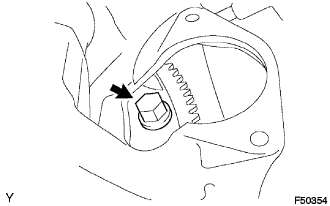 |
Install the 6 torque converter clutch mounting bolts.
| 5. INSTALL NO.3 FRAME CROSSMEMBER SUB-ASSEMBLY |
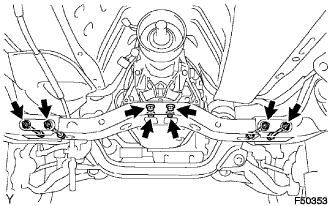 |
Install the frame crossmember sub-assembly No. 3 with the 4 bolts and 4 nuts.
Install the frame crossmember sub-assembly No. 3 with the 4 bolts.
| 6. INSTALL FLYWHEEL HOUSING SIDE COVER |
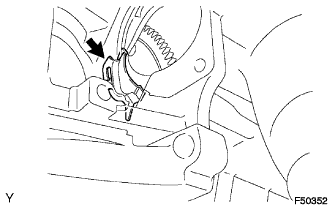 |
Install the flywheel housing side cover onto the cylinder block.
| 7. INSTALL STARTER ASSEMBLY |
Install the starter assembly with the 2 bolts.
Install the wire harness with the nut to terminal 30.
Connect terminal 50 to the starter assy.
| 8. INSTALL TRANSMISSION CONTROL CABLE ASSEMBLY |
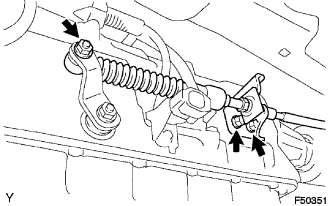 |
Install the transmission control cable bracket No. 1 with the 2 bolts.
Connect the transmission control cable with the nut.
| 9. INSTALL NO.1 OIL COOLER OUTLET TUBE |
Provisionally install the oil cooler outlet tube No. 1.
Provisionally install the oil cooler inlet tube No. 1.
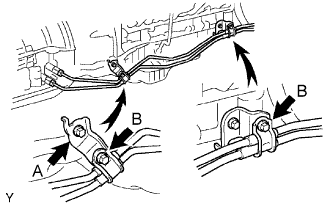 |
Install the 2 clamps and 3 bolts.
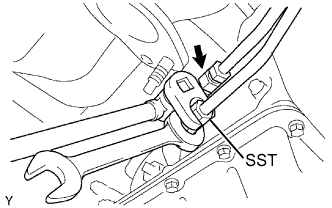 |
Using SST, tighten the oil cooler outlet tube No. 1.
| 10. INSTALL NO.1 OIL COOLER INLET TUBE |
Using SST, tighten the oil cooler inlet tube No. 1.
| 11. INSTALL NO.2 MANIFOLD STAY |
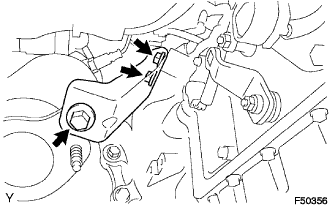 |
Install manifold stay No. 2 with the 3 bolts.
| 12. INSTALL MANIFOLD STAY |
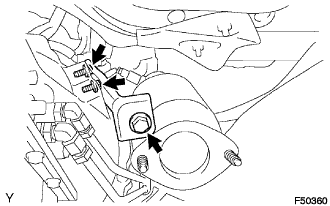 |
Install the manifold stay with the 3 bolts.
| 13. INSTALL PROPELLER WITH CENTER BEARING SHAFT ASSEMBLY |
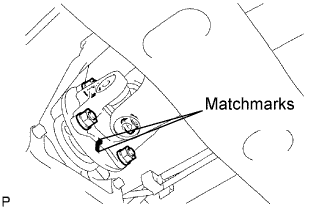 |
Align the matchmarks on the yoke and transfer flange.
Install the propeller shaft with the 4 nuts and 4 washers.
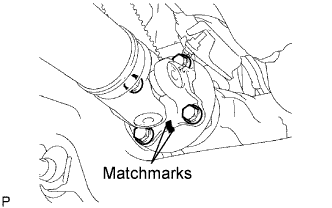 |
Align the matchmarks on the yoke and differential flange.
Install the propeller shaft with the 4 bolts, 4 nuts and 4 washers.
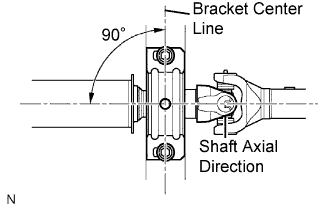 |
Provisionally install the center support bearing with 2 mounting bolts.
Torque the 2 bolts.
| 14. INSTALL EXHAUST PIPE |
| 15. INSTALL OXYGEN SENSOR |
| 16. CONNECT CABLE TO NEGATIVE BATTERY TERMINAL |
| 17. PERFORM INITIALIZATION |
| 18. ADD AUTOMATIC TRANSMISSION FLUID |
| 19. INSPECT SHIFT LEVER POSITION |
Check that the shift lever moves smoothly and appropriately from the P to R position, only when the ignition switch is turned to ON and the brake pedal is depressed.
When starting the engine, make sure that the vehicle moves forward when shifting the lever from the N to D position and moves rearward when shifting the lever to the R position.
| 20. CHECK FOR EXHAUST GAS LEAKAGE |
| 21. INSTALL NO. 2 ENGINE UNDER COVER (w/ No. 2 Engine Under Cover) |
| 22. INSTALL NO. 1 ENGINE UNDER COVER SUB-ASSEMBLY |