| B |  |
| REPLACE RADIO RECEIVER (Click here) |
| C | |
| REPLACE RADIO RECEIVER (Click here) |
AUDIO AND VISUAL SYSTEM (for CrewMax) > Radio Broadcast cannot be Received (Bad Reception) |
| 1.CHECK IF RADIO AUTO-SEARCH FUNCTIONS PROPERLY |
Perform the auto-search of the radio and check that it functions normally.
| Result | Proceed to |
| NG | A |
| OK (for Column Shift Type) | B |
| OK (for Floor Shift Type) | C |
|
| ||||
|
| ||||
| A | |
 |
| 2.CHECK OPTIONAL COMPONENTS |
Check if the telephone antenna, and other optional components are installed.
|
| ||||
| OK | ||
 | ||
| ||
| 3.CHECK ANTENNA FOR NOISE PRODUCTION |
With the ignition switch ACC, turn on the radio and choose the AM mode.
Place the tip of a screwdriver on the antenna and check that noise is heard from the speakers.
| Result | Proceed to |
| NG | A |
| OK (for Column Shift Type) | B |
| OK (for Floor Shift Type) | C |
|
| ||||
|
| ||||
| A | |
|
| 4.CHECK RADIO RECEIVER (ANTENNA) |
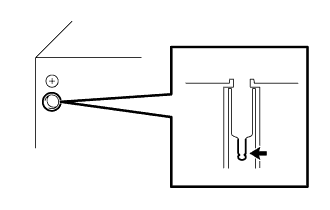 |
Remove the antenna plug of the radio receiver.
With the radio receiver connector connected, turn the ignition switch ACC.
Turn on the radio and choose the AM mode.
Place a flat-head screwdriver or a piece of metal, such as a thin wire, on the antenna jack of the radio receiver. Check that noise is heard from the speakers.
| Result | Proceed to |
| OK | A |
| NG (for Column Shift Type) | B |
| NG (for Floor Shift Type) | C |
|
| ||||
|
| ||||
| A | ||
| ||
| ||
