 |
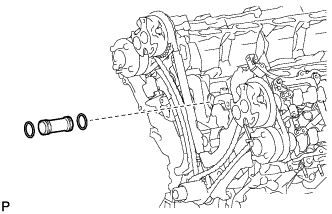
Apply soapy water to 2 new O-rings and install them to the inlet pipe.
OIL PUMP > INSTALLATION |
| 1. INSTALL WATER INLET PIPE |
|
Apply soapy water to 2 new O-rings and install them to the inlet pipe.
Install the inlet pipe to the No. 1 heat exchanger cover.
| 2. INSTALL TIMING CHAIN COVER SUB-ASSEMBLY |
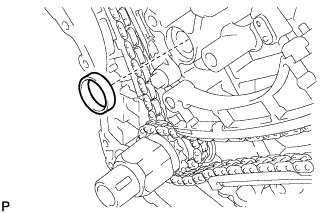 |
Apply a light coat of engine oil to a new oil pump gasket.
Install the oil pump gasket.
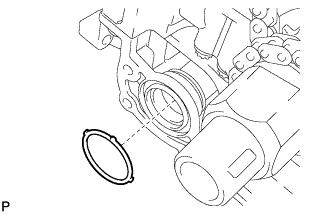 |
Apply a light coat of engine oil to a new O-ring.
Install the O-ring.
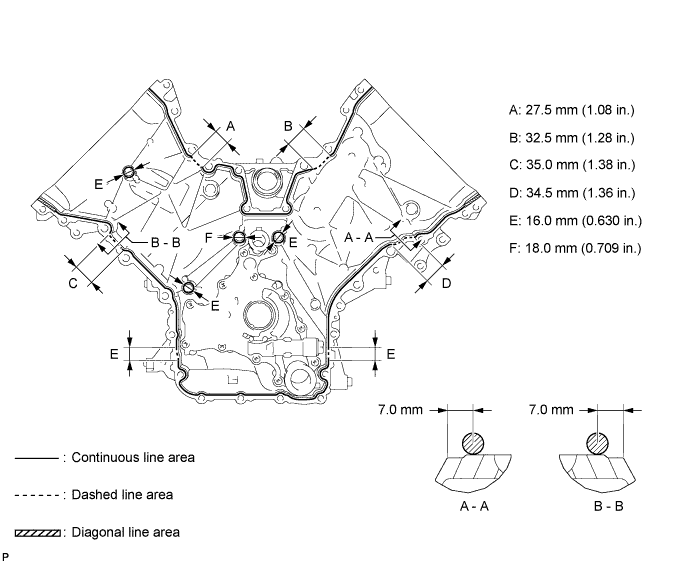
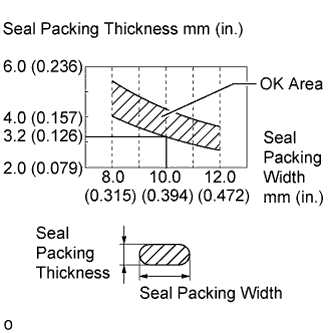
Apply seal packing in a continuous line to the timing chain cover as shown in the following illustration.
 |
| Area | Seal Packing Diameter | Application Position from Inside Edge of Cover |
| Continuous Line Area | 3.0 to 4.0 mm (0.118 to 0.157 in.) | 2.5 mm (0.0984 in.) |
| Dashed Line Area | 6.4 mm (0.252 in.) or more, or within OK area shown in illustration | 7.0 mm (0.276 in.) |
| Diagonal Line Area | 3.0 to 4.0 mm (0.118 to 0.157 in.) | 5.5 mm (0.217 in.) |
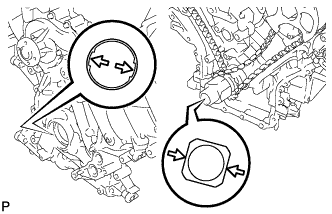 |
Align the oil pump drive rotor spline and crankshaft as shown in the illustration. Install the spline and chain cover to the crankshaft.
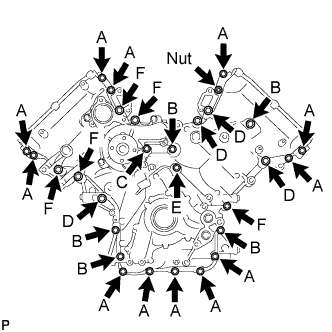 |
Temporarily install the timing chain cover with the 28 bolts and nut.
| Item | Length | Thread Diameter |
| Bolt A | 25 mm (0.984 in.) | 8 mm (0.315 in.) |
| Bolt B | 55 mm (2.17 in.) | 8 mm (0.315 in.) |
| Bolt C | 70 mm (2.76 in.) | 8 mm (0.315 in.) |
| Bolt D | 35 mm (1.38 in.) | 10 mm (0.394 in.) |
| Bolt E | 55 mm (2.17 in.) | 10 mm (0.394 in.) |
| Bolt F | 80 mm (3.15 in.) | 10 mm (0.394 in.) |
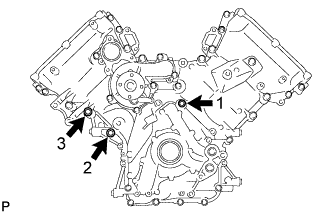 |
Tighten the 3 bolts in several steps in the sequence shown in the illustration.
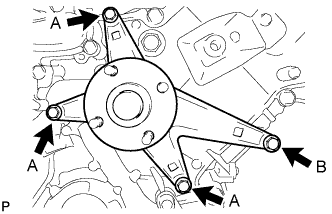 |
Temporarily install the fluid coupling bracket with the 4 bolts.
| Item | Length | Thread Diameter |
| Bolt A | 70 mm (2.76 in.) | 8 mm (0.315 in.) |
| Bolt B | 80 mm (3.15 in.) | 10 mm (0.394 in.) |
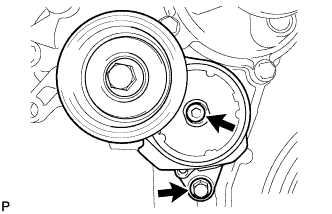 |
Temporarily install the belt tensioner with the standard bolt and 6 mm hexagon wrench bolt.
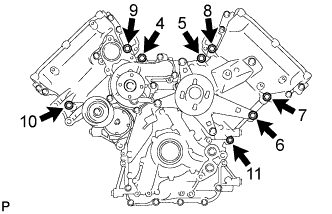 |
Tighten the 8 bolts labeled 4 to 11 in several steps in the sequence shown in the illustration.
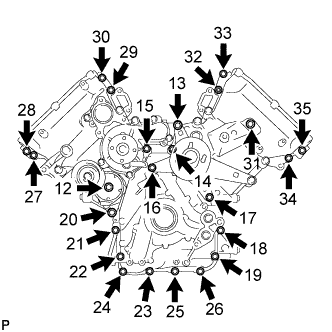 |
Tighten the 23 bolts and nut labeled 12 to 35 in several steps in the sequence shown in the illustration.
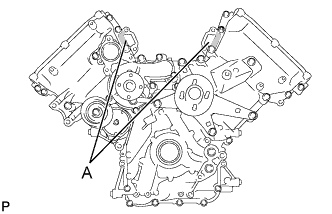 |
| 3. INSTALL CYLINDER HEAD COVER SUB-ASSEMBLY LH |
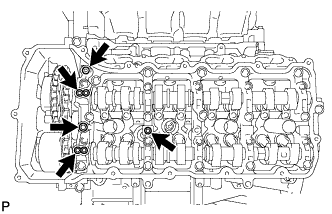 |
Install 5 new gaskets to the camshaft bearing caps (No. 2, No. 3).
Install the gasket to the cylinder head cover.
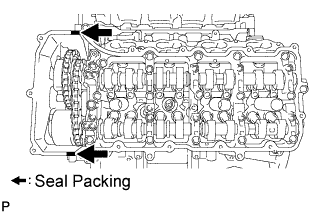 |
Apply seal packing as shown in the illustration.
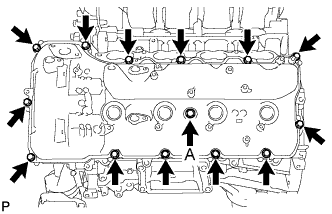 |
Install the cylinder head cover washer with a new seal and the 14 bolts.
| 4. INSTALL CYLINDER HEAD COVER SUB-ASSEMBLY RH |
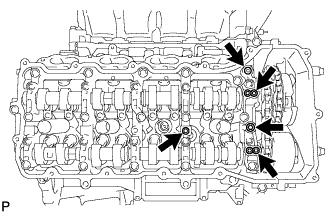 |
Install 5 new gaskets to the camshaft bearing caps. (No. 1, No. 3).
Install the gasket to the cylinder head cover.
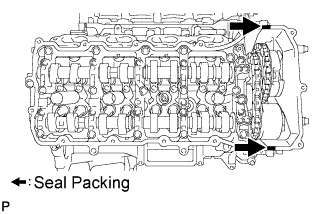 |
Apply seal packing as shown in the illustration.
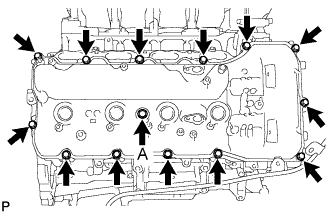 |
Install the cylinder head cover washer with a new seal and the 14 bolts.
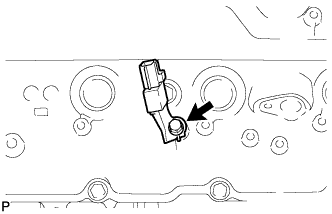 |
Install the noise filter to the cylinder head cover with the bolt.
| 5. INSTALL IGNITION COIL ASSEMBLY |
Install the 8 ignition coils with the 8 bolts.
| 6. INSTALL CRANKSHAFT PULLEY |
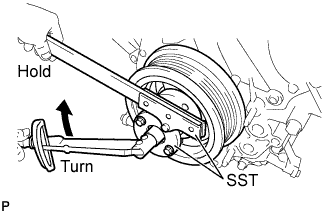 |
Align the pulley set key with the key groove of the pulley, and slide on the pulley.
Using SST, install the pulley set bolt.
| 7. CONNECT WIRE HARNESS CLAMP BRACKET |
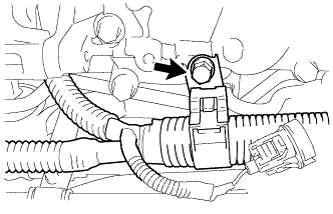 |
Connect the bracket to the timing chain cover with the bolt.
| 8. INSTALL NO. 1 IDLER PULLEY SUB-ASSEMBLY |
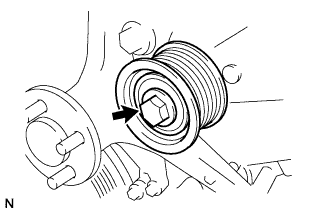 |
Install the idler pulley with the bolt.
| 9. INSTALL WATER PUMP PULLEY |
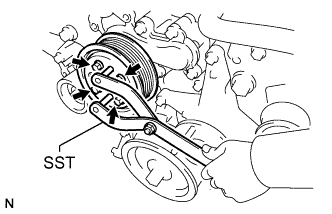 |
Temporarily install the pulley with the 4 bolts.
Using SST, hold the pulley and tighten the 4 bolts.
| 10. INSTALL WATER INLET HOUSING |
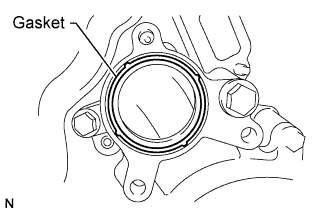 |
Install a new gasket to the timing chain cover.
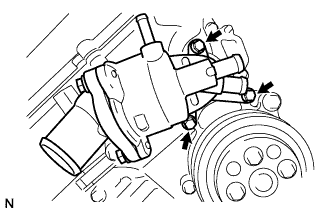 |
Install the water inlet with the 3 bolts.
| 11. INSTALL AIR TUBE SUB-ASSEMBLY |
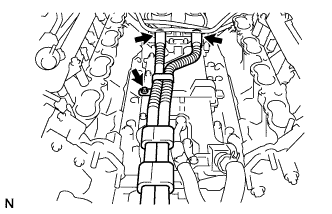 |
Connect the 2 hoses.
Install the air tube with the bolt.
| 12. INSTALL NO. 1 ENGINE COVER |
 |
| 13. INSTALL NO. 2 ENGINE COVER |
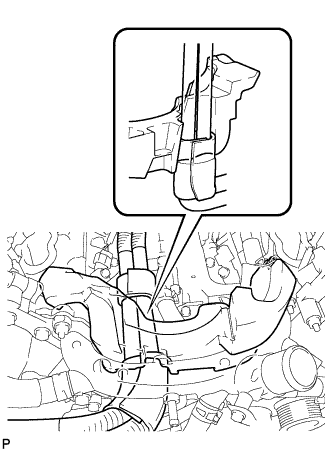 |
| 14. INSTALL FRONT WATER BY-PASS JOINT |
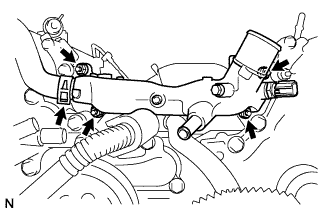 |
Install 2 new gaskets and the water by-pass joint with the 4 nuts.
Connect the No. 2 water by-pass hose to the water by-pass joint.
| 15. INSTALL WATER BY-PASS PIPE SUB-ASSEMBLY |
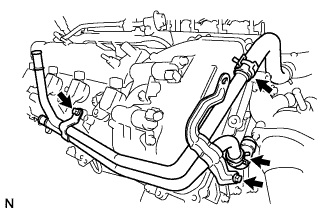 |
Connect the 2 hoses.
Install the water by-pass pipe with the 2 bolts.
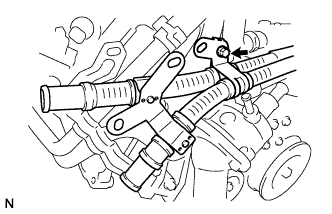 |
Connect the air tube with the bolt.
| 16. INSTALL NO. 1 WATER BY-PASS HOSE |
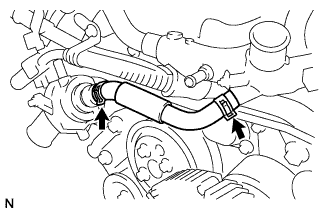 |
Install the No. 1 water by-pass hose by connecting the hose to the water inlet housing and front water by-pass joint.
| 17. INSTALL GENERATOR ASSEMBLY |
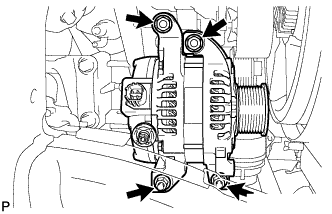 |
Install the 2 stud bolts.
Install the generator with the 2 bolts and 2 nuts.
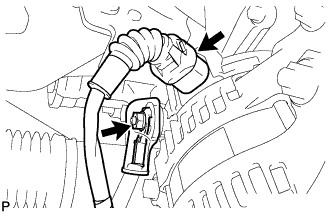 |
Connect the generator connector.
Connect the generator wire with the nut.
Install the terminal cap.
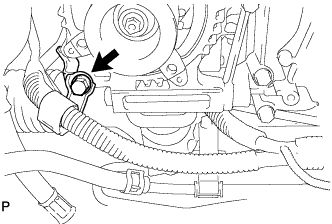 |
Connect the wire harness bracket to the generator with the bolt.
| 18. CONNECT VANE PUMP ASSEMBLY |
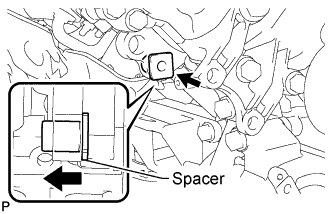 |
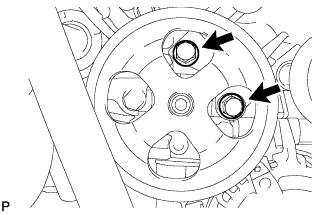 |
Connect the vane pump to the timing chain cover with the 2 bolts.
| 19. INSTALL ENGINE OIL LEVEL DIPSTICK GUIDE |
Apply a light coat of engine oil to a new O-ring.
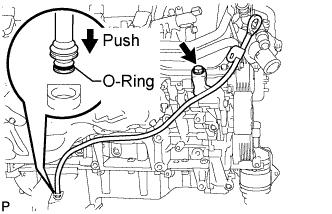 |
Install the O-ring to the guide.
Install the dipstick guide with the bolt.
Install the dipstick.
| 20. INSTALL OIL FILTER BRACKET (w/o Oil Cooler) |
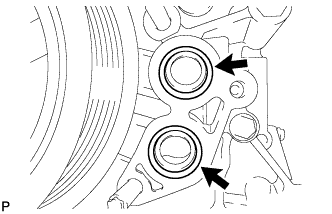 |
Apply a light coat of engine oil to 2 new O-rings.
Install the 2 O-rings to the timing chain cover.
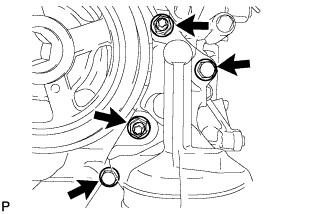 |
Install the oil filter bracket with the 2 bolts and 2 nuts.
| 21. INSTALL OIL FILTER BRACKET (w/ Oil Cooler) |
|
Apply a light coat of engine oil to 2 new O-rings.
Install the 2 O-rings to the timing chain cover.
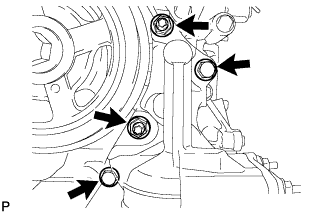 |
Install the oil filter bracket with the 2 nuts and 2 bolts.
| 22. INSTALL NO. 1 OIL COOLER BRACKET (w/ Oil Cooler) |
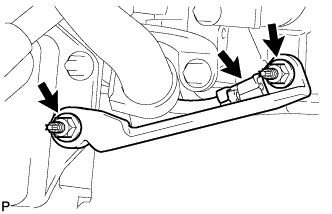 |
Connect the ground wire to the cylinder block.
Install the oil cooler bracket with the 2 nuts.
| 23. INSTALL NO. 2 WATER BY-PASS PIPE (w/ Oil Cooler) |
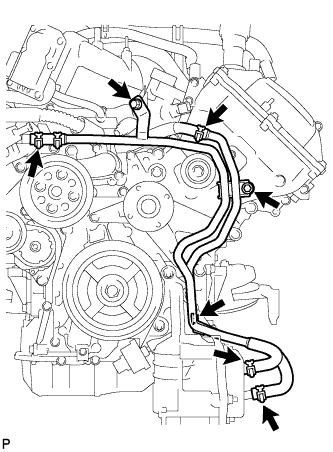 |
Connect the 4 hoses.
Install the water by-pass hose with the 3 bolts.
| 24. INSTALL OIL PRESSURE SENDER GAUGE ASSEMBLY |
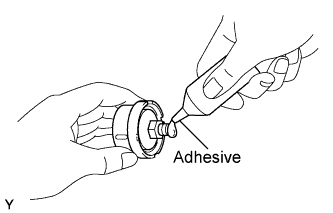 |
Apply adhesive to 2 or 3 threads of the oil pressure sender gauge.
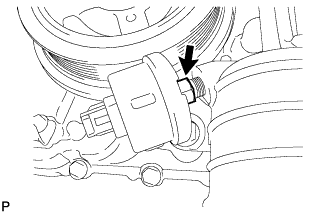 |
Install the oil pressure sender gauge.
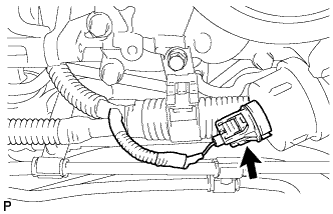 |
Connect the sender gauge connector.
| 25. INSTALL OIL FILTER ELEMENT |
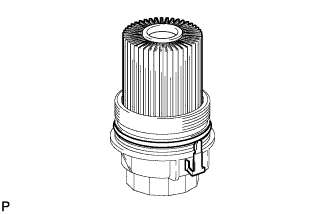 |
Clean the inside of the oil filter cap, its threads and its O-ring groove.
Apply a small amount of engine oil to a new O-ring and install it to the oil filter cap.
Set a new oil filter element to the oil filter cap.
Remove any dirt or foreign matter from the installation surface of the engine.
Apply a small amount of engine oil to the O-ring again and temporarily install the oil filter cap.
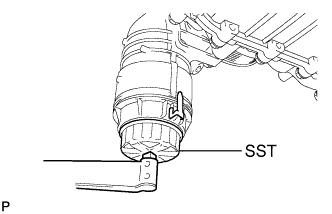 |
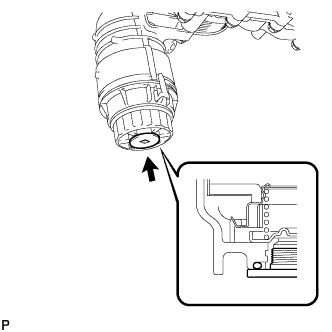
Using SST, tighten the oil filter cap.
 |
Apply a small amount of engine oil to a new drain plug O-ring, and install it to the oil filter cap.
Install the oil filter drain plug.
| 26. CONNECT NO. 2 FUEL TUBE SUB-ASSEMBLY |
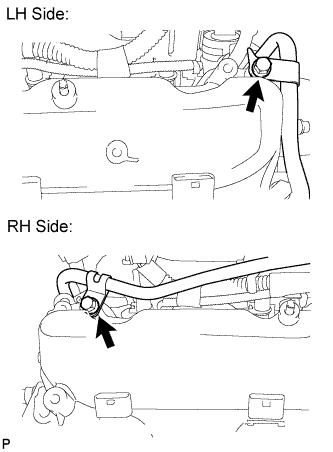 |
Connect the fuel tube with the 2 bolts.
| 27. CONNECT COOLER COMPRESSOR ASSEMBLY |
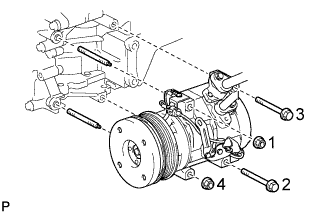 |
Install the cooler compressor with the 2 stud bolts.
Install the 2 bolts and 2 nuts.
| 28. CONNECT HEATER HOSE AND PIPE |
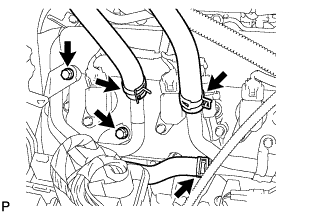 |
Connect the 3 hoses.
Install the 2 bolts.
| 29. CONNECT AIR PUMP HOSE AND WIRE HARNESS |
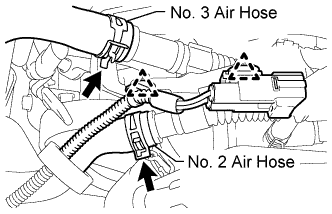 |
Connect the No. 2 and No. 3 air hoses.
Connect the 2 clamps and air pump wire harness.
| 30. INSTALL INTAKE MANIFOLD |
Install the intake manifold (Click here).
| 31. CONNECT ENGINE WIRE |
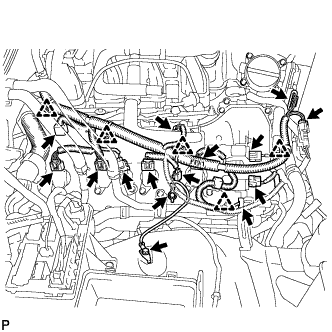 |
Engine Room RH Side:
Connect the 5 clamps.
Connect the throttle position sensor and throttle control motor connector.
Connect the 2 air pump connectors.
Install the ground wire with the 2 bolts.
Connect the noise filter connector.
Connect the 2 VVT sensor connectors.
Connect the injector connector.
Connect the 4 ignition coil connectors.
Connect the 2 camshaft timing oil control valve connectors.
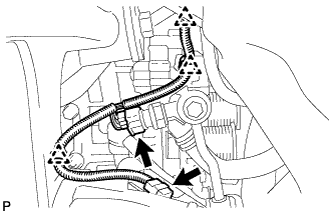 |
Connect the 2 clamps and power steering oil pressure switch connector.
for 4WD:
Connect the clamp and junction connector.
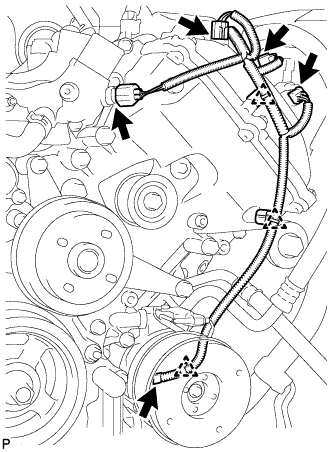 |
Engine Room LH Side:
Connect the cooler compressor connector.
Connect the 3 clamps.
Connect the camshaft position sensor connector.
Connect the 2 camshaft timing oil control valve connectors.
Connect the engine coolant temperature sensor connector.
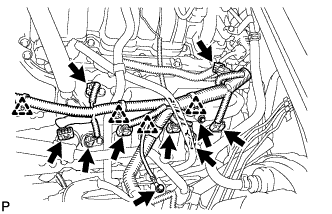 |
Connect the 4 clamps.
Install the ground wire with the 2 bolts.
Connect the noise filter connector.
Connect the 2 VVT sensor connectors.
Connect the 4 ignition coil connectors.
Connect the injector connector.
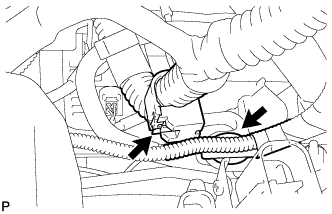 |
Connect the 2 wire harness clamps.
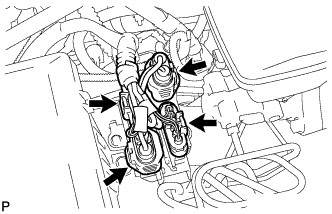 |
Connect the 4 air injection control driver connectors.
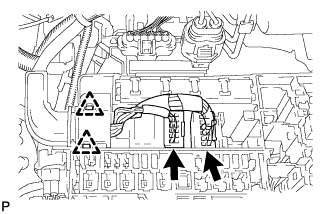 |
Connect the 2 connectors and attach the 2 clamps to the engine room junction block.
Install the engine room relay block cover.
| 32. INSTALL AIR CLEANER ASSEMBLY |
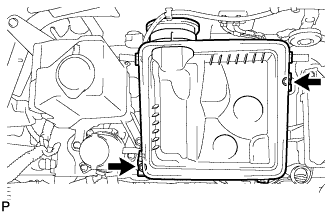 |
Install the air cleaner case with the 2 bolts.
Install the air cleaner element onto the air cleaner case.
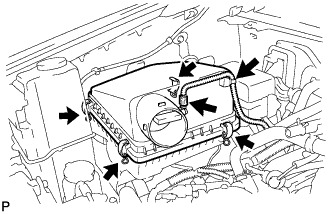 |
Install the air cleaner cap.
Fasten the 4 hook clamps.
Connect the MAF meter connector.
Attach the wire harness clamp.
| 33. INSTALL AIR CLEANER HOSE ASSEMBLY |
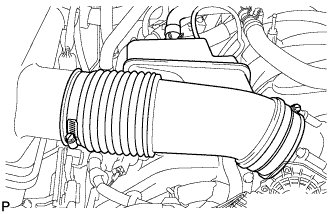 |
Install the air cleaner hose with the 2 clamps.
Connect the vacuum hose.
Connect the ventilation hose.
| 34. INSTALL RADIATOR ASSEMBLY |
Install the radiator (Click here).
| 35. ADD ENGINE OIL |
Add fresh oil.
| Oil Grade | Oil Viscosity (SAE) |
| ILSAC multigrade engine oil | 0W-20 5W-20 (0W-20 is best choice for fuel economy and good starting in cold weather.) |
| Item | Specified Condition |
| Drain and refill with oil filter change | 7.0 liters (7.4 US qts, 6.2 Imp. qts) |
| Drain and refill without oil filter change | 6.6 liters (7.0 US qts, 5.8 Imp. qts) |
| Dry fill | 8.4 liters (8.9 US qts, 7.4 Imp. qts) |
Install the oil filler cap.
| 36. ADD ENGINE COOLANT |
Add engine coolant.
| Item | Specified Condition |
| w/ Trailer Towing System | 13.0 liters (13.7 US qts, 11.4 Imp. qts) |
| w/o Trailer Towing System | 12.1 liters (12.8 US qts, 10.6 Imp. qts) |
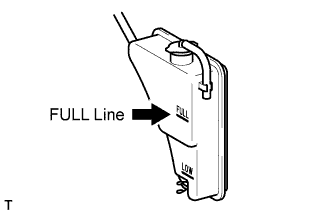 |
Slowly pour coolant into the radiator reservoir until it reaches the FULL line.
Install the reservoir cap.
Press the inlet and outlet radiator hoses several times by hand, and then check the coolant level. If the coolant level is low, add coolant.
Install the radiator cap.
Start the engine and warm it up until the thermostat opens.
Maintain the engine speed at 2000 to 2500 rpm.
Press the inlet and outlet radiator hoses several times by hand to bleed air.
Stop the engine, and wait until the engine coolant cools down to ambient temperature.
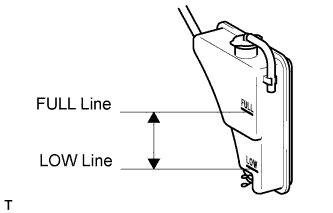 |
Check that the coolant level is between the FULL and LOW lines.
If the coolant level is below the LOW line, repeat all of the procedures above.
If the coolant level is above the FULL line, drain coolant so that the coolant level is between the FULL and LOW lines.
| 37. CONNECT CABLE TO NEGATIVE BATTERY TERMINAL |
| 38. INSPECT FOR OIL LEAK |
Start the engine. Make sure that there are no oil leaks from the area that was worked on.
| 39. INSPECT FOR COOLANT LEAK |
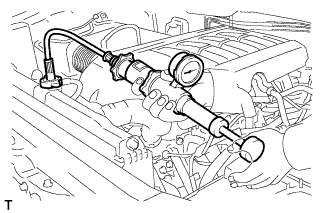 |
Fill the radiator with coolant and attach a radiator cap tester.
Warm up the engine.
Using the radiator cap tester, increase the pressure inside the radiator to 118 kPa (1.2 kgf/cm2, 17 psi), and check that the pressure does not drop.
If the pressure drops, check the hoses, radiator and water pump for leaks. If no external leaks are found, check the heater core, cylinder block and head.
| 40. CHECK ENGINE OIL LEVEL |
Warm up the engine, then stop the engine and wait for 5 minutes.
Check that the engine oil level is between the low level and full level marks on the dipstick.
If low, check for leakage and add oil up to the full level mark.