ROOF HEADLINING (for Regular Cab) > INSTALLATION |
| 1. INSTALL ROOF HEADLINING ASSEMBLY |
|
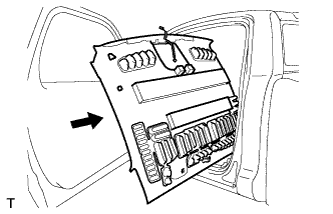
Place the roof headlining in the cabin as shown in the illustration.
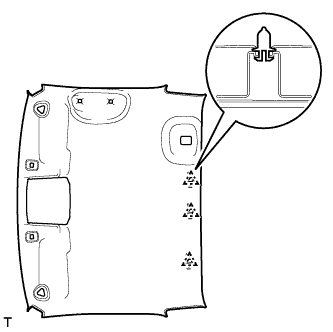 |
Attach the 3 clips to install the headlining.
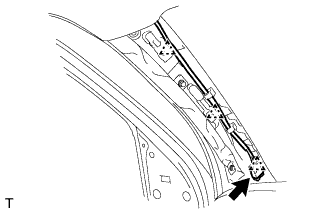 |
Connect the roof wire connector and attach each clamp.
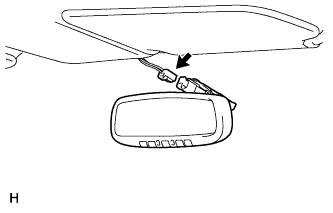 |
w/ EC Mirror:
Connect the EC mirror connector.
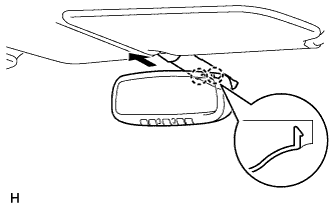 |
Attach the 2 claws to install the inner rear view mirror cover.
| 2. INSTALL COAT HOOK |
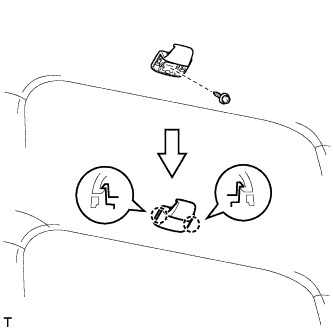 |
Install the coat hook with the screw.
Attach the 2 claws to install the coat hook cap.
| 3. INSTALL ASSIST GRIP PLUG |
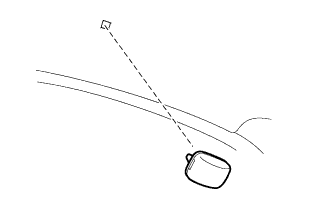 |
Install a new assist grip plug.
| 4. INSTALL ASSIST GRIP SUB-ASSEMBLY |
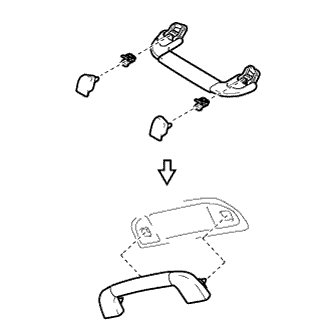 |
Install the 2 clips and 2 covers to the assist grip, as shown in the illustration.
Install the assist grip.
| 5. INSTALL VISOR HOLDER |
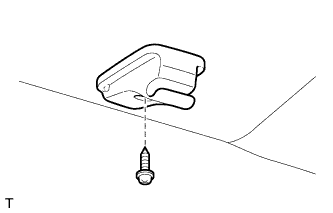 |
Install the visor holder with the screw.
| 6. INSTALL VISOR ASSEMBLY LH |
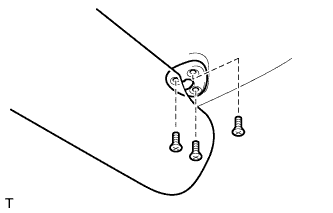 |
Install the visor with the 3 screws.
| 7. INSTALL VISOR ASSEMBLY RH |
| 8. INSTALL VISOR BRACKET COVER LH |
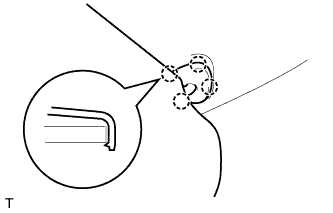 |
Attach the 4 claws to install the visor bracket cover.
| 9. INSTALL VISOR BRACKET COVER RH |
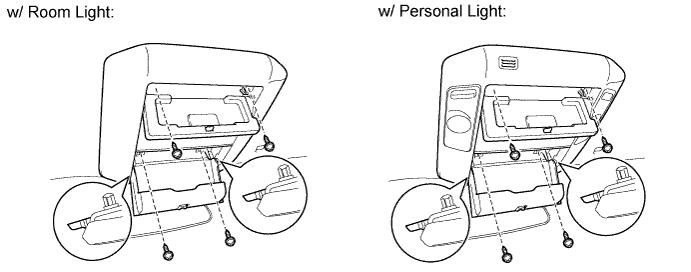
| 10. INSTALL ROOF CONSOLE BOX ASSEMBLY |
Connect the connector.
Install the roof console box with the 4 screws.
| 11. INSTALL FRONT QUARTER TRIM PANEL ASSEMBLY LH |
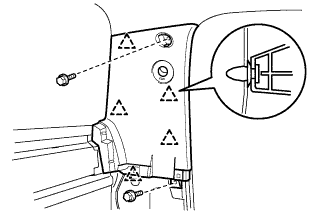 |
Attach the 5 clips to install the quarter trim panel.
Install the 2 bolts.
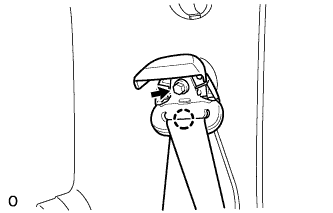 |
Insert the bolt and extension of the anti-rotation device through the quarter trim panel hole into the vehicle body.
Install the seat belt's shoulder anchor with the bolt.
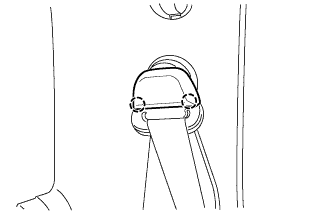 |
Attach the 2 claws to close the seat belt anchor cover.
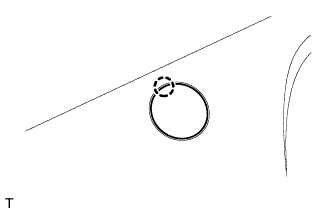 |
Attach the claw to install the cover.
| 12. INSTALL FRONT QUARTER TRIM PANEL ASSEMBLY RH |
| 13. INSTALL LOWER QUARTER TRIM PANEL ASSEMBLY LH |
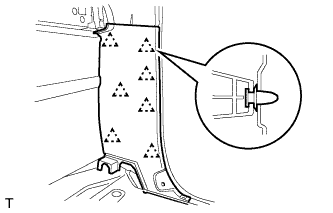 |
Attach the 7 clips to install the quarter trim panel.
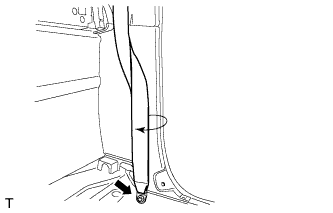 |
Twist the seat belt clockwise and install the outer lap belt anchor with the bolt.
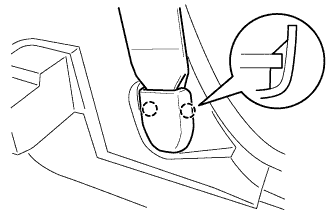 |
Attach the 2 claws to install the cover.
| 14. INSTALL LOWER QUARTER TRIM PANEL ASSEMBLY RH |
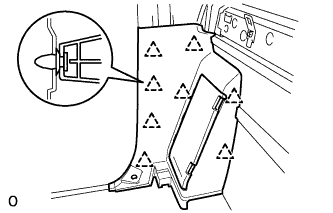 |
Attach the 8 clips to install the quarter trim panel.
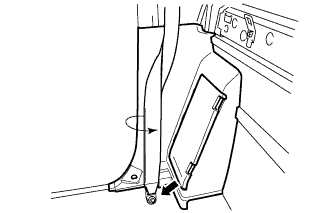 |
Twist the seat belt counterclockwise and install the outer lap belt anchor with the bolt.
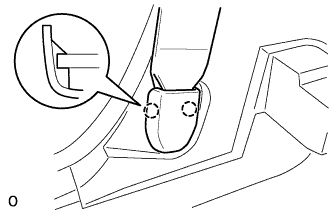 |
Attach the 2 claws to install the cover.
| 15. INSTALL FRONT PILLAR GARNISH LH |
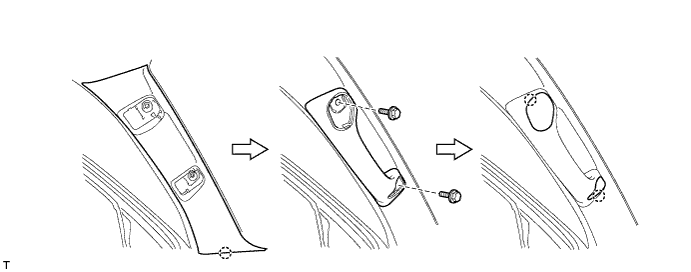
Attach the claw to install the front pillar garnish.
Install the assist grip with the 2 bolts.
Attach the 2 claws to install the 2 assist grip plugs.
| 16. INSTALL FRONT PILLAR GARNISH RH |
| 17. INSTALL LUGGAGE COMPARTMENT BOX RH |
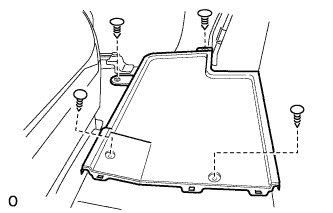 |
Install the luggage compartment box with the 4 clips.
| 18. INSTALL LUGGAGE COMPARTMENT BOX LH |
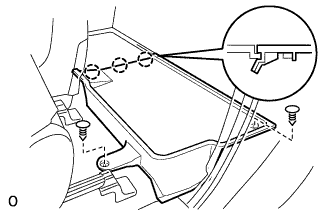 |
Attach the 3 claws to install the luggage compartment box.
Install the 2 clips.
| 19. INSTALL UPPER BACK PANEL GARNISH |
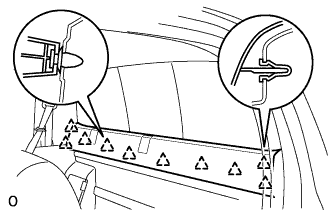 |
Attach the 10 clips to install the back panel garnish.
| 20. INSTALL FRONT DOOR OPENING TRIM WEATHERSTRIP LH |
| 21. INSTALL FRONT DOOR OPENING TRIM WEATHERSTRIP RH |
| 22. INSTALL COWL SIDE TRIM BOARD LH |
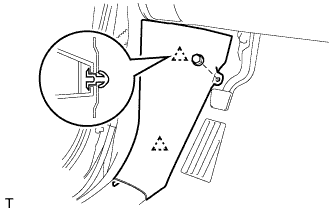 |
Attach the 2 clips to install the cowl side trim board.
Install the clip.
| 23. INSTALL COWL SIDE TRIM BOARD RH |
| 24. INSTALL FRONT DOOR SCUFF PLATE LH |
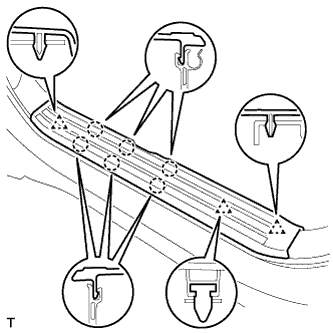 |
Attach the 6 claws and 3 clips to install the scuff plate.
| 25. INSTALL FRONT DOOR SCUFF PLATE RH |
| 26. INSTALL FRONT SEAT ASSEMBLY (for Center Seat) |
Install the front seat (Click here).
| 27. INSTALL FRONT SEAT ASSEMBLY (for Fold Down Seat Type) |
Install the front seat (Click here).
| 28. INSTALL FRONT SEAT ASSEMBLY (for Manual Seat) |
Install the front seat (Click here).
| 29. CONNECT CABLE TO NEGATIVE BATTERY TERMINAL |
| 30. CHECK SRS WARNING LIGHT |
Check the SRS warning light (Click here).