 |
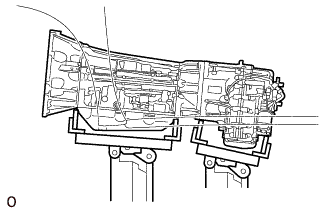
Support the transfer assembly with a transmission jack.
- NOTICE:
- Secure the transfer assembly to the transmission jack using a belt, etc. to prevent it from falling.
TRANSFER ASSEMBLY > INSTALLATION |
| 1. INSTALL TRANSFER ASSEMBLY |
|
Support the transfer assembly with a transmission jack.
Raise the transfer assembly so that it is level with the automatic transmission assembly and install the transfer assembly with the 8 bolts.
| 2. CONNECT WIRE HARNESS AND CONNECTOR |
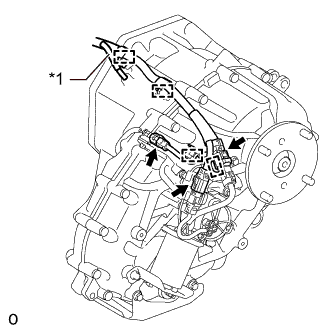 |
Connect the 3 connectors, 4 clamps and transfer breather hose.
| *1 | Transfer Breather Hose |
| 3. INSTALL REAR NO. 1 ENGINE MOUNTING INSULATOR |
Remove the transmission jack from the transfer assembly.
Install the rear No. 1 engine mounting insulator with the 4 bolts.
| 4. INSTALL NO. 3 FRAME CROSSMEMBER SUB-ASSEMBLY |
Install the No. 3 frame crossmember sub-assembly to the rear No. 1 engine mounting insulator with the 4 bolts.
Install the No. 3 frame crossmember sub-assembly with the 4 bolts, 4 washers and 4 nuts.
Remove the transmission jack from the automatic transmission assembly.
| 5. INSTALL PROPELLER WITH CENTER BEARING SHAFT ASSEMBLY |
| 6. INSTALL FRONT PROPELLER SHAFT ASSEMBLY |
| 7. ADD TRANSFER OIL |
Install a new transfer case plug (drain).
Add oil so that the oil level is between 0 to 5.0 mm (0 to 0.196 in.) from the bottom lip of the transfer case plug (filler) hole.
Wait approximately 5 minutes and check that the oil level has not changed.
Install a new transfer case plug (filler).
Install the lower transfer case protector .
| 8. CHECK TRANSFER OIL |
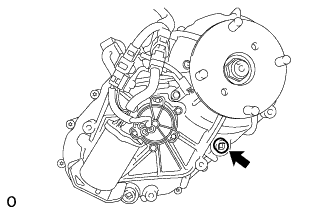 |
Remove the transfer case plug (filler).
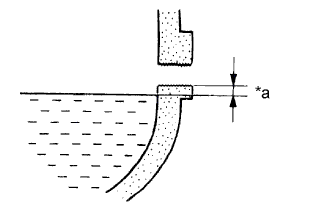 |
Check that the oil level is between 0 to 5.0 mm (0 to 0.196 in.) from the bottom lip of the transfer case plug (filler) hole.
If the result is not as specified, add Toyota Genuine Transfer gear oil LF 75W or equivalent.
| *a | 0 to 5.0 mm (0 to 0.196 in.) |
When the oil level is too low, check for oil leaks.
Wait approximately 5 minutes and check that the oil level has not changed.
Install a new transfer case plug (filler).
| 9. CHECK FOR TRANSFER OIL LEAK |