FRONT SEAT OUTER BELT ASSEMBLY (for Regular Cab) > INSTALLATION |
| 1. INSTALL FRONT SEAT OUTER BELT ASSEMBLY LH |
|
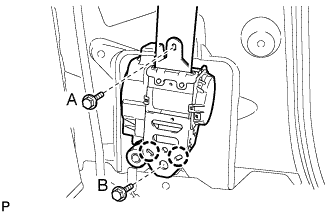
Align the vehicle's claws with the seat belt retractor positioning holes.
Install the front seat outer belt assembly LH with the 2 bolts.
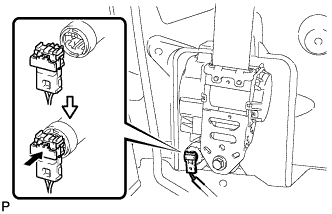 |
Connect the pretensioner connector as shown in the illustration.
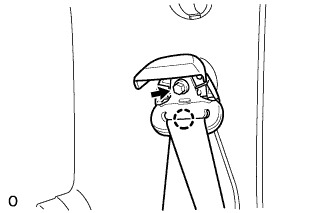 |
Insert the bolt and extension of the anti-rotation device through the quarter trim panel hole into the vehicle body.
Connect the front seat outer belt assembly LH with the bolt.
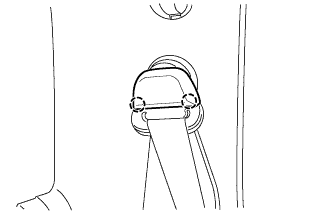 |
Attach the 2 claws to close the seat belt anchor cover.
| 2. INSTALL LOWER QUARTER TRIM PANEL ASSEMBLY LH (for LH Side) |
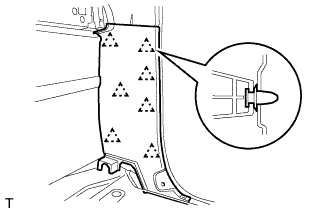 |
Attach the 7 clips to install the lower quarter trim panel assembly LH.
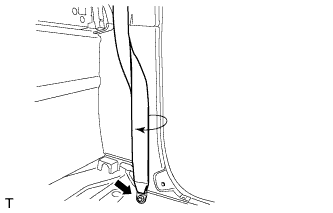 |
Twist the front seat outer belt assembly LH clockwise and connect it with the bolt.
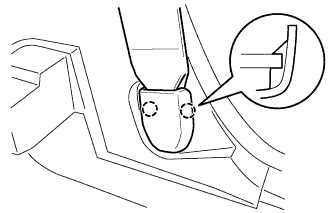 |
Attach the 2 claws to install the cover.
| 3. INSTALL LOWER QUARTER TRIM PANEL ASSEMBLY RH (for RH Side) |
Attach the 9 clips to install the lower quarter trim panel assembly RH.
Install the jack assembly.
Install the trim cover.
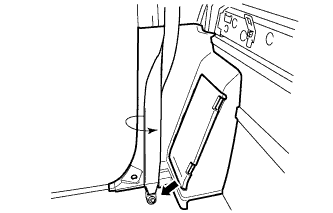 |
Twist the front seat outer belt assembly RH counterclockwise and connect it with the bolt.
Attach the 2 claws to install the cover.
| 4. INSTALL LUGGAGE COMPARTMENT BOX RH |
Install the luggage compartment box RH with the 4 clips.
| 5. INSTALL LUGGAGE COMPARTMENT BOX LH |
Attach the 3 claws to install the luggage compartment box LH.
Install the 2 clips.
| 6. INSTALL UPPER BACK PANEL GARNISH |
Attach the 10 clips to install the upper back panel garnish.
| 7. INSTALL FRONT DOOR OPENING TRIM WEATHERSTRIP LH |
| 8. INSTALL FRONT DOOR SCUFF PLATE LH |
Attach the 6 claws and 3 clips to install the front door scuff plate LH.
| 9. INSTALL FRONT SEAT ASSEMBLY |
for Manual Seat:
(Click here)
for Power Seat:
(Click here)
| 10. CONNECT CABLE TO NEGATIVE BATTERY TERMINAL |
| 11. CHECK SRS WARNING LIGHT |