ROOF HEADLINING (for Double Cab) > REMOVAL |
| 1. PRECAUTION |
| 2. DISCONNECT CABLE FROM NEGATIVE BATTERY TERMINAL |
| 3. REMOVE FRONT SEAT ASSEMBLY (for Manual Seat) |
| 4. REMOVE FRONT SEAT ASSEMBLY (for Power Seat) |
| 5. REMOVE FRONT SEAT ASSEMBLY (for Center Seat) |
| 6. REMOVE REAR SEAT ASSEMBLY |
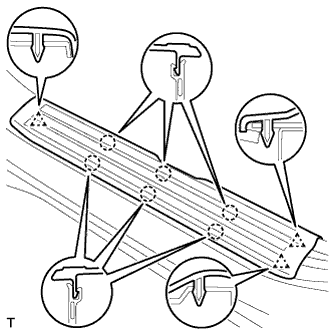
| 7. REMOVE FRONT DOOR SCUFF PLATE LH |
|
Detach the 6 claws and 3 clips, and remove the front door scuff plate LH.
| 8. REMOVE FRONT DOOR SCUFF PLATE RH |
| 9. REMOVE REAR DOOR SCUFF PLATE LH |
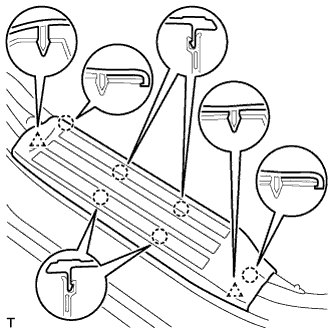 |
Detach the 6 claws and 2 clips, and remove the rear door scuff plate LH.
| 10. REMOVE REAR DOOR SCUFF PLATE RH |
| 11. REMOVE COWL SIDE TRIM BOARD LH |
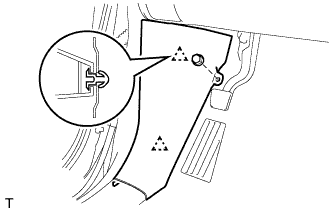 |
Remove the nut.
Detach the 2 clips and remove the cowl side trim board LH.
| 12. REMOVE COWL SIDE TRIM BOARD RH |
| 13. REMOVE FRONT DOOR OPENING TRIM WEATHERSTRIP LH |
Remove the front door opening trim weatherstrip LH.
| 14. REMOVE FRONT DOOR OPENING TRIM WEATHERSTRIP RH |
| 15. REMOVE REAR DOOR OPENING TRIM WEATHERSTRIP LH |
Remove the rear door opening trim weatherstrip LH.
| 16. REMOVE REAR DOOR OPENING TRIM WEATHERSTRIP RH |
| 17. REMOVE FRONT PILLAR GARNISH LH |
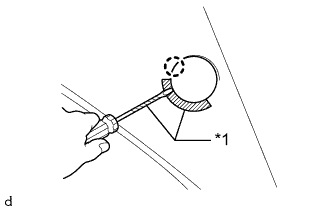 |
Apply protective tape as shown in the illustration.
| *1 | Protective Tape |
Using a screwdriver, detach the claw and open the cover.
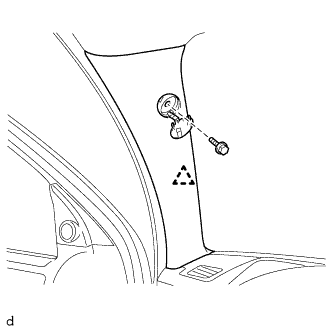 |
Remove the bolt.
Detach the clip and remove the front pillar garnish LH.
Protect the curtain shield airbag assembly.
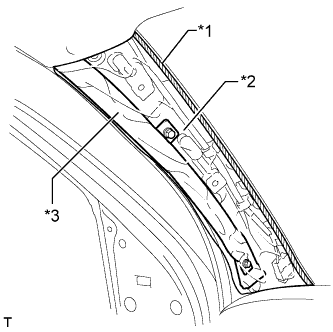 |
Completely cover the curtain shield airbag assembly with a cloth or nylon sheet and secure the ends of the cover with adhesive tape as shown in the illustration.
| *1 | Adhesive Tape |
| *2 | Protective Cover |
| *3 | Curtain Shield Airbag Assembly |
| 18. REMOVE FRONT PILLAR GARNISH RH |
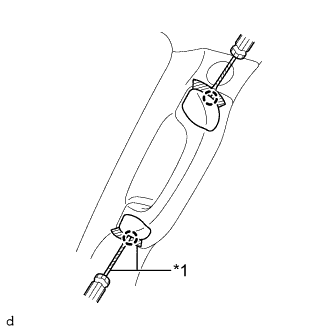 |
Apply protective tape as shown in the illustration.
| *1 | Protective Tape |
Using a screwdriver, detach the 2 claws and open the 2 assist grip covers.
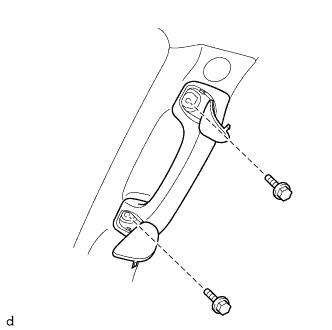 |
Remove the 2 bolts and front assist grip sub-assembly from the front pillar garnish RH.
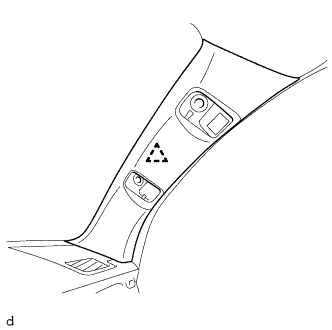 |
Detach the clip and remove the front pillar garnish RH.
Protect the curtain shield airbag assembly.
Completely cover the curtain shield airbag assembly with a cloth or nylon sheet and secure the ends of the cover with adhesive tape.
| 19. REMOVE LOWER CENTER PILLAR GARNISH LH |
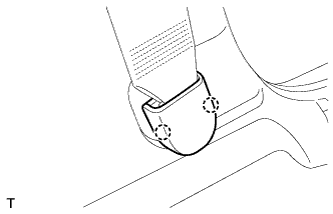 |
Detach the 2 claws and remove the cover.
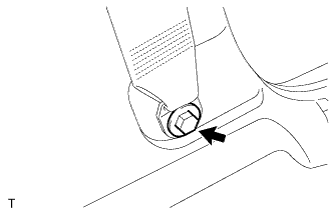 |
Loosen the bolt and disconnect the front seat outer belt assembly LH.
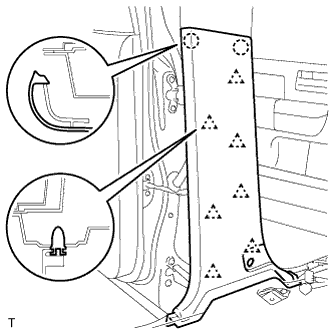 |
Detach the 7 clips and 2 claws, and remove the lower center pillar garnish LH.
| 20. REMOVE LOWER CENTER PILLAR GARNISH RH |
| 21. REMOVE CENTER PILLAR GARNISH LH |
Using a screwdriver, detach the 2 claws and open the 2 assist grip covers.
Remove the 2 bolts and rear assist grip assembly from the center pillar garnish LH.
Remove the bolt.
Detach the clip, guide and remove the center pillar garnish LH.
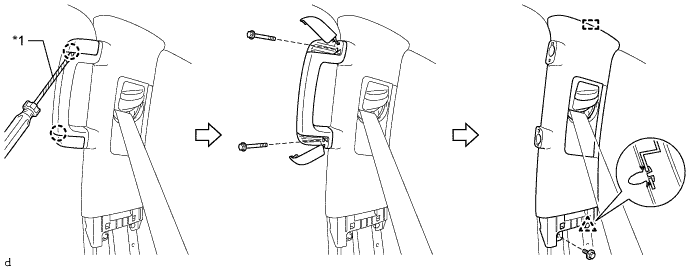
| *1 | Protective Tape | - | - |
Pass the front seat outer belt assembly LH through the hole of the center pillar garnish LH.
| 22. REMOVE CENTER PILLAR GARNISH RH |
| 23. REMOVE FRONT SHOULDER BELT ANCHOR PLATE SUB-ASSEMBLY LH |
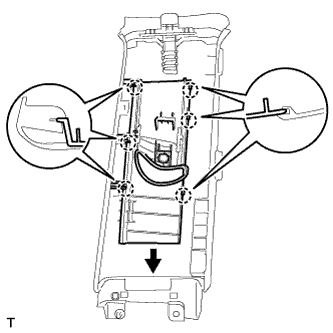 |
Detach the 6 claws of the front shoulder belt anchor plate sub-assembly LH, and slide the front shoulder belt anchor plate sub-assembly LH in the direction of the arrow to remove it.
| 24. REMOVE FRONT SHOULDER BELT ANCHOR PLATE SUB-ASSEMBLY RH |
| 25. REMOVE LOWER QUARTER TRIM PANEL ASSEMBLY LH |
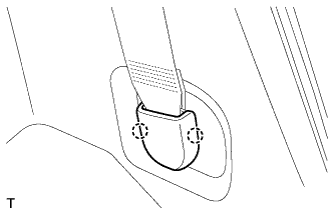 |
Detach the 2 claws and remove the cover.
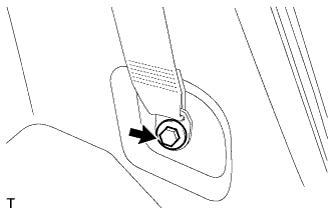 |
Loosen the bolt and disconnect the rear seat outer belt assembly.
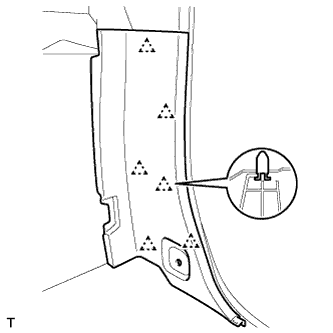 |
Detach the 6 clips and remove the lower quarter trim panel assembly LH.
| 26. REMOVE LOWER QUARTER TRIM PANEL ASSEMBLY RH |
| 27. REMOVE FRONT QUARTER TRIM PANEL ASSEMBLY LH |
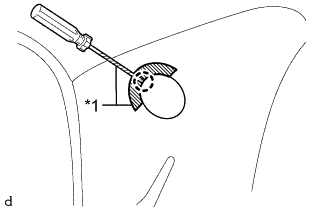 |
Apply protective tape as shown in the illustration.
| *1 | Protective Tape |
Using a screwdriver, detach the claw and open the cover.
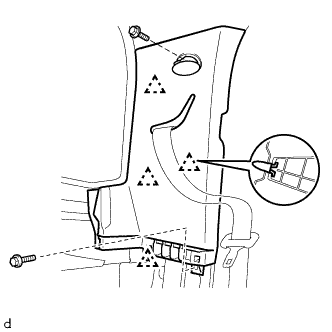 |
Remove the 2 bolts.
Detach the 4 clips and remove the front quarter trim panel assembly LH.
Pass the rear seat outer belt assembly through the hole of the front quarter trim panel assembly LH.
| 28. REMOVE FRONT QUARTER TRIM PANEL ASSEMBLY RH |
| 29. REMOVE ROOF CONSOLE BOX ASSEMBLY |
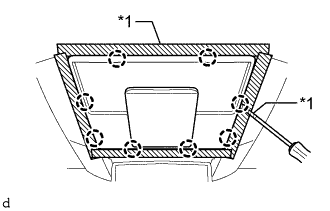 |
Apply protective tape as shown in the illustration.
| *1 | Protective Tape |
Using a screwdriver, detach the 8 claws and remove the roof console box base.
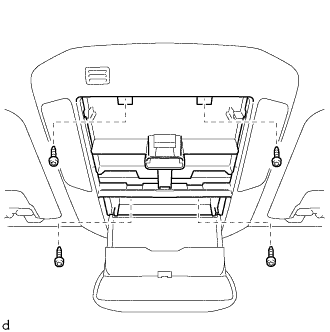 |
Using a T20 "TORX" driver, remove the 4 "TORX" screws and remove the roof console box assembly.
Disconnect the connector.
| 30. REMOVE INNER REAR VIEW MIRROR STAY HOLDER COVER (w/ EC Mirror) |
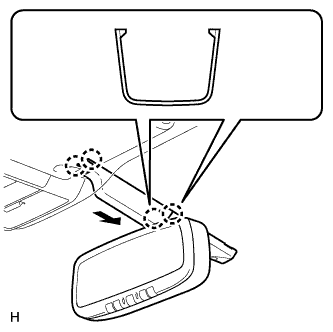 |
Slide the inner rear view mirror stay holder cover in the direction indicated by the arrow in the illustration to detach the 2 claws from the roof headlining, and then detach the 2 claws of the inner rear view mirror stay holder cover from the mirror and remove the inner rear view mirror stay holder cover.
| 31. REMOVE ROOM LIGHT ASSEMBLY |
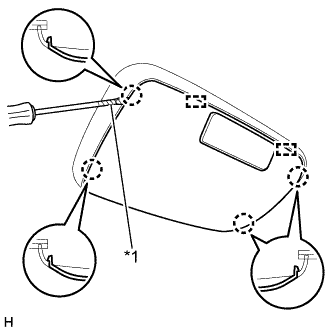 |
Using a screwdriver, detach the 4 claws and 2 guides and remove the No. 1 room light lens.
| *1 | Tape |
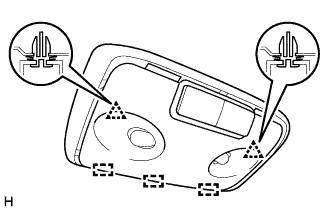 |
Detach the 2 clips and 3 guides and remove the No. 1 room light assembly.
| 32. REMOVE VISOR ASSEMBLY LH |
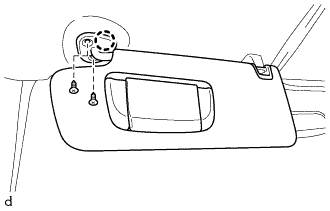 |
Remove the 2 screws.
Detach the claw and remove the visor assembly LH.
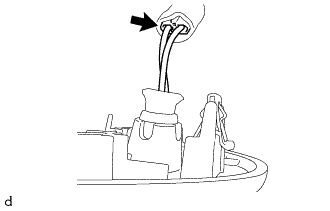 |
w/ Vanity Light:
Disconnect the connector.
| 33. REMOVE VISOR ASSEMBLY RH |
| 34. REMOVE VISOR HOLDER |
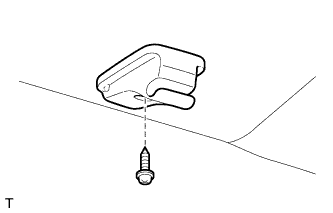 |
Using a T20 "TORX" driver, remove the "TORX" screw and visor holder.
| 35. REMOVE BACK WINDOW ASSEMBLY |
for Fixed Type:
(Click here)
for Slide Type:
(Click here)
for Power Slide Type:
(Click here)
| 36. REMOVE ASSIST GRIP SUB-ASSEMBLY |
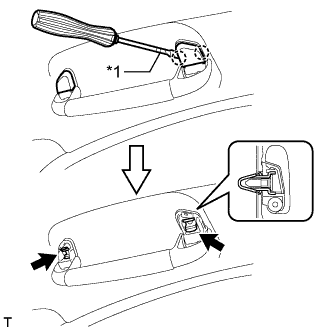 |
Using a screwdriver, detach the 2 claws and remove the assist grip cover.
| *1 | Protective Tape |
Detach the 2 clips and remove the assist grip sub-assembly.
| 37. REMOVE COAT HOOK |
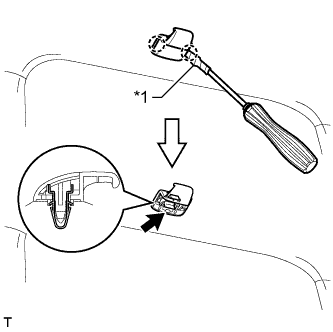 |
Using a screwdriver, detach the 2 claws and remove the coat hook cap.
| *1 | Protective Tape |
Detach the clip and remove the coat hook.
| 38. REMOVE ROOF HEADLINING ASSEMBLY |
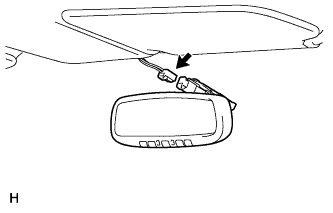 |
w/ EC Mirror:
Disconnect the connector.
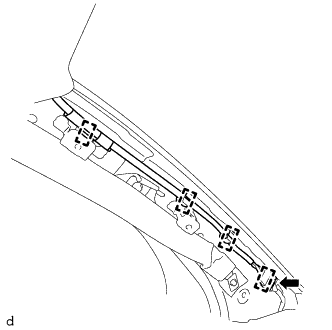 |
Disconnect the connector and detach the 4 wire harness clamps from the front pillar LH.
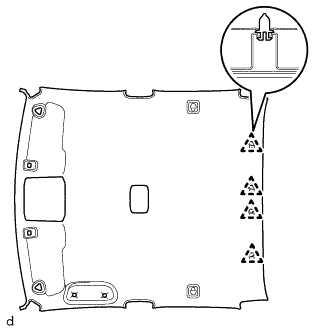 |
Detach the 4 clips and remove the roof headlining assembly.
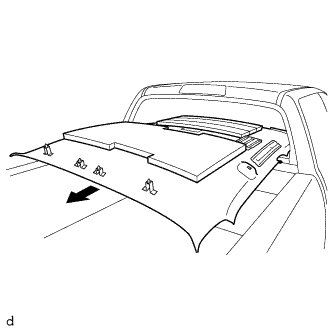 |
Take out the roof headlining assembly from the cabin as shown in the illustration.