AUDIO / VIDEO INSTRUMENT PANEL SPEAKER(for CrewMax) REMOVAL
PROCEDURE

 62212
1.REMOVE FRONT PILLAR GARNISH LH
62211
2.REMOVE FRONT PILLAR GARNISH RH
55409A
3.REMOVE NO. 1 INSTRUMENT PANEL SPEAKER PANEL SUB-ASSEMBLY
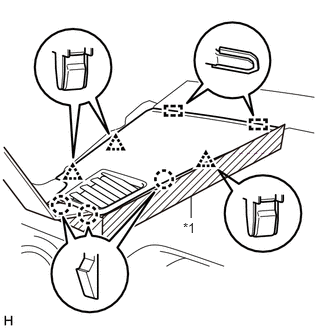
| *1 | Protective Tape |
Apply protective tape as shown in the illustration.
Using moulding remover B, detach the 3 clips, 3 claws and 2 guides and remove the No. 1 instrument panel speaker panel sub-assembly.
55409F
4.REMOVE NO. 2 INSTRUMENT PANEL SPEAKER PANEL SUB-ASSEMBLY
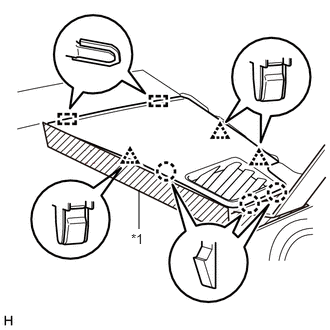
| *1 | Protective Tape |
Apply protective tape as shown in the illustration.
Using moulding remover B, detach the 3 clips, 3 claws and 2 guides and remove the No. 2 instrument panel speaker panel sub-assembly.
86160P
5.REMOVE FRONT NO. 2 SPEAKER ASSEMBLY LH
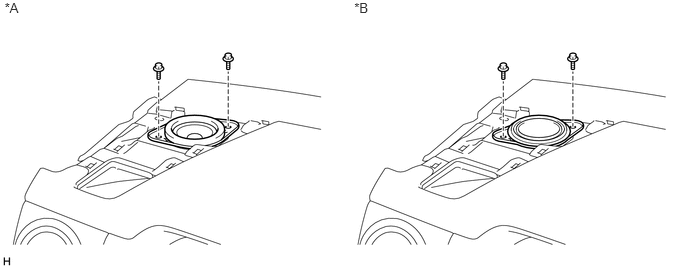
| *A | for Standard | *B | for 12 Speakers |
Remove the 2 bolts.
Disconnect the connector and remove the front No. 2 speaker assembly LH.
- NOTICE:
-
Do not touch the cone part of the speaker.
86160P
6.REMOVE FRONT NO. 2 SPEAKER ASSEMBLY RH
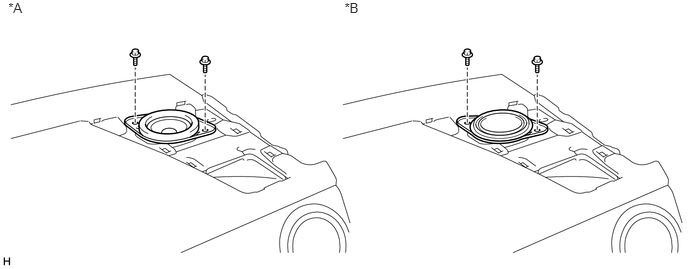
| *A | for Standard | *B | for 12 Speakers |
Remove the 2 bolts.
Disconnect the connector and remove the front No. 2 speaker assembly RH.
- NOTICE:
-
Do not touch the cone part of the speaker.
55525
7.REMOVE NO. 1 SPEAKER HOLE COVER
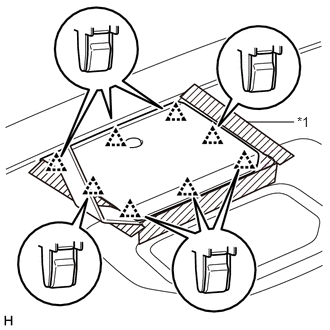
| *1 | Protective Tape |
Apply protective tape as shown in the illustration.
Using moulding remover B, detach the 8 clips and remove the No. 1 speaker hole cover.
86160R
8.REMOVE FRONT NO. 4 SPEAKER ASSEMBLY (for 12 Speakers)
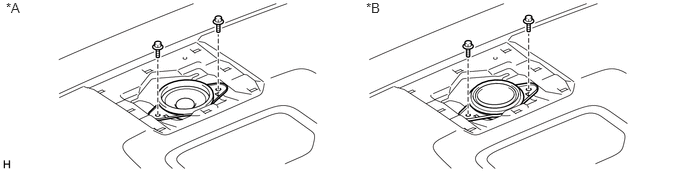
| *A | for Standard | *B | for 12 Speakers |
Remove the 2 bolts.
Disconnect the connector and remove the front No. 4 speaker assembly.
- NOTICE:
-
Do not touch the cone part of the speaker.