SEAT REAR SEAT ASSEMBLY(for CrewMax RH Side) REMOVAL
PROCEDURE

 1.REMOVE REAR SEAT ASSEMBLY RH
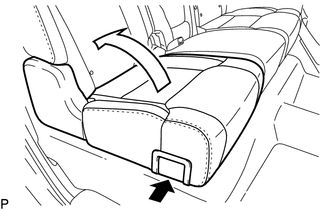
Pull the No. 1 reclining adjuster release handle RH and fold up the seat cushion.
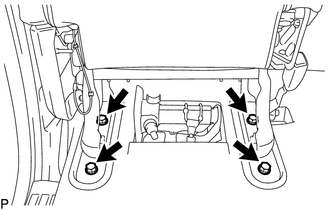
Remove the 4 bolts and rear seat assembly RH.
- NOTICE:
-
Be careful not to damage the vehicle body.
73390A
2.REMOVE REAR SEAT INNER BELT ASSEMBLY
- HINT:
-
Perform the following procedure when removing and installing the rear inner seat leg bracket sub-assembly or rear outer seat leg bracket sub-assembly.
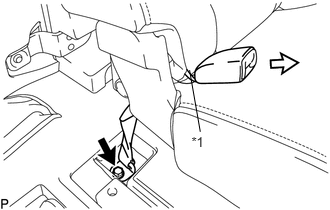
Remove the bolt.
Pass the rear seat inner belt assembly through the rubber band of the separate type rear seatback cover in the direction indicated by the arrow shown in the illustration, and then remove the rear seat inner belt assembly.
| *1 | Rubber Band |
3.REMOVE REAR SEAT ASSEMBLY LH
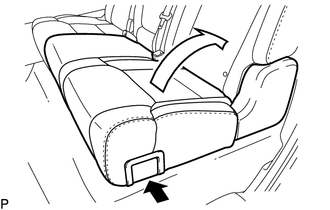
Pull the No. 1 reclining adjuster release handle LH and fold up the seat cushion.
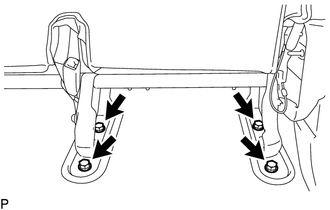
Remove the 4 bolts and rear seat assembly LH.
- NOTICE:
-
Be careful not to damage the vehicle body.
73233A
4.REMOVE REAR NO. 1 SEAT OUTER LAP BELT ANCHOR COVER
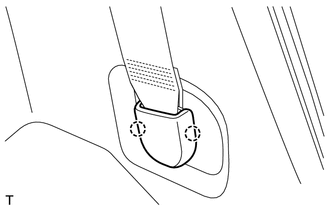
Detach the 2 claws and remove the rear No. 1 seat outer lap belt anchor cover.
73370B
5.DISCONNECT REAR SEAT OUTER BELT ASSEMBLY LH
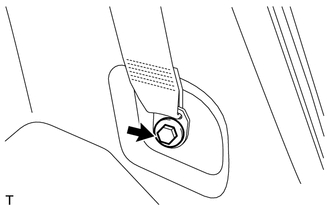
Remove the bolt and disconnect the floor anchor of the rear seat outer belt assembly LH.
73360B
6.DISCONNECT REAR SEAT OUTER BELT ASSEMBLY RH
- HINT:
-
Use the same procedure described for the LH side.
86150
7.REMOVE NO. 1 BOX SPEAKER ASSEMBLY (w/ Woofer)
67918B
8.REMOVE REAR DOOR SCUFF PLATE LH
67917B
9.REMOVE REAR DOOR SCUFF PLATE RH
67872
10.REMOVE REAR DOOR WEATHERSTRIP LH
Partially remove the rear door weatherstrip LH so that the lower quarter trim panel assembly LH can be removed (See page Vehicle Interior>INTERIOR>ROOF HEADLINING(for CrewMax)>REMOVAL).
67871
11.REMOVE REAR DOOR WEATHERSTRIP RH
Partially remove the rear door weatherstrip RH so that the lower quarter trim panel assembly RH can be removed (See page Vehicle Interior>INTERIOR>ROOF HEADLINING(for CrewMax)>REMOVAL).
62540
12.REMOVE LOWER QUARTER TRIM PANEL ASSEMBLY LH
62530
13.REMOVE LOWER QUARTER TRIM PANEL ASSEMBLY RH
58510D
14.REMOVE FRONT FLOOR CARPET ASSEMBLY
Remove the tool bag.
Detach the 6 clamps.
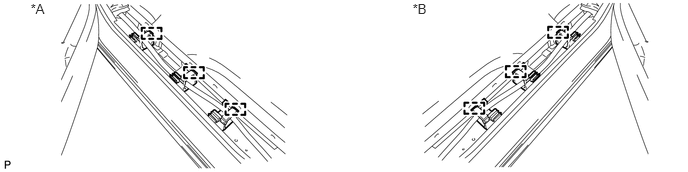
| *A | for LH Side | *B | for RH Side |
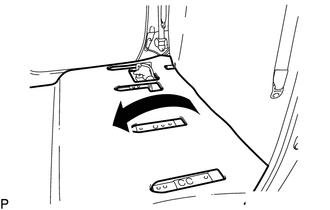
Fold down the front floor carpet assembly.
58429D
15.REMOVE REAR FLOOR BOARD SPACER
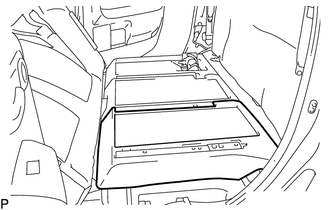
Remove the rear floor board spacer.
58428A
16.REMOVE NO. 2 REAR FLOOR BOARD SPACER
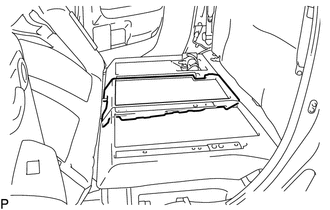
Remove the No. 2 rear floor board spacer.
58426K
17.REMOVE REAR FLOOR BOARD RH
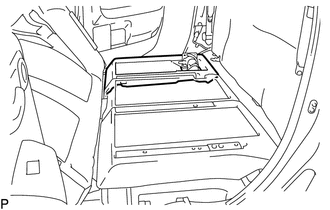
Remove the rear floor board RH.
18.REMOVE REAR INNER SEAT LEG BRACKET SUB-ASSEMBLY LH
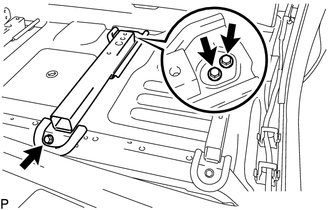
Remove the 3 bolts and rear inner seat leg bracket sub-assembly LH.
79106A
19.REMOVE REAR OUTER SEAT LEG BRACKET SUB-ASSEMBLY LH
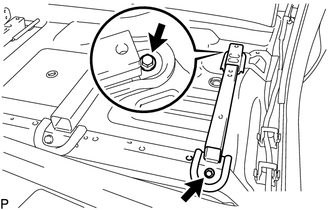
Remove the 2 bolts and rear outer seat leg bracket sub-assembly LH.
20.REMOVE REAR OUTER SEAT LEG BRACKET SUB-ASSEMBLY RH
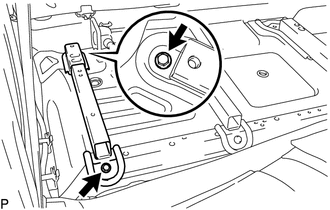
Remove the 2 bolts and rear inner seat leg bracket sub-assembly RH.
79105A
21.REMOVE REAR INNER SEAT LEG BRACKET SUB-ASSEMBLY RH
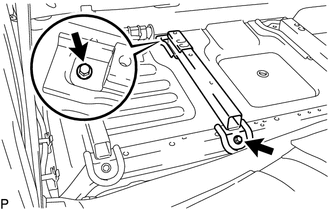
Remove the 2 bolts and rear inner seat leg bracket sub-assembly RH.