STEERING GEAR / LINKAGE STEERING GEAR REMOVAL
CAUTION / NOTICE / HINT
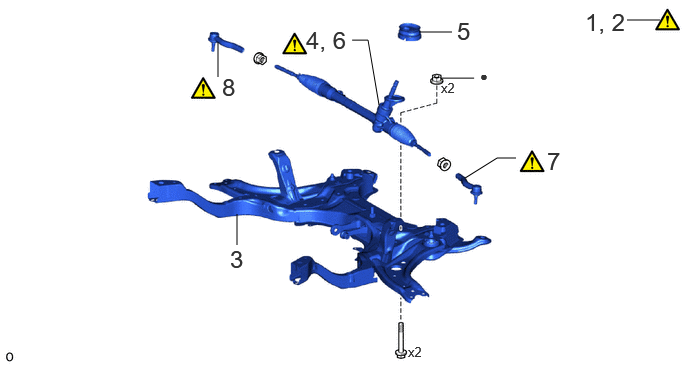
| Procedure | Part Name Code | 
|

|

|
|
|---|---|---|---|---|---|
| 1 | ALIGN FRONT WHEELS FACING STRAIGHT AHEAD | - | ( ) |
- | - |
| 2 | SECURE STEERING WHEEL | - | ()
|
- | - |
| 3 | FRONT SUSPENSION CROSSMEMBER SUB-ASSEMBLY | 51201 | - | - | - |
| 4 | REMOVE STEERING LINK ASSEMBLY | - | ()
|
- | - |
| 5 | STEERING COLUMN HOLE COVER | 45253 | - | - | - |
| 6 | SECURE STEERING LINK ASSEMBLY | - | ()
|
- | - |
| 7 | TIE ROD END SUB-ASSEMBLY LH | 45047 | ()
|
- | - |
| 8 | TIE ROD END SUB-ASSEMBLY RH | 45046 | ()
|
- | - |
| ● | Non-reusable part | - | - |
CAUTION / NOTICE / HINT
The necessary procedures (adjustment, calibration, initialization, or registration) that must be performed after parts are removed, installed, or replaced during the steering link assembly removal/installation are shown below.
| Replacement Part or Procedure | Necessary Procedure | Effect/Inoperative when not Performed | Link |
|---|---|---|---|
| Front wheel alignment adjustment | for HV Model TMC Made:
1.
Perform "Reset Memory" 2.
Perform calibration (linear solenoid valve offset learning, SM solenoid valve offset learning, brake pedal stroke sensor assembly zero point calibration, system information memorization, and yaw rate and acceleration sensor zero point calibration) |
·
DTCs are stored ·
ABS warning light illuminates ·
Brake system warning light (yellow indicator) illuminates ·
Slip indicator light illuminates ·
VSC disabled or malfunctions |
()
|
| for HV Model TMMF Made:
1.
Perform "Reset Memory" 2.
Perform calibration (brake pedal stroke sensor assembly zero point calibration, system information memorization, and yaw rate and acceleration sensor zero point calibration) |
·
DTCs are stored ·
ABS warning light illuminates ·
Brake system warning light (yellow indicator) illuminates ·
Slip indicator light illuminates ·
VSC disabled or malfunctions |
()
|
|
| for Gasoline Model:
Calibration |
·
DTCs are stored ·
ABS warning light illuminates ·
Slip indicator light illuminates ·
VSC disabled or malfunctions |
for TMC Made:
( )
for TMMF Made: ( )
|
|
| Suspension, tires, etc.
(The vehicle height changes because of suspension or tire replacement.) |
·
Ultrasonic sensor detection angle ·
Ultrasonic sensor detection angle registration |
Parking support brake system | ()
|
w/ Advanced Park:
Advanced Park |
()
|
||
| Rear television camera assembly optical axis (Back camera position setting) | Parking assist monitor system | ()
|
|
·
Parking assist ECU initialization ·
Adjust steering angle |
Panoramic view monitor system | w/o Advanced Park:
( )
w/ Advanced Park: ( )
|
|
w/ Advanced Park:
Advanced Park |
()
|
PROCEDURE

 1. ALIGN FRONT WHEELS FACING STRAIGHT AHEAD
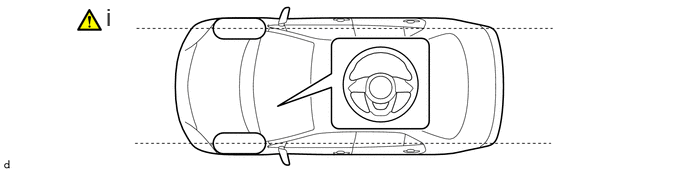
Align the front wheels facing straight ahead.
2. SECURE STEERING WHEEL
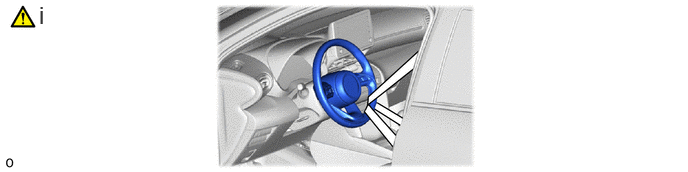
Secure the steering wheel with the seat belt to prevent damage to the spiral cable by rotation of the steering wheel.
51201
3.REMOVE FRONT SUSPENSION CROSSMEMBER SUB-ASSEMBLY
4.REMOVE STEERING LINK ASSEMBLY
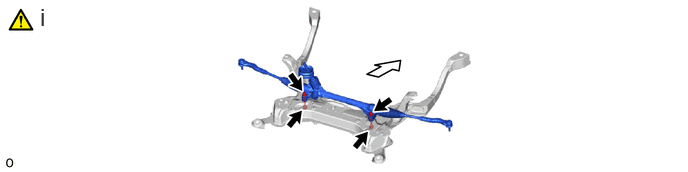

|
Front of the Vehicle | - | - |
Remove the 2 bolts, 2 nuts and steering link assembly from the front suspension crossmember sub-assembly.
- NOTICE:
-
Because the nut has its own stopper, do not turn the nut. Loosen the bolt with the nut secured.
45253
5.REMOVE STEERING COLUMN HOLE COVER

6.SECURE STEERING LINK ASSEMBLY
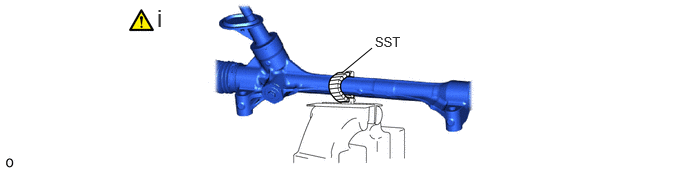
Using SST with wrapped in protective tape, secure the steering link assembly in a vise.
- SST
- 09612-00012
45047
7.REMOVE TIE ROD END SUB-ASSEMBLY LH
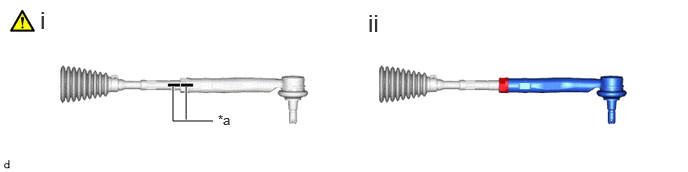
| *a | Matchmark | - | - |
Put matchmarks on the tie rod end sub-assembly LH and steering gear assembly.
Remove the tie rod end sub-assembly LH and lock nut.
45046
8.REMOVE TIE ROD END SUB-ASSEMBLY RH
Perform the same procedure as for the LH side.