2NZ-FE ENGINE MECHANICAL CYLINDER BLOCK REASSEMBLY
PROCEDURE

 11415
1.INSTALL CYLINDER BLOCK WATER DRAIN COCK SUB-ASSEMBLY (w/ Cylinder Block Water Drain Cock Sub-assembly)
Apply adhesive to the end 2 or 3 threads of the drain union and install the water drain cock within 3 minutes of applying the adhesive.
- Adhesive:
Toyota Genuine Adhesive 1324, Three Bond 1324 or equivalent
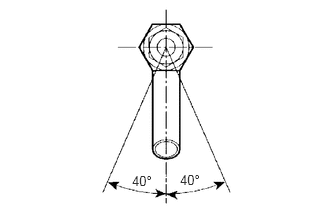
After applying the specified torque, rotate the drain union clockwise until the drain port faces downward.
- Torque:
- 35 N*m (357 kgf*cm, 26 ft.*lbf)
- NOTICE:
- ·
Do not put into coolant within 1 hour of installation.
·Do not rotate the drain union more than 360° in step (b), and never loosen it after setting the union correctly.
11432A
2.INSTALL NO.1 TAPER SCREW PLUG WITH HEAD (w/o Cylinder Block Water Drain Cock Sub-assembly)
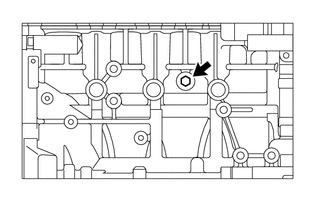
Apply adhesive to the end 2 or 3 threads of the No. 1 taper screw plug with head and install it within 3 minutes of applying the adhesive.
- Adhesive:
Toyota Genuine Adhesive 1324, Three Bond 1324 or equivalent
- Torque:
- 30 N*m (306 kgf*cm, 22 ft.*lbf)
- NOTICE:
-
Do not put into coolant within 1 hour of installation.
11434C
3.INSTALL STRAIGHT PIN
Using a plastic-faced hammer, tap in the straight pin.
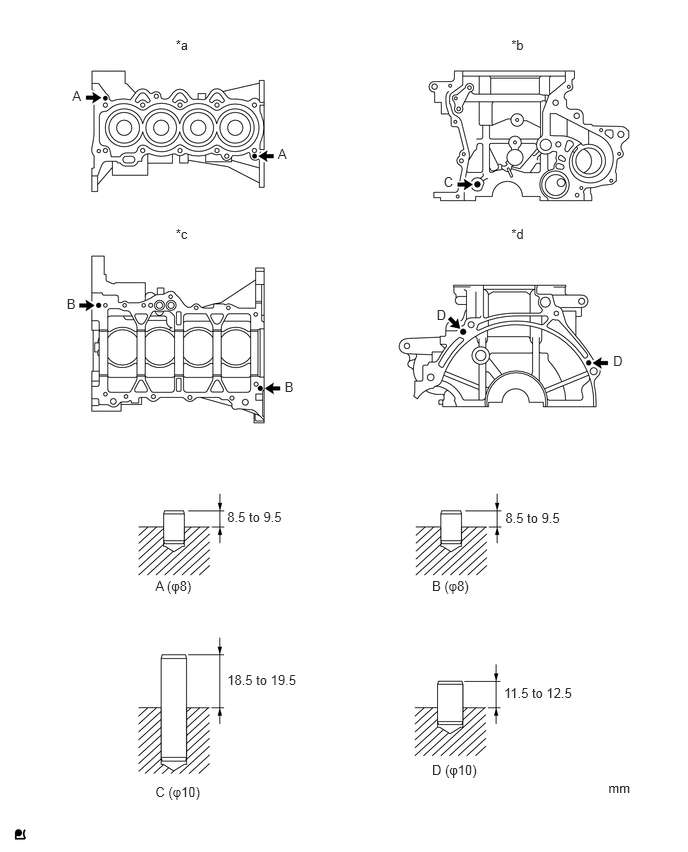
| *a | Upper Side | *b | Front Side |
| *c | Lower Side | *d | Rear Side |
- Standard protrusion:
- Pin A:
8.5 to 9.5 mm (0.335 to 0.374 in.)
- Pin B:
8.5 to 9.5 mm (0.335 to 0.374 in.)
- Pin C:
18.5 to 19.5 mm (0.728 to 0.768 in.)
- Pin D:
11.5 to 12.5 mm (0.453 to 0.492 in.)
15100A
4.INSTALL OIL PUMP SET RING PIN
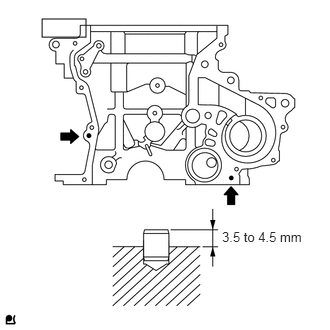
Using a plastic-faced hammer, tap in a new ring pin.
- Standard protrusion:
3.5 to 4.5 mm (0.138 to 0.177 in.)
15104E
5.INSTALL STUD BOLT
Install the 7 stud bolts.
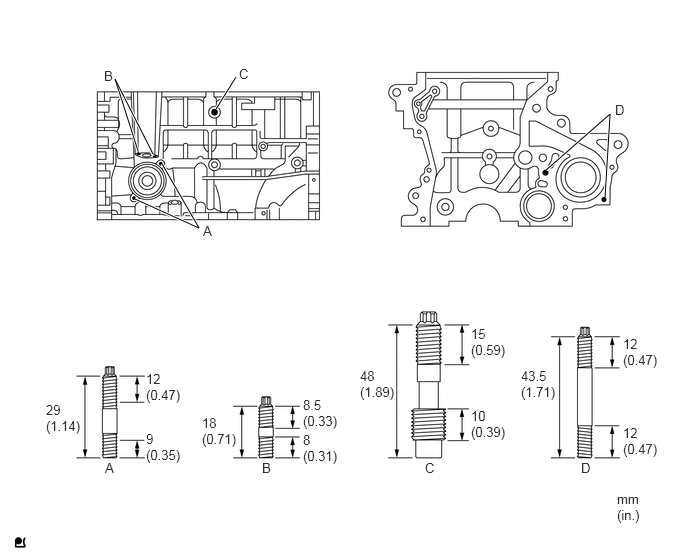
- Torque:
- Stud bolts A, B and D : 5.0 N*m (51 kgf*cm, 44 in.*lbf)
- Stud bolt C : 11 N*m (112 kgf*cm, 8 ft.*lbf)
- NOTICE:
-
The lower threads of the bolt are installed into the cylinder block.
11711
6.INSTALL CRANKSHAFT BEARING
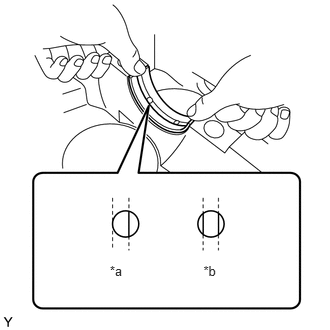
Align the crankshaft bearing (upper) with the oil hole of the cylinder block and install the bearing.
| *a | Incorrect |
| *b | Correct |
- NOTICE:
-
Do not apply engine oil to the bearing or its contact surface.
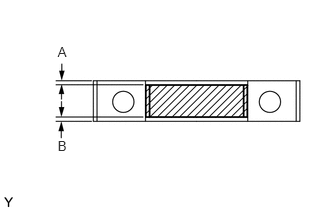
Align the crankshaft bearing (lower) with the bearing cap and install the crankshaft bearing cap.
- NOTICE:
- ·
Install the bearing cap so that the gap between A and B is less than 0.4 mm (0.016 in.).
·Do not apply engine oil to the bearing or its contact surface.
11791
7.INSTALL CRANKSHAFT THRUST WASHER UPPER
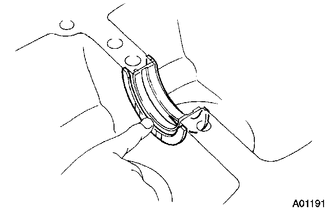
Install the 2 thrust washers onto the No. 3 journal position of the cylinder block with the oil grooves facing outward.
Apply engine oil to the upper bearing and install the crankshaft onto the cylinder block.
13411
8.INSTALL CRANKSHAFT
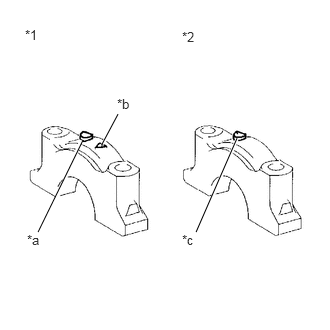
Examine the front marks and numbers and install the bearing caps onto the cylinder block.
| *1 | No. 3 Bearing Cap |
| *2 | No. 1,2,4,5 Bearing Cap |
| *a | Front Mark |
| *b | Number |
| *c | Front Mark and Number |
Apply a light coat of engine oil to the threads of the bearing cap bolts.
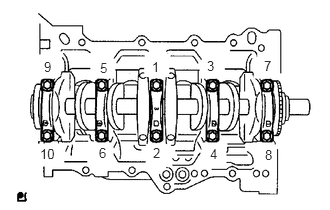
Using 12 mm socket wrench, tighten the bolts in several steps to the specified torque in the sequence shown in the illustration (*1).
- Torque:
- 22 N*m (224 kgf*cm, 16 ft.*lbf)
- NOTICE:
-
Check that the crankshaft turns smoothly.
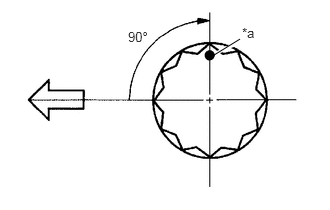
Mark the front of the bearing cap bolts with paint.
| *a | Paint Mark |

|
Engine Front |
Further tighten the bearing cap bolts by 90° in the same sequence as step (*1).
Check that the painted mark is now at a 90° angle from the front.
11791
9.INSPECT CRANKSHAFT THRUST CLEARANCE
10.INSPECT CRANKSHAFT OIL CLEARANCE
13101
11.INSTALL WITH PIN PISTON SUB-ASSEMBLY
Heat the piston to approximately 80 to 90°C (176 to 194°F).
- CAUTION:
-
Use gloves to protect your hands as the piston is hot.
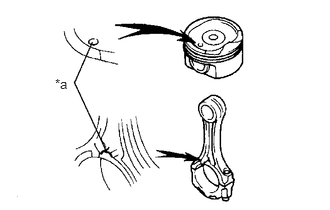
Coat the piston pin and pin holes in the piston with engine oil.
| *a | Front Mark |
Align the cavity of the piston with the protruding portion on the connecting rod.
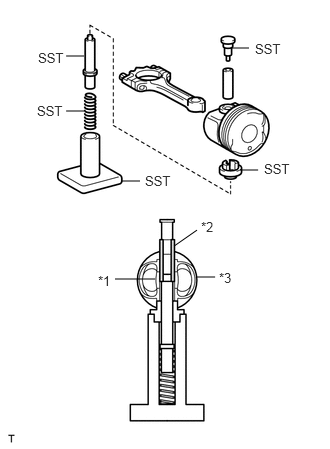
Using SST, press in the piston pin.
| *1 | Connecting Rods |
| *2 | Piston Pin |
| *3 | Piston |
- SST
- 09221-25026 (09221-00021, 09221-00030, 09221-00150, 09221-00090, 09221-00100)
13041
12.INSTALL CONNECTING ROD BEARING
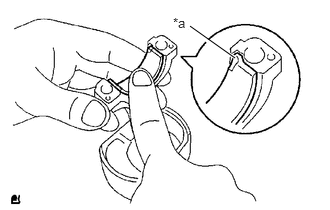
Align the bearing claw with the groove of the connecting rod or connecting cap.
| *a | Claw |
- NOTICE:
-
Clean the back side of the bearing and the bearing surface of the connecting rod and keep them free of oil.
13011
13.INSTALL PISTON RING SET
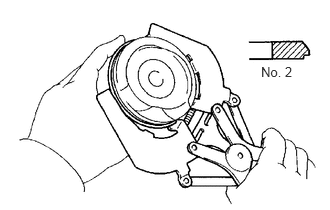
- HINT:
-
When reusing the piston rings, install them onto the matched pistons with the surfaces facing correctly.
Install the oil ring expander and 2 side rails by hand.
Using a piston ring expander, install the 2 compression rings.
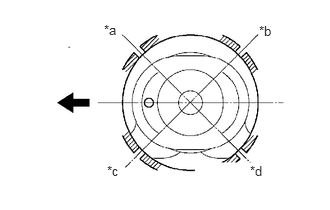
Position the piston rings so that the ring ends are as shown.
| *a | No. 1 Compression and Expander |
| *b | Lower Side Rail |
| *c | Upper Side Rail |
| *d | No. 2 Compression |

|
Engine Front |
14.INSTALL PISTON SUB-ASSEMBLY WITH CONNECTING ROD
Apply engine oil to the cylinder walls, the pistons, and the surfaces of connecting rod bearings.
Check the position of the piston ring ends.
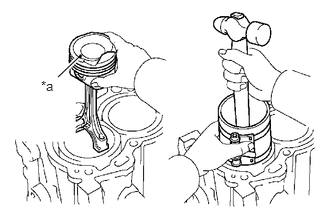
Using a piston ring compressor, push the correctly numbered piston and connecting rod assemblies into each cylinder with the front mark on the piston facing forward.
| *a | Front Mark |
- NOTICE:
- ·
Clean the back side of the bearing and the bearing surface of the connecting rod cap and keep them free of oil.
·Match the numbered connecting rod cap with the connecting rod.
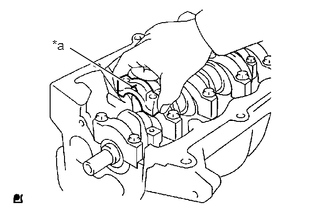
Make sure that the connecting rod and cap are in the correct combination and that the front mark of the cap is facing in the correct mounting orientation, then install the cap onto the connecting rod.
| *a | Front Mark |
Apply a light coat of engine oil to the threads of the connecting rod cap bolts.
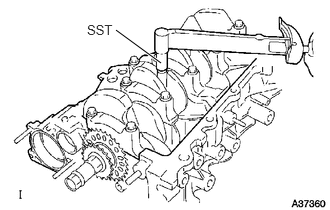
Using SST, tighten the bolts in several steps to the specified torque.
- SST
- 09205-16011
- Torque:
- 15 N*m (153 kgf*cm, 11 ft.*lbf)
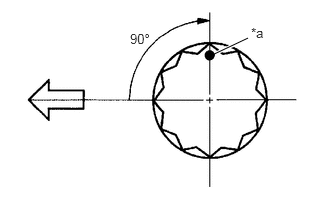
Mark the front of the connecting cap bolts with paint.
| *a | Paint Mark |
|
|
Engine Front |
Further tighten the cap bolts by 90° as shown.
Check that the crankshaft turns smoothly.