2NZ-FE LUBRICATION OIL PUMP REMOVAL
PROCEDURE

 1.DISCONNECT CABLE FROM NEGATIVE BATTERY TERMINAL
2.REMOVE FRONT WHEEL RH
51441C
3.REMOVE ENGINE UNDER COVER RH (for Plastic Type)
51442C
4.REMOVE ENGINE UNDER COVER LH (for Plastic Type)
51405A
5.REMOVE NO. 1 ENGINE UNDER COVER SUB-ASSEMBLY (for Metal Type)
6.DRAIN ENGINE OIL
7.DRAIN COOLANT
27020
8.REMOVE GENERATOR ASSEMBLY
19500D
9.REMOVE NO. 1 IGNITION COIL
12261
10.DISCONNECT VENTILATION HOSE
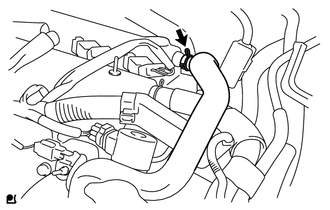
Disconnect the ventilation hose from the cylinder head cover.
23820
11.DISCONNECT FUEL VAPOR FEED HOSE ASSEMBLY
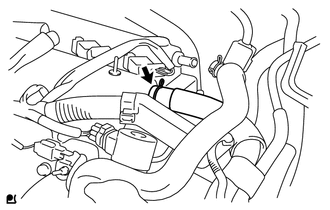
Disconnect the fuel vapor feed hose assembly from the cylinder head cover.
11201
12.REMOVE CYLINDER HEAD COVER SUB-ASSEMBLY
12305
13.REMOVE ENGINE MOUNTING INSULATOR SUB-ASSEMBLY RH
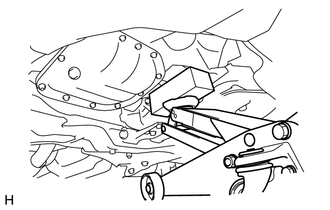
Place a wooden block on a jack underneath the engine.
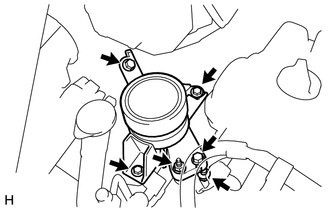
Remove the 4 bolts, 2 nuts and the engine mounting insulator sub-assembly RH.
13407
14.REMOVE CRANKSHAFT DAMPER SUB-ASSEMBLY
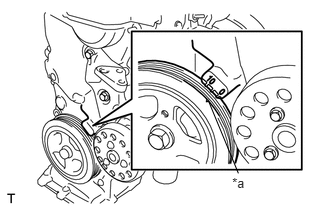
Set the No. 1 cylinder to TDC/compression.
Turn the crankshaft damper sub-assembly, and align its timing notch with timing mark "0" of the oil pump.
| *a | Timing Notch |
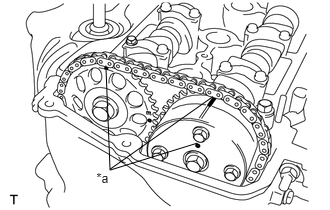
Check that the timing marks on the camshaft timing sprocket and the camshaft timing gear are all facing upward as shown in the illustration.
| *a | Timing Marks |
If not, turn the crankshaft 1 complete revolution (360°) and align the marks as above.
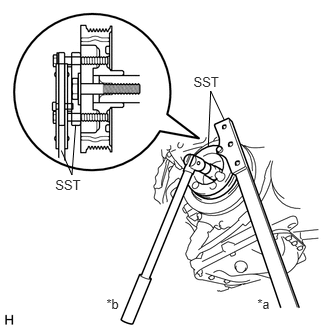
Using SST, loosen the bolt while holding the crankshaft damper sub-assembly.
| *a | Hold |
| *b | Loosen |
- SST
- 09213-58014 (90201-08131, 91111-50845)
09330-00021 (09330-00030)
- NOTICE:
-
Check the SST installation positions when installing them, to avoid the SST fixing bolts from coming into contact with the oil pump assembly.
Remove the SSTs and the bolt.
Remove the crankshaft damper sub-assembly.
15100Q
15.REMOVE CRANKSHAFT POSITION SENSOR
11101J
16.REMOVE CAMSHAFT TIMING OIL CONTROL VALVE ASSEMBLY
16173
17.REMOVE WATER PUMP PULLEY
16100
18.REMOVE WATER PUMP ASSEMBLY
12315A
19.REMOVE TRANSVERSE ENGINE ENGINE MOUNTING BRACKET
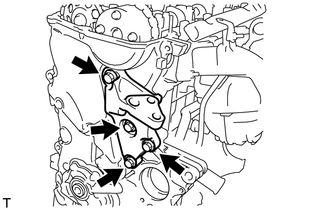
Remove the 4 bolts and the transverse engine engine mounting bracket.
15100
20.REMOVE OIL PUMP ASSEMBLY
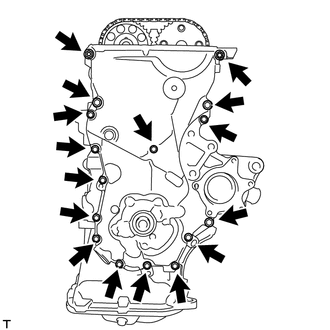
Remove the 15 bolts and the nut.
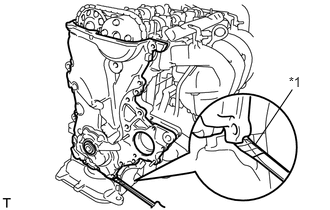
Using a screwdriver with its tip wrapped in protective tape, pry the oil pump assembly to remove it.
| *1 | Protective Tape |
- NOTICE:
-
Do not damage the contact surfaces of the oil pump assembly and oil pan sub-assembly.
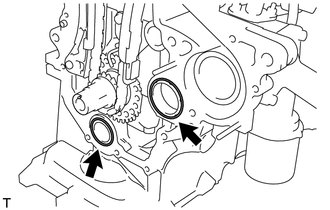
Remove the 2 O-rings from the cylinder block and oil pan sub-assembly.