U340E AUTOMATIC TRANSMISSION / TRANSAXLE SHIFT LEVER INSTALLATION
PROCEDURE

 1.INSTALL SHIFT LEVER ASSEMBLY
Engage the 3 clamps and install the wire harness to the shift lever assembly.
Connect the 2 connectors to the shift lever assembly.
Temporarily install the shift lever assembly with the 4 bolts.
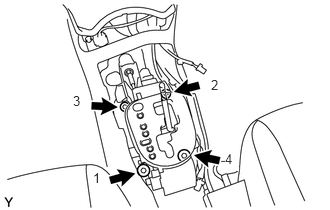
Fully tighten the 4 bolts in the order shown in the illustration.
- Torque:
- 12 N*m (122 kgf*cm, 9 ft.*lbf)
33820B
2.CONNECT TRANSMISSION CONTROL CABLE ASSEMBLY
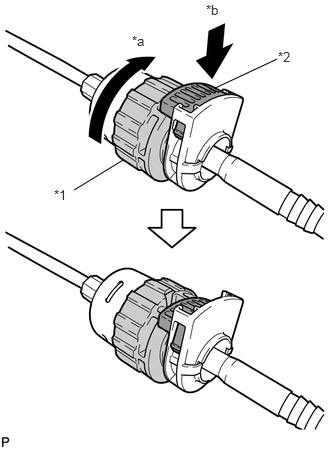
Rotate the nut of the transmission control cable approximately 180° in the direction shown in the illustration, and while holding the nut, push in the lock.
| *1 | Nut |
| *2 | Lock |
| *a | Rotate Approximately 180° |
| *b | Push In |
- NOTICE:
-
Rotating the nut too much will damage the internal spring, and the transmission control cable assembly will not be reusable. Do not turn the nut too far.
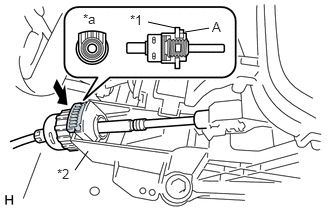
Install the transmission control cable assembly to the shift lever plate.
| *1 | Lock |
| *2 | Shift Lever Retainer |
| *a | Tab |
- NOTICE:
- ·
Install the cable outer with the tab facing upwards.
·After installation, check that the cable outer lock extends past section A as shown in the diagram.
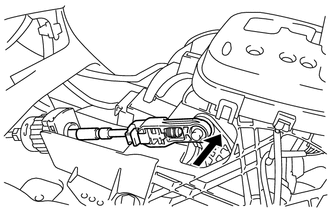
Confirm that the shift lever is in N and connect the end of the transmission control cable assembly to the shift lever assembly.
- NOTICE:
- ·
Securely install the cable end to the shift lever assembly.
·Install the cable end so that its adjustment lock section is on the driver side.
3.ADJUST SHIFT LEVER POSITION
4.INSPECT SHIFT LEVER POSITION
5.INSTALL REAR CONSOLE BOX ASSEMBLY
33504F
6.INSTALL SHIFT LEVER KNOB SUB-ASSEMBLY
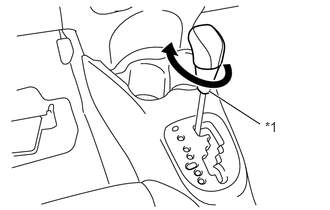
Turn the shift lever knob sub-assembly clockwise and install the shift lever knob sub-assembly to the shift lever assembly.
| *1 | Knob Cover |
- NOTICE:
-
When tightening the shift lever knob sub-assembly, do not hold the knob cover. Instead, hold the knob itself when tightening.