DOOR LOCK REAR DOOR LOCK REMOVAL
CAUTION / NOTICE / HINT
- HINT:
- ·
Use the same procedure for both the RH and LH sides.
·The procedure described below is for the RH side.
PROCEDURE

 67673A
1.REMOVE REAR DOOR FRAME GARNISH
69260E
2.REMOVE REAR DOOR WINDOW REGULATOR HANDLE ASSEMBLY (w/o Power Window)
74271A
3.REMOVE REAR DOOR ARMREST BASE UPPER PANEL (w/ Power Window)
74271A
4.REMOVE REAR DOOR ARMREST BASE UPPER PANEL (w/o Power Window)
67603
5.REMOVE REAR DOOR TRIM BOARD SUB-ASSEMBLY
67841E
6.REMOVE REAR DOOR SERVICE HOLE COVER (w/ Rear Speaker)
67841E
7.REMOVE REAR DOOR SERVICE HOLE COVER (w/o Rear Speaker)
67407E
8.REMOVE REAR DOOR WINDOW DIVISION BAR SUB-ASSEMBLY
68103
9.REMOVE REAR DOOR GLASS SUB-ASSEMBLY
68142C
10.REMOVE REAR DOOR GLASS RUN
69050A
11.REMOVE REAR DOOR LOCK ASSEMBLY (w/ Power Door Lock)
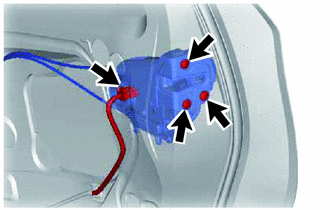
Disconnect the connector.
Using a T30 "TORX" wrench, remove the 3 screws.
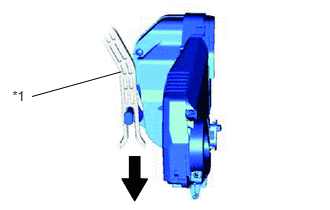
Slide the rear door lock downward, and remove the rear door lock from the release plate.
| *1 | Release Plate |

|
Slide Direction |
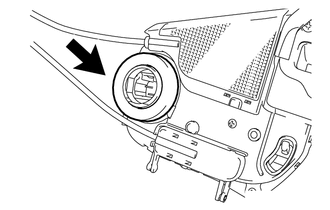
Remove the door lock wire harness seal from the rear door lock.
69050A
12.REMOVE REAR DOOR LOCK ASSEMBLY (w/o Power Door Lock)
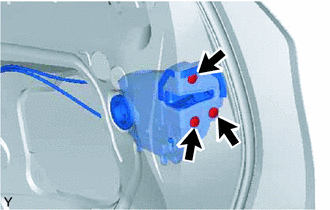
Using a T30 "TORX" wrench, remove the 3 screws.
Slide the rear door lock downward, and remove the rear door lock from the release plate.
| *1 | Release Plate |
|
|
Slide Direction |
Remove the door lock wire harness seal from the rear door lock.
69730D
13.REMOVE REAR DOOR LOCK REMOTE CONTROL CABLE ASSEMBLY
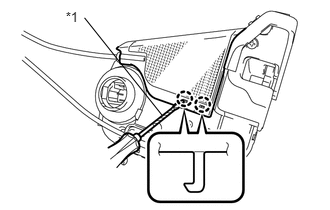
Using a screwdriver with its tip wrapped in protective tape, disengage the 2 claws.
| *1 | Protective Tape |
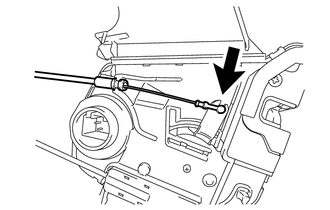
Remove the rear door lock remote control cable from rear door lock.
69770B
14.REMOVE REAR DOOR INSIDE LOCKING CABLE ASSEMBLY
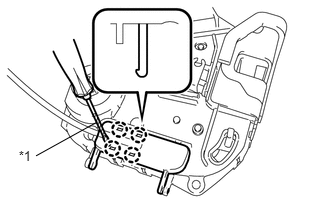
Using a screwdriver with its tip wrapped in protective tape, disengage the 4 claws.
| *1 | Protective Tape |
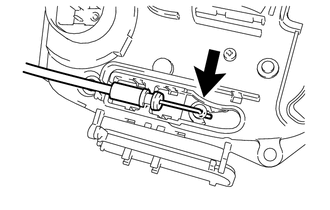
Remove the rear door inside locking cable from rear door lock.