DOOR / HATCH REAR DOOR DISASSEMBLY
CAUTION / NOTICE / HINT
- HINT:
- ·
Use the same procedure for both the RH and LH sides.
·The procedure described below is for the RH side.
PROCEDURE

 1. PRECAUTION
- NOTICE:
-
After turning the ignition switch off, waiting time may be required before disconnecting the cable from battery terminal. Therefore, make sure to read the disconnecting the cable from the battery terminal notice before proceeding with work (See page General>INTRODUCTION>REPAIR INSTRUCTION>PRECAUTION).
2.DISCONNECT CABLE FROM NEGATIVE BATTERY TERMINAL
- CAUTION:
-
Wait at least 90 seconds after disconnecting the cable from the negative (-) battery terminal to disable the SRS system.
67673A
3.REMOVE REAR DOOR FRAME GARNISH
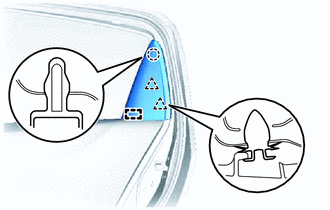
Disengage the 2 clips and claw.
Disengage the guide and remove the rear door frame garnish.
69260E
4.REMOVE REAR DOOR WINDOW REGULATOR HANDLE ASSEMBLY (w/o Power Window)
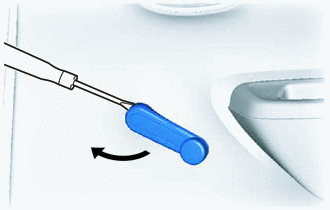
Insert a clip remover between the plate and front door trim board.
Turn the handle with the clip remover inserted, as shown in the illustration.
Remove the front door window regulator handle and clip.
Remove the window regulator handle plate.
74271A
5.REMOVE REAR DOOR ARMREST BASE UPPER PANEL (w/ Power Window)
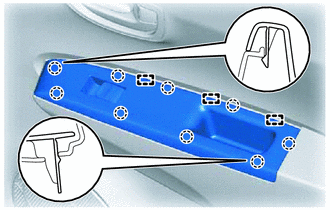
Using a moulding remover, disengage the 9 claws and 3 guides.
Disconnect the connector and remove the rear armrest base upper panel.
74271A
6.REMOVE REAR DOOR ARMREST BASE UPPER PANEL (w/o Power Window)
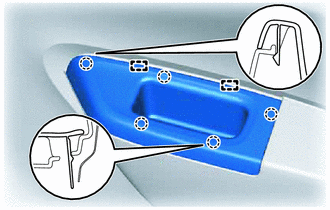
Using a moulding remover, disengage the 5 claws and 2 guides and remove the rear armrest base upper panel.
67603
7.REMOVE REAR DOOR TRIM BOARD SUB-ASSEMBLY
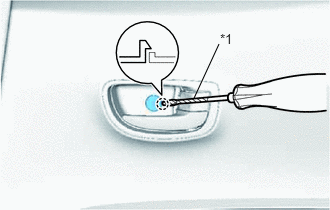
Using a screwdriver with its tip wrapped in protective tape, disengage the claw and open the cover.
| *1 | Protective Tape |
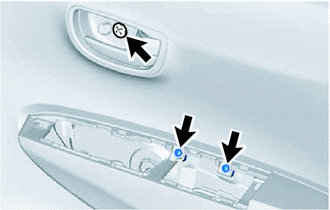
Remove the 3 screws.
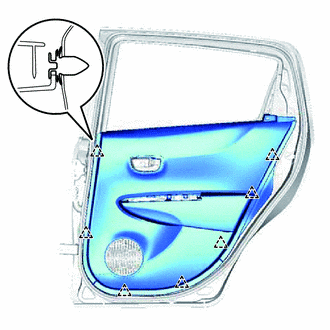
Disengage the 7 clips.
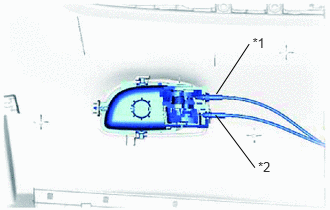
Disconnect the rear door lock remote control cable assembly and the rear door inside locking cable assembly and remove the rear door trim board.
| *1 | Rear Door Lock Remote Control Cable Assembly |
| *2 | Rear Door Inside Locking Cable Assembly |
69205A
8.REMOVE REAR DOOR INSIDE HANDLE SUB-ASSEMBLY
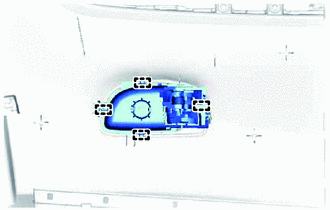
Disengage the 4 guides and remove the rear door inside handle.
68173B
9.REMOVE REAR DOOR GLASS INNER WEATHERSTRIP
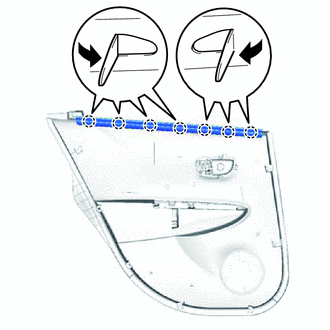
Disengage the 7 claws and remove the rear door glass inner weatherstrip as shown in the illustration.
86160B
10.REMOVE REAR SPEAKER ASSEMBLY (w/ Rear Speaker)
67841E
11.REMOVE REAR DOOR SERVICE HOLE COVER (w/ Rear Speaker)
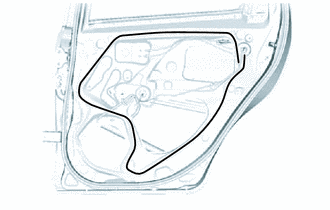
Remove the rear door service hole cover.
- HINT:
-
Remove any tape remaining on the door side.
67841E
12.REMOVE REAR DOOR SERVICE HOLE COVER (w/o Rear Speaker)
Remove the rear door service hole cover.
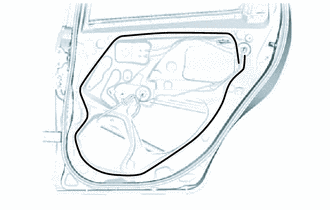
- HINT:
-
Remove any tape remaining on the door side.
67407E
13.REMOVE REAR DOOR WINDOW DIVISION BAR SUB-ASSEMBLY
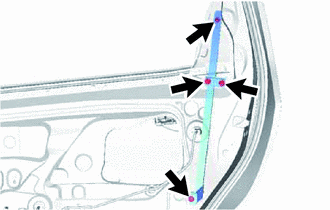
Remove the 3 bolts and nut, and the rear door window division bar.
68103
14.REMOVE REAR DOOR GLASS SUB-ASSEMBLY
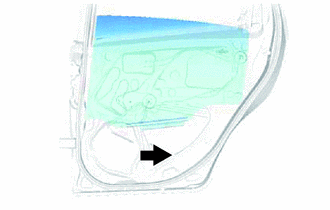
Slide the lower section of the rear door glass as indicated by the arrow as shown in the illustration.
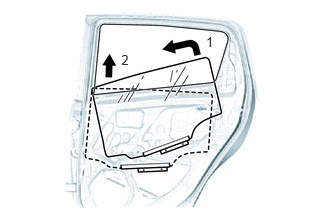
Remove the rear door glass as indicated by the arrows in the order shown in the illustration.
- NOTICE:
-
Do not damage the rear door glass.
69905B
15.REMOVE REAR DOOR GLASS CHANNEL SUB-ASSEMBLY
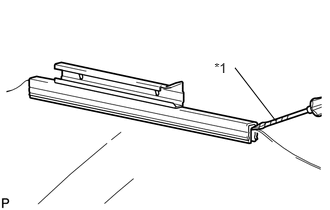
Using a screwdriver with its tip wrapped in protective tape, remove the rear door glass channel.
| *1 | Protective Tape |
- NOTICE:
-
Do not damage the rear door glass.
69975A
16.REMOVE REAR DOOR GLASS CHANNEL FILLER
Remove the rear door glass channel filler.
69803
17.REMOVE REAR DOOR WINDOW REGULATOR SUB-ASSEMBLY (w/ Power Window)
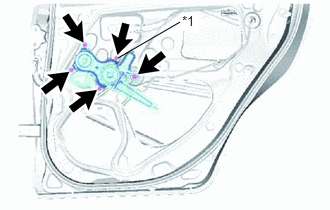
Disconnect the connector.
| *1 | Temporary Bolt |
Loosen the temporary bolt.
- NOTICE:
-
Do not remove the temporary bolt. If the temporary bolt is removed, the rear door window regulator may fall and cause damage.
Remove the 3 bolts.
Remove the temporary bolt and the rear door window regulator.
69803
18.REMOVE REAR DOOR WINDOW REGULATOR SUB-ASSEMBLY (w/o Power Window)
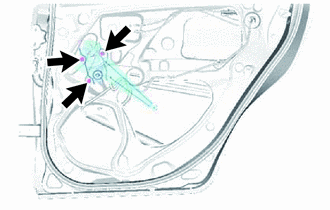
Remove the 3 bolts and the rear door window regulator.
- NOTICE:
-
Do not drop or damage the window regulator when removing the bolts.
68142C
19.REMOVE REAR DOOR GLASS RUN
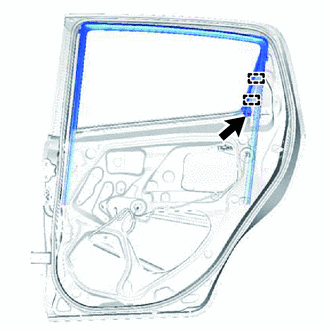
Remove the clip.
Disengage the 2 guides and remove the rear door glass run.
68180C
20.REMOVE REAR DOOR GLASS OUTER WEATHERSTRIP ASSEMBLY
- HINT:
-
Use the same procedure as for the LH side (See page Vehicle Exterior>EXTERIOR PANELS / TRIM>REAR DOOR BELT MOULDING>REMOVAL).
69050A
21.REMOVE REAR DOOR LOCK ASSEMBLY (w/ Power Door Lock)
69050A
22.REMOVE REAR DOOR LOCK ASSEMBLY (w/o Power Door Lock)
69227J
23.REMOVE REAR DOOR OUTSIDE HANDLE COVER
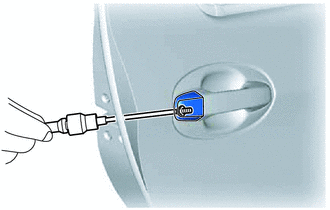
Using a "TORX" socket wrench T30, loosen the screw.
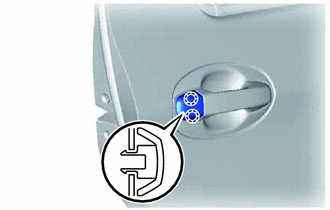
Disengage the 2 claws and remove the rear door outside handle cover.
69230
24.REMOVE REAR DOOR OUTSIDE HANDLE ASSEMBLY
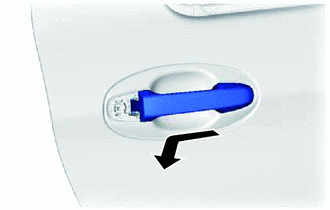
Remove the rear door outside handle in the direction indicated by the arrow as shown in the illustration.
69241G
25.REMOVE REAR DOOR OUTSIDE HANDLE FRONT PAD
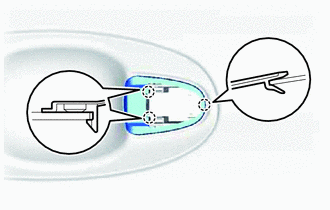
Disengage the 3 claws and remove the rear door outside handle front pad.
69242G
26.REMOVE REAR DOOR OUTSIDE HANDLE REAR PAD
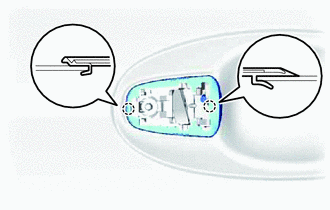
Disengage the 2 claws and remove the rear door outside handle rear pad.
69203A
27.REMOVE REAR DOOR OUTSIDE HANDLE FRAME SUB-ASSEMBLY
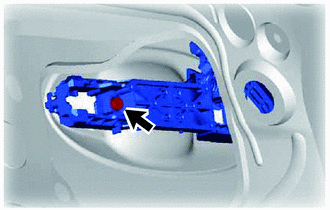
Using a "TORX" socket wrench T30, loosen the screw.
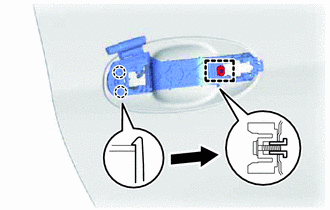
Slide the rear door outside handle frame and disengage the grommet and 2 claws of the rear door outside handle frame, and then remove it.
68630D
28.REMOVE REAR DOOR CHECK ASSEMBLY
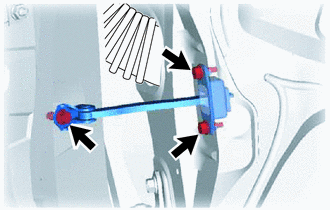
Remove the 3 bolts and the rear door check.
67871
29.REMOVE REAR DOOR WEATHERSTRIP
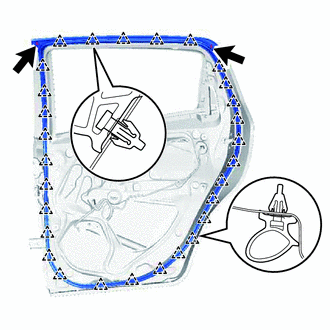
Using a clip remover, disengage the 2 clips.
Using a clip remover, disengage the 29 clips and remove the rear door weatherstrip.
75923
30.REMOVE NO. 2 BLACK OUT TAPE
- HINT:
-
Use the same procedure as for the LH side (See page Vehicle Exterior>EXTERIOR PANELS / TRIM>BLACK OUT TAPE(for Rear Door)>REMOVAL).