 |
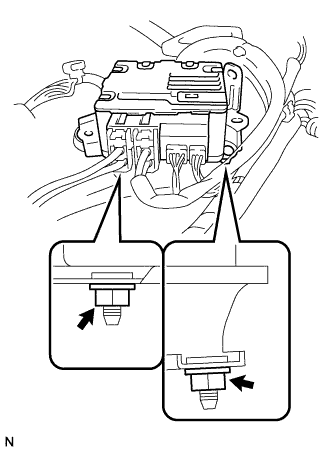
Install the power steering ECU with the 2 nuts.
- Torque:
- 5.0 N*m{ 51 kgf*cm , 44 in.*lbf }
POWER STEERING ECU (for Sedan) > INSTALLATION |
| 1. INSTALL POWER STEERING ECU |
|
Install the power steering ECU with the 2 nuts.
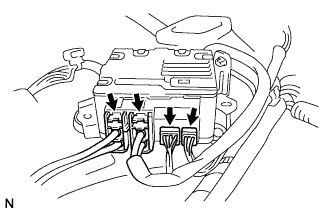 |
Connect the 4 connectors.
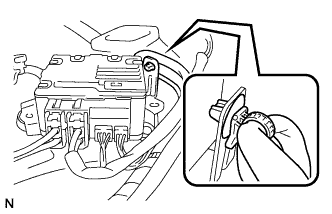 |
Install the wire harness clamp.
| 2. INSTALL UPPER INSTRUMENT PANEL SUB-ASSEMBLY |
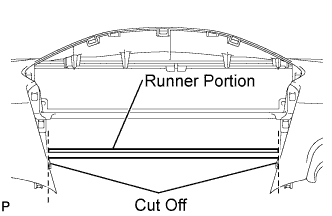 |
Using a nipper, cut off both ends of the runner portion shown in the illustration (When installing a new one).
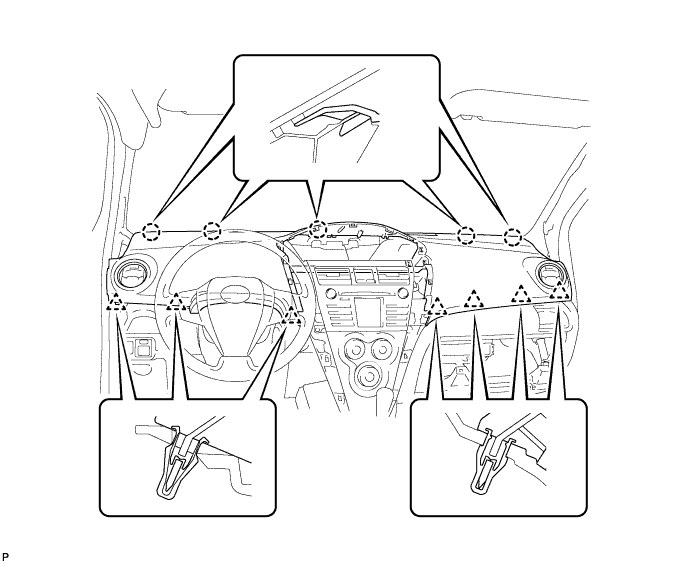
Engage the 5 claws at the front side of the instrument panel.
Engage the 7 clips at the rear side of the instrument panel.
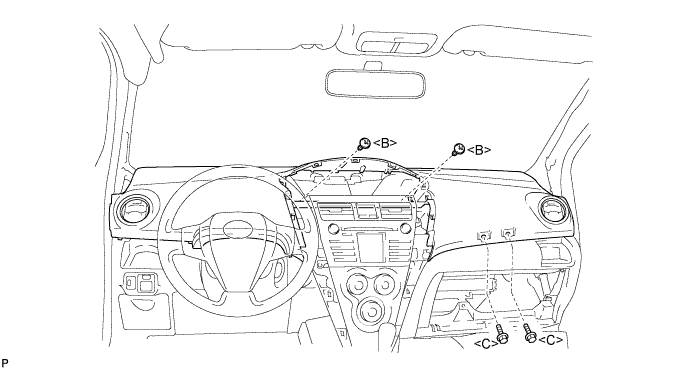
Install the upper instrument panel with the 2 <C> bolts and the 2 <B> screws.
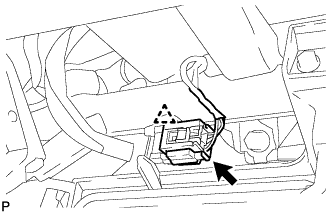 |
Connect the passenger airbag connector and clamp.
| 3. INSTALL GLOVE COMPARTMENT DOOR ASSEMBLY |
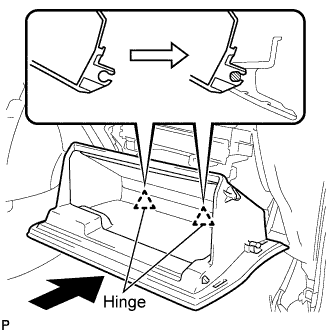 |
Engage the claws of the hinge portions by pushing the glove compartment door in the horizontal direction to install the glove compartment door assembly.
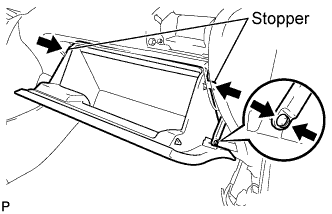 |
Slightly flex the upper portion of the glove compartment door assembly to engage the stopper.
Install the 2 glove compartment door stoppers onto the glove compartment door.
| 4. INSTALL FRONT PILLAR GARNISH RH |
Install the 3 clamps.
Connect the antenna connector.
Engage the 2 clips and the 2 claws and install the front pillar garnish.
| 5. INSTALL FRONT PILLAR GARNISH LH |
Install the 4 clamps.
Engage the 2 clips and the 2 claws and install the front pillar garnish.
| 6. INSTALL FRONT DOOR OPENING TRIM WEATHERSTRIP RH |
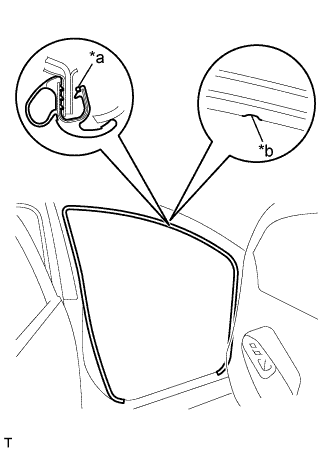 |
Align the location mark with the paint mark first, and install the front door opening trim weatherstrip, as shown in the illustration.
| *a | Paint Mark |
| *b | Location Mark |
| Area | Color |
| RH side | Blue |
| LH side | Pink |
| 7. INSTALL FRONT DOOR OPENING TRIM WEATHERSTRIP LH |
| 8. INSTALL COMBINATION METER ASSEMBLY |
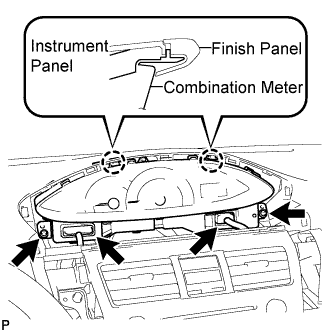 |
Install the combination meter assembly with the 2 screws.
Connect the 2 connectors.
| 9. INSTALL INSTRUMENT CLUSTER FINISH PANEL NO.1 |
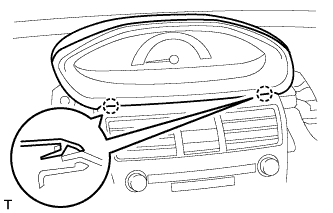 |
Fit the 2 claws of the instrument cluster finish panel into the upper instrument cluster finish panel center.
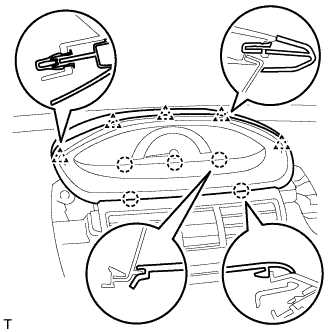 |
Engage the 5 claws and 5 clips and install the instrument cluster finish panel.
| 10. INSTALL INSTRUMENT PANEL FINISH PANEL END RH |
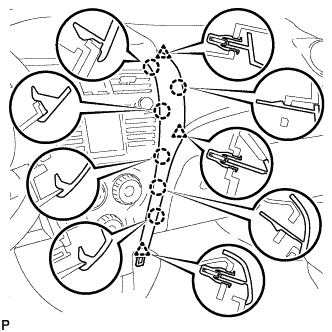 |
Engage the 6 claws and 3 clips and install the instrument panel finish panel end RH.
| 11. INSTALL INSTRUMENT PANEL FINISH PANEL END LH |
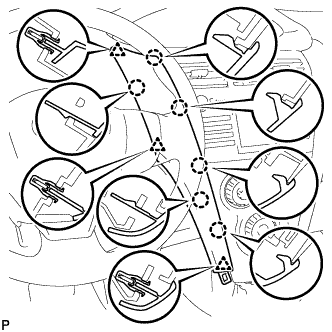 |
Engage the 6 claws and 3 clips and install the instrument panel finish panel end LH.
| 12. INSTALL INSTRUMENT PANEL FINISH PANEL LOWER CENTER |
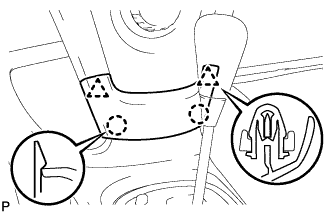 |
Engage the 2 claws and 2 clips and install the instrument panel finish panel.
| 13. CONNECT CABLE TO NEGATIVE BATTERY TERMINAL |
| 14. CHECK SRS WARNING LIGHT |
| 15. PERFORM ZERO POINT CALIBRATION |