 |
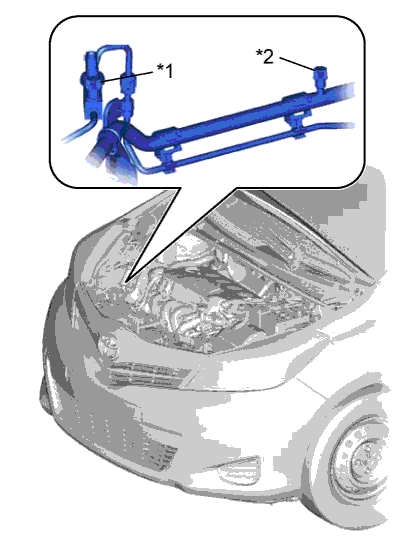
Remove the caps from the service valves on the refrigerant line.
| *1 | High Pressure Service Valve |
| *2 | Low Pressure Service Valve |
AIR CONDITIONING UNIT (for Hatchback) > REMOVAL |
| 1. PRECAUTION |
| 2. RECOVER REFRIGERANT FROM REFRIGERATION SYSTEM |
Start up the engine.
A/C switch on.
Turn the blower switch to on.
Operate the cooler compressor with an engine speed of approximately 1000 rpm for 5 to 6 minutes to circulate the refrigerant and collect the remaining compressor oil from each component, in the cooler compressor.
Stop the engine.
|
Remove the caps from the service valves on the refrigerant line.
| *1 | High Pressure Service Valve |
| *2 | Low Pressure Service Valve |
Connect the refrigerant recovery unit.
Recover the refrigerant from the air conditioning system using a refrigerant recovery unit.
| 3. DRAIN ENGINE COOLANT (for 1NZ-FE) |
| 4. DISCONNECT CABLE FROM NEGATIVE BATTERY TERMINAL |
| 5. REMOVE WINDSHIELD WIPER MOTOR AND LINK |
| 6. REMOVE FRONT NO. 1 VENTILATOR SEAL |
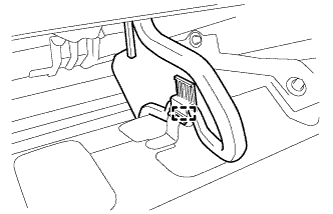 |
Disengage the clamp and remove the front No. 1 ventilator seal.
| 7. REMOVE FRONT AIR SHUTTER SEAL RH |
| 8. REMOVE COWL TOP TO COWL INNER BRACE |
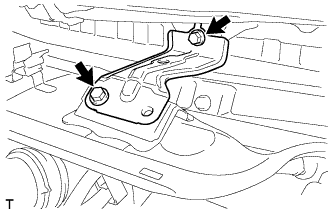 |
Remove the 2 bolts and the inner cowl top to cowl brace.
| 9. REMOVE COWL TOP OUTER PANEL |
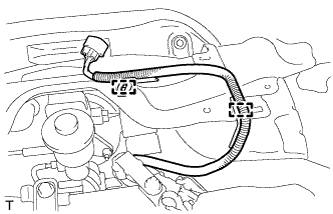 |
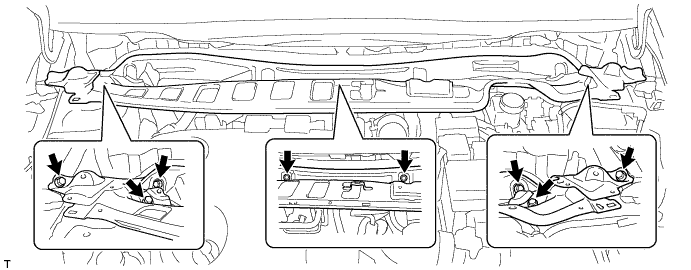
Disengage the 2 clamps and separate the wire harness.
Remove the 8 bolts and the outer cowl top panel.
| 10. DISCONNECT AIR CONDITIONER TUBE AND ACCESSORY ASSEMBLY |
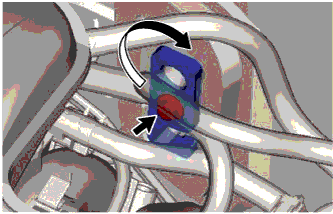 |
Remove the bolt.
Turn the hook connector clockwise and disconnect the air conditioner tube and liquid tube.
Remove the O-ring from the air conditioner tube and liquid tube.
| 11. DISCONNECT HEATER WATER OUTLET HOSE A |
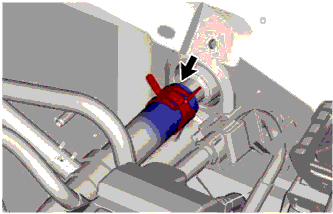 |
Slide the clip and disconnect the heater water outlet hose from the air conditioning unit.
| 12. DISCONNECT HEATER WATER INLET HOSE A |
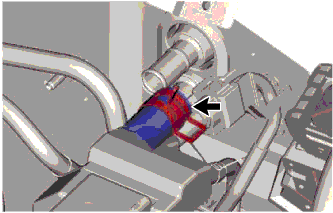 |
Slide the clip and disconnect the heater water inlet hose from the air conditioning unit.
| 13. REMOVE LOWER INSTRUMENT PANEL SUB-ASSEMBLY |
| 14. REMOVE STEERING COLUMN ASSEMBLY |
| 15. REMOVE HEATER TO REGISTER DUCT ASSEMBLY |
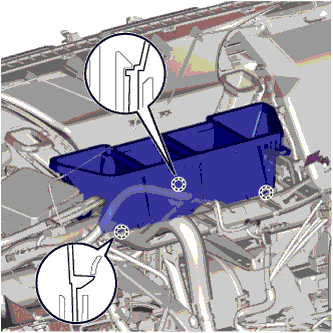 |
Disengage the 3 claws and remove the heater to register duct.
| 16. REMOVE DEFROSTER NOZZLE ASSEMBLY |
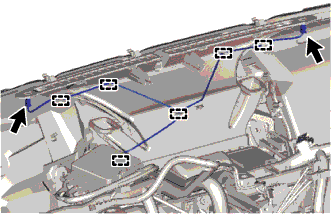 |
Disconnect the connectors and disengage the clamps, then disconnect the wire harness.
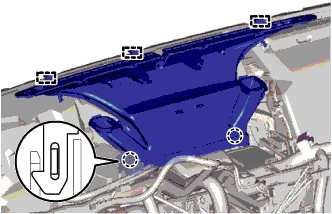 |
Disengage the 2 claws and 3 guides and remove the defroster nozzle.
| 17. REMOVE REAR NO. 2 AIR DUCT (for Cold Area Specification Vehicles) |
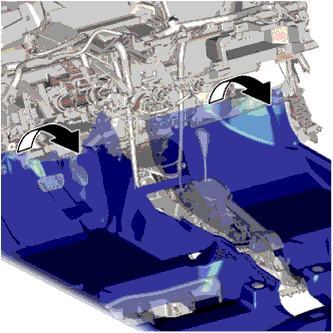 |
Open the floor carpet so that the air duct can be removed and installed from the vehicle.
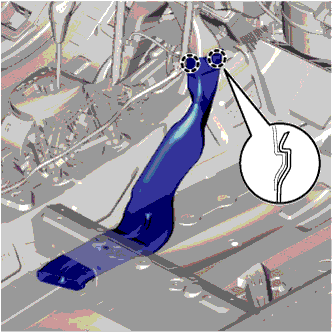 |
Disengage the 2 claws and remove the air duct.
| 18. REMOVE REAR NO. 4 AIR DUCT (for Cold Area Specification Vehicles) |
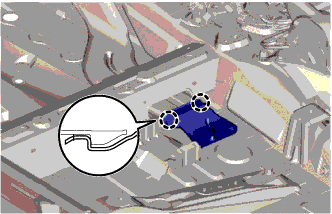 |
Disengage the 2 claws and remove the air duct.
| 19. REMOVE REAR NO. 3 AIR DUCT (for Cold Area Specification Vehicles) |
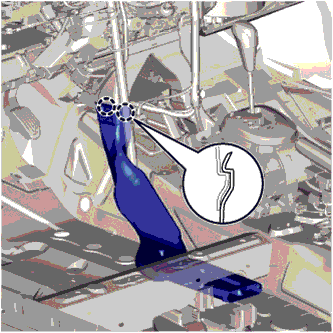 |
Disengage the 2 claws and remove the air duct.
| 20. SEPARATE DRAIN COOLER HOSE |
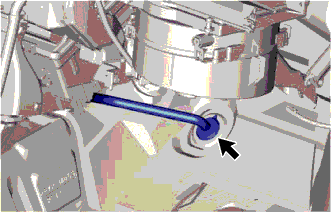 |
Separate the drain cooler hose.
| 21. REMOVE NO. 1 INSTRUMENT PANEL BRACE SUB-ASSEMBLY (except Cold Area Specification Vehicles) |
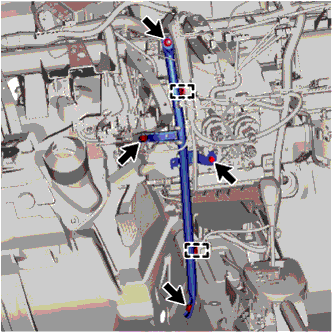 |
Disengage the 2 clamps.
Remove the 2 bolts, nut and screw, then remove the instrument panel brace.
| 22. REMOVE NO. 1 INSTRUMENT PANEL BRACE SUB-ASSEMBLY (for Cold Area Specification Vehicles) |
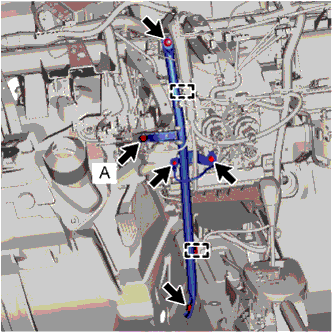 |
Disengage the 2 clamps.
Remove the bolt and disconnect the ground wire.
Remove the 2 bolts, nut and screw, then remove the instrument panel brace.
| 23. REMOVE REAR NO. 1 AIR DUCT (for Cold Area Specification Vehicles) |
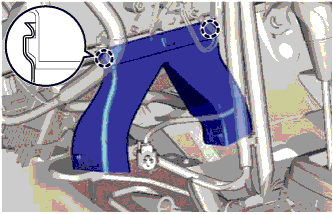 |
Disengage the 2 claws and remove the air duct.
| 24. REMOVE INSTRUMENT PANEL JUNCTION BLOCK ASSEMBLY |
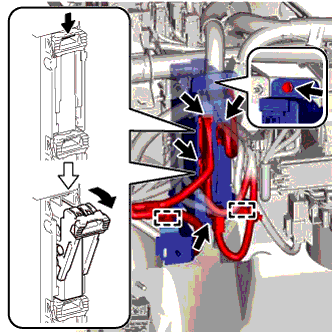 |
Disengage the clamps.
Disconnect the connectors on the front side.
Remove the bolt and separate the instrument panel junction block.
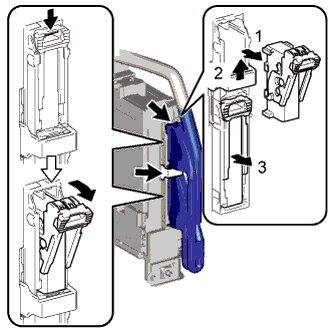 |
Disconnect the back side connectors and remove the instrument panel junction block as shown in the illustration.
| 25. SEPARATE INSTRUMENT PANEL WIRE |
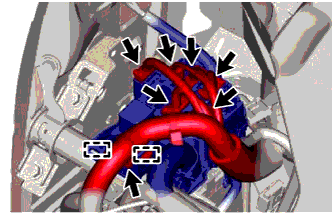 |
Disconnect the connectors.
Remove the screw.
Disengage the 2 clamps and separate the connector holder.
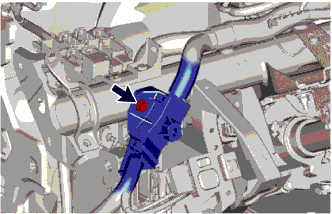 |
Remove the screw and the wire harness protector.
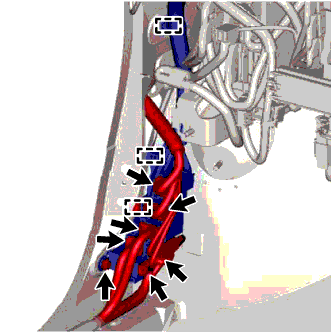 |
Disconnect the connectors.
Remove the bolt.
Disengage the 3 clamps and remove the connector holder.
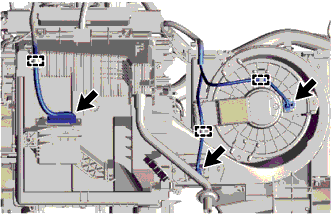 |
Disconnect the 3 connectors.
Disengage the 3 clamps and disconnect the instrument panel wire.
Remove the bolts and disconnect the ground wire.
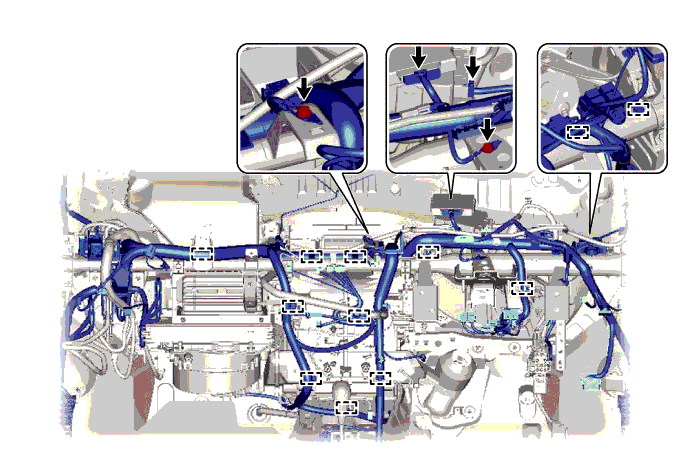
Disconnect the connectors and clamps, then disconnect the instrument panel wire.
| 26. REMOVE INSTRUMENT PANEL REINFORCEMENT |
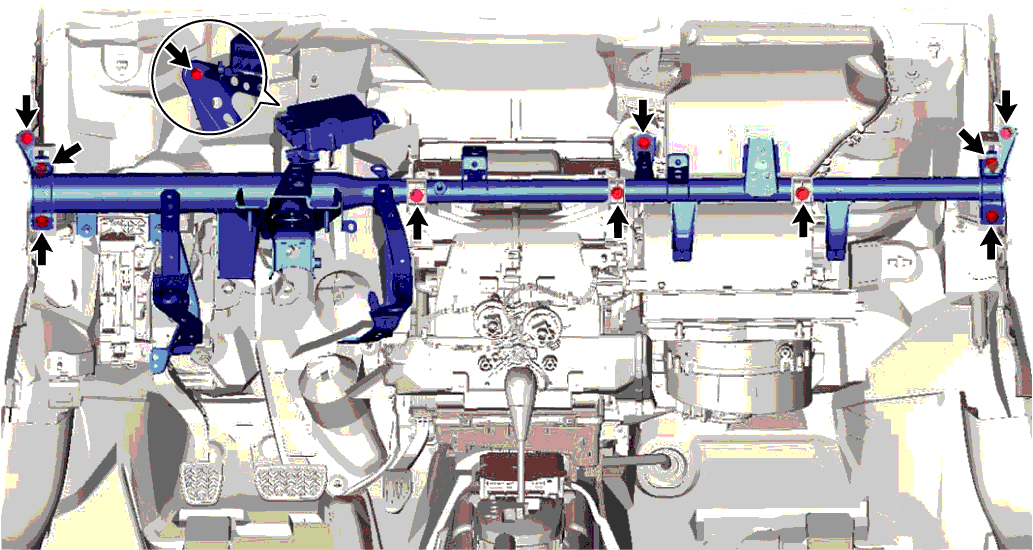
Remove the 8 bolts and 3 screws, then remove the instrument panel reinforcement.
| 27. REMOVE AIR CONDITIONER UNIT ASSEMBLY |
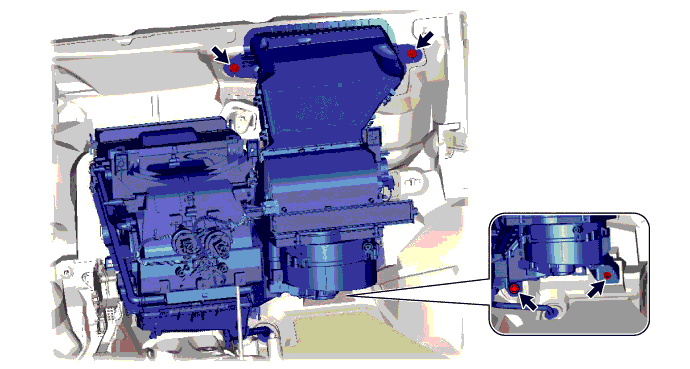
Remove the 3 bolts and nut, then remove the air conditioner unit.
| 28. REMOVE AIR CONDITIONING AMPLIFIER ASSEMBLY |
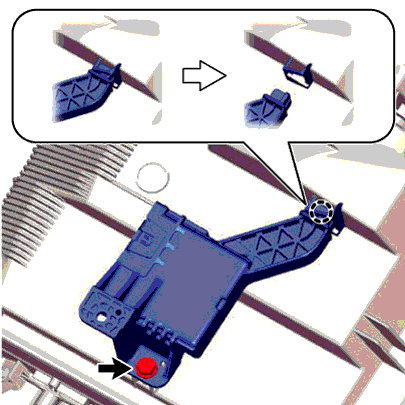 |
Remove the screw.
Disengage the claw and remove the air conditioning amplifier as shown in the illustration.
| 29. REMOVE AIR CONDITIONING RADIATOR ASSEMBLY |
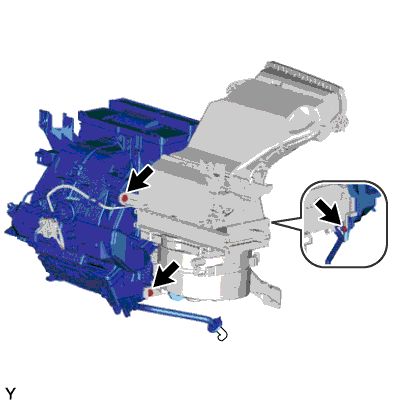 |
Remove the 3 screws and the air conditioning radiator.
| 30. REMOVE NO. 1 AIR DUCT |
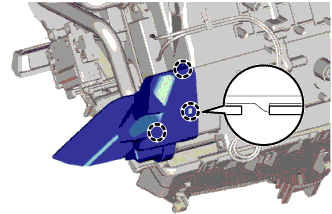 |
Disengage the 3 claws and remove the air duct.
| 31. REMOVE NO. 2 AIR DUCT |
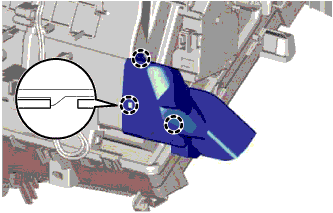 |
Disengage the 3 claws and remove the air duct.