 |
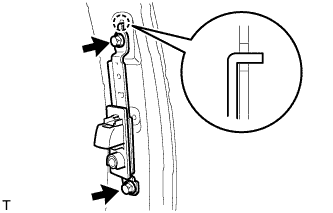
Insert the hook into the body hole and install the shoulder belt anchor adjuster with the 2 bolts.
- Torque:
- 42 N*m{ 430 kgf*cm , 31 ft.*lbf }
FRONT SEAT OUTER BELT ASSEMBLY (for Sedan) > INSTALLATION |
| 1. INSTALL FRONT SHOULDER BELT ANCHOR ADJUSTER ASSEMBLY |
|
Insert the hook into the body hole and install the shoulder belt anchor adjuster with the 2 bolts.
| 2. INSTALL SHOULDER BELT ANCHORAGE PLATE COVER |
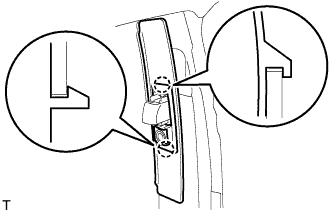 |
Engage the 2 claws and install the shoulder belt anchorage plate cover.
| 3. INSTALL CENTER PILLAR UPPER GARNISH |
Engage the 2 hooks and 2 clips and install the center pillar upper garnish.
| 4. INSTALL FRONT SEAT OUTER BELT ASSEMBLY |
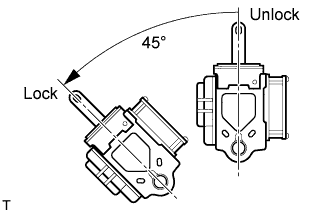 |
Check the angle of inclination required to lock the retractor.
Gently incline the retractor from its initial position. Check that the belt does not lock when the retractor is inclined 15 ° or less in any direction. Also, check that the belt locks when the inclination of the retractor is 45 ° or more.
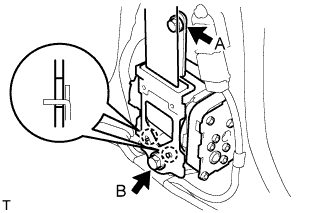 |
Hook the lower stay of the retractor onto the 2 body hooks and provisionally install the retractor with the 2 bolts.
Tighten bolt A and then bolt B.
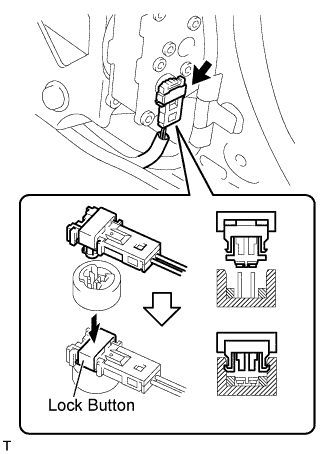 |
Connect the pretensioner connector.
Connect the pretensioner connector.
Lock the locking button.
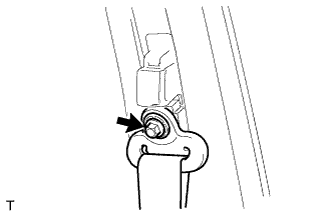 |
Install the shoulder anchor with the bolt.
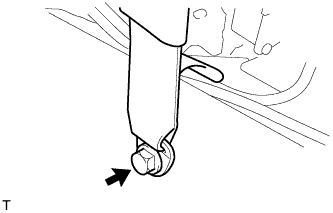 |
Install the anchor plate with the bolt.
Check that the ELR locks.
With the belt installed, check that the belt locks when it is pulled out quickly.
If the operation is not as specified, replace the front seat outer belt.
| 5. INSTALL LAP BELT OUTER ANCHOR COVER |
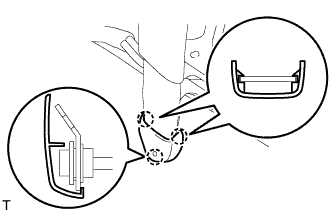 |
Engage the 3 claws and install the lap belt outer anchor cover.
| 6. INSTALL SEAT BELT ANCHOR COVER CAP |
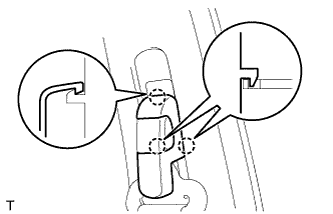 |
Engage the 3 claws and install the seat belt anchor cover cap.
| 7. INSTALL CENTER PILLAR LOWER GARNISH |
Engage the 2 clips and 3 claws and install the center pillar lower garnish.
| 8. INSTALL REAR DOOR OPENING TRIM WEATHERSTRIP |
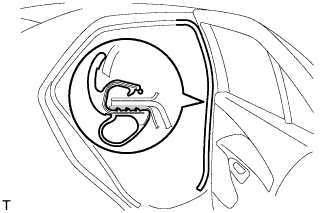 |
Install the rear door opening trim weatherstrip.
| 9. INSTALL FRONT DOOR OPENING TRIM WEATHERSTRIP |
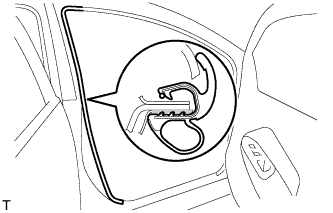 |
Install the front door opening trim weatherstrip.
| 10. INSTALL REAR DOOR SCUFF PLATE |
Engage the 7 claws and install the rear door scuff plate.
| 11. INSTALL FRONT DOOR SCUFF PLATE |
Engage the 11 claws and install the front door scuff plate.
| 12. CONNECT CABLE TO NEGATIVE BATTERY TERMINAL |
| 13. INSPECT SRS WARNING LIGHT |