Home › Vehicle Interior › SEAT BELT › REAR CENTER SEAT OUTER BELT ASSEMBLY (for Sedan)

REAR CENTER SEAT OUTER BELT ASSEMBLY (for Sedan) > INSTALLATION


1. INSTALL REAR CENTER SEAT OUTER BELT ASSEMBLY


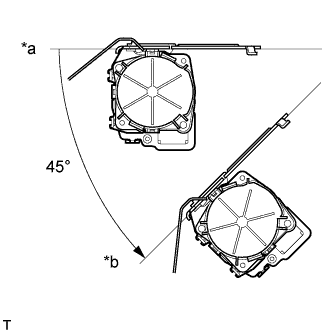
    B134915E03
  1. Check the angle of inclination required to lock the retractor.
    Text in Illustration 
    *a
    Unlock
    *b
    Lock

    1. Gently incline the retractor from its initial position. Check that the belt does not lock when the retractor is inclined 15° or less in any direction. Also, check that the belt locks when the inclination of the retractor is 45° or more.

      NOTICE:
      Do not disassemble the retractor.

      If the operation is not as specified, replace the rear center seat outer belt.

  1. Insert the hook into the body hole and install the retractor with the bolt.

    Torque:
    42 N*m{ 428 kgf*cm , 31 ft.*lbf }

  1. Check that the ELR locks.

    NOTICE:
    1. The check should be performed with the rear seat outer belt installed.
    2. Do not allow the anchor part of the rear seat outer belt and the protruding parts of the floor panel to overlap.


    1. With the belt installed, check that the belt locks when it is pulled out quickly.
      If the operation is not as specified, replace the rear center seat outer belt.


2. INSTALL PACKAGE TRAY TRIM PANEL ASSEMBLY
  1. Engage the 5 claws and install the package tray trim.

  1. Install the 4 clips.


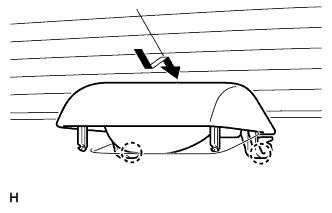
3. INSTALL HIGH MOUNTED STOP LIGHT ASSEMBLY


    E127792
  1. Connect the connector.

  1. Engage the 4 claws and install the high mounted stop light assembly.


4. INSTALL ROOF SIDE INNER GARNISH RH
  1. Engage the 4 clips and the claw and install the roof side inner garnish.


5. INSTALL ROOF SIDE INNER GARNISH LH

HINT:
Use the same procedure as for the RH side.


6. INSTALL REAR SEAT SIDE COVER RH
  1. Engage the 2 clips and the 4 claws and install the rear seat side cover.


7. INSTALL REAR SEAT SIDE COVER LH

HINT:
Use the same procedure as for the RH side.


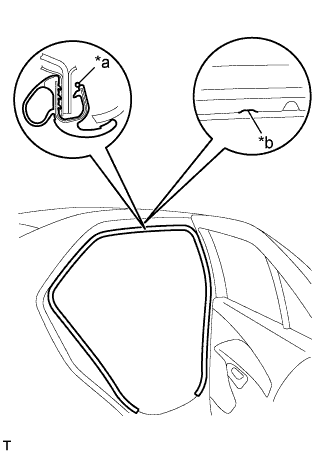
8. INSTALL REAR DOOR OPENING TRIM WEATHERSTRIP RH


    B134773E02
  1. Align the location mark with the paint mark first, and install the rear door opening trim weatherstrip, as shown in the illustration.
    Text in Illustration 
    *a
    Paint Mark
    *b
    Location Mark

    Paint Mark:
    Area
    Color
    RH side
    Green
    LH side
    Red


9. INSTALL REAR DOOR OPENING TRIM WEATHERSTRIP LH

HINT:
Use the same procedure as for the RH side.


10. INSTALL REAR DOOR SCUFF PLATE RH
  1. Engage the 7 claws and install the rear door scuff plate.


11. INSTALL REAR DOOR SCUFF PLATE LH

HINT:
Use the same procedure as for the RH side.


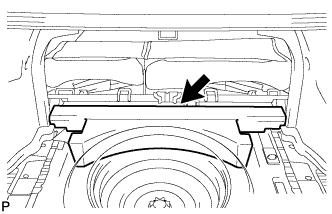
12. INSTALL LUGGAGE COMPARTMENT TRIM INNER PAD


    B136275
  1. Install the luggage compartment trim inner pad.


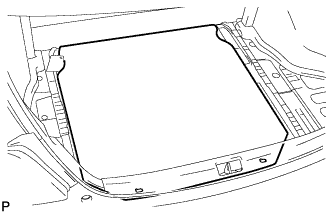
13. INSTALL SPARE WHEEL COVER ASSEMBLY


    B136270
  1. Install the spare wheel cover assembly.


14. INSTALL REAR SEAT ASSEMBLY (for 60/40 Split Seat Type LH Side)
(Click here)


15. INSTALL REAR SEAT ASSEMBLY (for 60/40 Split Seat Type RH Side)
(Click here)