HEATING / AIR CONDITIONING AIR CONDITIONING UNIT REMOVAL
PROCEDURE

 1.RECOVER REFRIGERANT FROM REFRIGERATION SYSTEM
2.DRAIN ENGINE COOLANT
for 1NZ-FE:
Click hereEngine / Hybrid System>1NZ-FE COOLING>COOLANT>REPLACEMENT
for 2NZ-FE:
Click hereEngine / Hybrid System>2NZ-FE COOLING>COOLANT>REPLACEMENT
55301
3.REMOVE INSTRUMENT PANEL SUB-ASSEMBLY
89170A
4.REMOVE AIRBAG ECU ASSEMBLY
5.REMOVE STEERING COLUMN ASSEMBLY
88712
6.DISCONNECT NO. 1 COOLER REFRIGERANT SUCTION HOSE (w/ Cooler System)
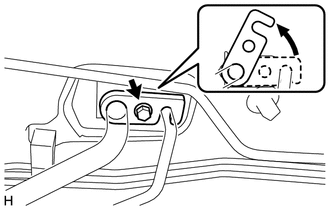
Remove the bolt.
Turn the hook connector counterclockwise and disconnect the No. 1 cooler refrigerant suction hose.
Remove the O-ring from the No. 1 cooler refrigerant suction hose.
- NOTICE:
-
Seal the openings of the disconnected parts using vinyl tape to prevent the entry of moisture and foreign matter.
88706A
7.DISCONNECT LIQUID TUBE SUB-ASSEMBLY A (w/ Cooler System)
Disconnect the liquid tube sub-assembly A.
Remove the O-ring from the liquid tube sub-assembly A.
- NOTICE:
-
Seal the openings of the disconnected parts using vinyl tape to prevent the entry of moisture and foreign matter.
88482
8.REMOVE COOLER CAP (w/o Cooler System)
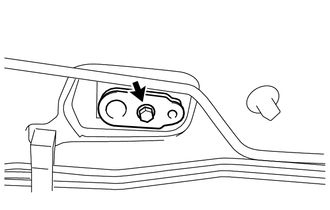
Remove the bolt and cooler cap.
Remove the O-ring from the cooler cap.
- NOTICE:
-
Seal the openings of the disconnected parts using vinyl tape to prevent the entry of moisture and foreign matter.
87246
9.DISCONNECT HEATER WATER OUTLET HOSE
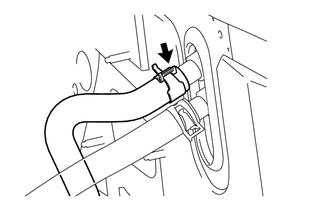
Loosen the hose clip and disconnect the heater water outlet hose from the heater radiator assembly.
87245
10.DISCONNECT HEATER WATER INLET HOSE
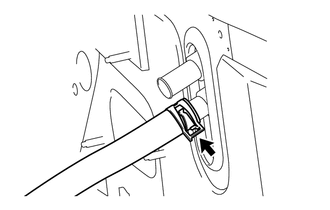
Loosen the hose clip and disconnect the heater water inlet hose from the heater radiator assembly.
55306A
11.REMOVE NO. 1 INSTRUMENT PANEL BRACE SUB-ASSEMBLY
Disengage the front floor carpet.
Remove the clip and peel back the front floor carpet assembly.
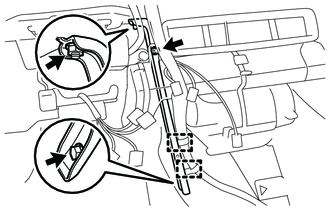
Disengage the 2 clamps.
Remove the bolt, nut, screw and then remove the No. 1 instrument panel brace sub-assembly.
88539
12.SEPARATE NO. 1 COOLER UNIT DRAIN HOSE
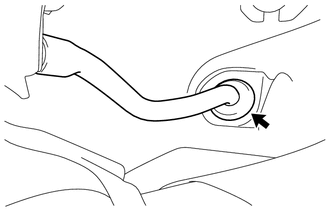
Separate the No. 1 cooler unit drain hose.
88539C
13.REMOVE NO. 2 COOLER UNIT DRAIN HOSE
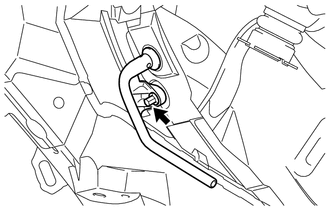
Remove the clip and No. 2 cooler unit drain hose.
88650N
14.REMOVE AIR CONDITIONING AMPLIFIER ASSEMBLY (for Automatic Air Conditioning System)
88650N
15.REMOVE AIR CONDITIONING AMPLIFIER ASSEMBLY (for Manual Air Conditioning System)
87165C
16.REMOVE BLOWER MOTOR CONTROL (for Automatic Air Conditioning System)
87138C
17.REMOVE BLOWER RESISTOR (for Manual Air Conditioning System)
87010
18.REMOVE AIR CONDITIONING UNIT ASSEMBLY
for LHD:
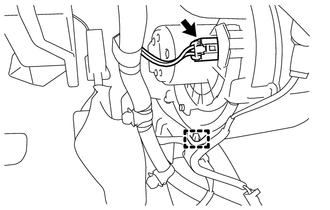
Disengage the clamp.
Disconnect the connector.
for RHD:
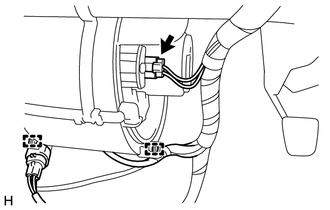
Disengage the 2 clamps.
Disconnect the connector.
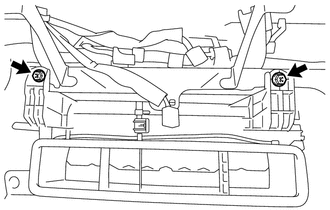
Remove the 2 screws.
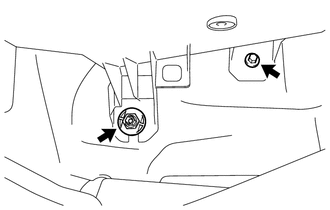
Remove the nut and bolt.
for Automatic Air Conditioning System:
Pull the air conditioning unit assembly toward the rear of the vehicle.
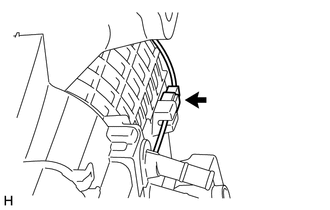
Disconnect the connector and remove the air conditioning unit assembly.
for Manual Air Conditioning System:
Pull the air conditioning unit assembly toward the rear of the vehicle.
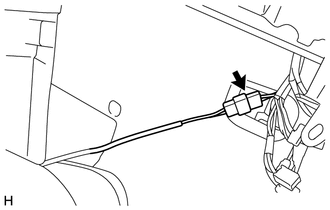
Disconnect the connector and remove the air conditioning unit assembly.
87211C
19.REMOVE NO. 4 AIR DUCT
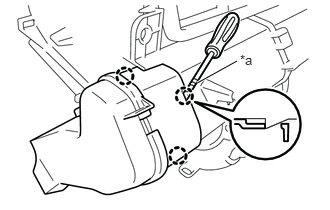
| *a | Protective Tape |
Using a screwdriver with its tip wrapped in protective tape, disengage the 3 claws and remove the No. 4 air duct.
87211G
20.REMOVE NO. 5 AIR DUCT
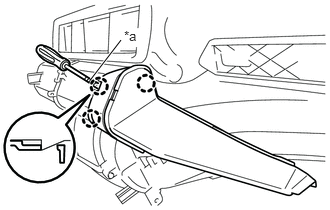
| *a | Protective Tape |
Using a screwdriver with its tip wrapped in protective tape, disengage the 3 claws and remove the No. 5 air duct.