2NZ-FE ENGINE MECHANICAL CAMSHAFT REMOVAL
PROCEDURE

 58910C
1.REMOVE REAR CONSOLE BOX ASSEMBLY
57533B
2.REMOVE FRONT FLOOR CENTER BRACE
17410
3.REMOVE FRONT EXHAUST PIPE ASSEMBLY
51441C
4.REMOVE ENGINE UNDER COVER RH (w/o Metal Type Under Cover)
51451A
5.REMOVE CENTER ENGINE UNDER COVER (w/ Metal Type Under Cover)
51405A
6.REMOVE NO. 1 ENGINE UNDER COVER SUB-ASSEMBLY (w/ Metal Type Under Cover)
11212
7.REMOVE NO. 2 CYLINDER HEAD COVER
12261
8.DISCONNECT VENTILATION HOSE
23820
9.DISCONNECT FUEL VAPOR FEED HOSE ASSEMBLY
19500D
10.REMOVE NO. 1 IGNITION COIL
11201
11.REMOVE CYLINDER HEAD COVER SUB-ASSEMBLY
12305
12.REMOVE ENGINE MOUNTING INSULATOR SUB-ASSEMBLY RH
13512
13.REMOVE NO. 2 CAMSHAFT
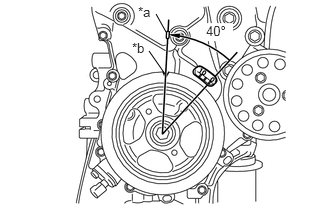
| *a | Alignment Mark |
| *b | Timing Notch |
- NOTICE:
-
When rotating the camshaft with the chain sub-assembly removed, rotate the crankshaft damper sub-assembly counterclockwise 40° from the TDC and align its timing notch with the alignment mark of the oil pump assembly to prevent the pistons from coming into contact with the valves.
Set the No. 1 cylinder to TDC/compression.
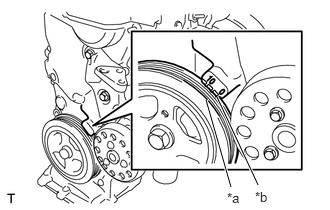
| *a | Timing Notch |
| *b | Timing Mark "0" |
Turn the crankshaft damper sub-assembly and align its timing notch with the timing mark "0" of the oil pump assembly.
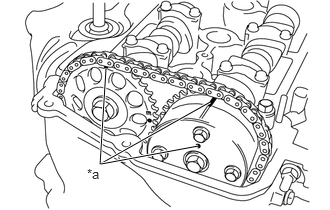
| *a | Timing Mark |
Check that both timing marks on the camshaft timing sprocket and camshaft timing gear assembly are facing upward, as shown in the illustration.
- HINT:
-
If not, turn the crankshaft 1 complete revolution (360°) and align the marks as above.
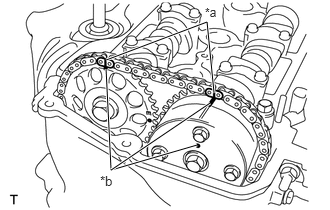
| *a | Paint Mark |
| *b | Timing Mark |
Place paint marks on the chain sub-assembly in the places where the timing marks of the camshaft timing sprocket and camshaft timing gear assembly are located.
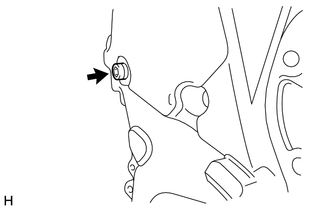
Using an 8 mm hexagon wrench, remove the taper screw plug from the oil pump assembly.
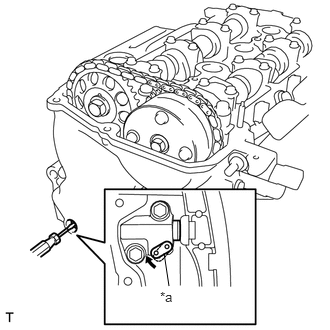
| *a | Stopper Plate |
Insert a screwdriver into the service hole in the oil pump assembly to pull the stopper plate of the No. 1 timing chain tensioner assembly upward.
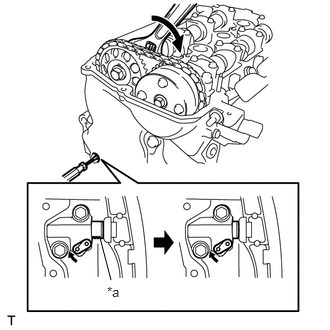
| *a | Plunger |
Using a wrench, rotate No. 2 camshaft clockwise to push in the plunger of the No. 1 timing chain tensioner assembly.
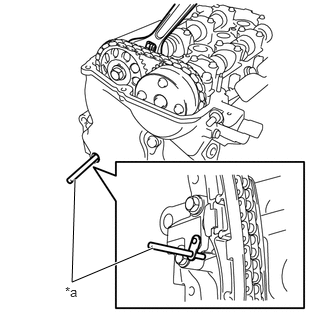
| *a | 3 mm (0.12 in.) Diameter Bar |
Remove the screwdriver from the service hole, then align the hole in the stopper plate with the service hole and insert a 3 mm (0.12 in.) diameter bar into the holes to hold the stopper plate.
- HINT:
- ·
Fix the stopper plate using the 3 mm (0.12 in.) diameter bar while rotating the No. 2 camshaft right and left slightly.
·Hold the 3 mm (0.12 in.) diameter bar with tape so that the bar does not come off.
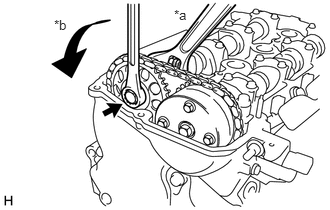
| *a | Hold |
| *b | Turn |
Using a wrench, hold the hexagonal lobe of No. 2 camshaft and loosen the flange bolt.
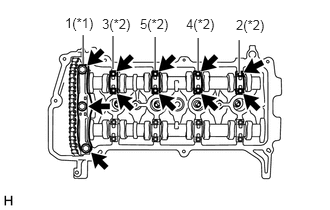
| *1 | No. 1 Camshaft Bearing Cap |
| *2 | No. 2 Camshaft Bearing Cap |
Using several steps, loosen and remove the 11 bolts uniformly in the sequence shown in the illustration, then remove the No. 1 camshaft bearing cap and 4 No. 2 camshaft bearing caps from the cylinder head sub-assembly.
- NOTICE:
-
Loosen the bolts uniformly while keeping the No. 2 camshaft level.
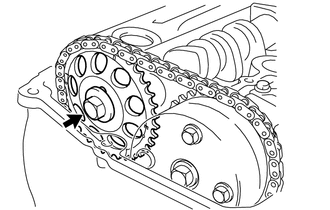
Remove the flange bolt and camshaft timing sprocket from the No. 2 camshaft.
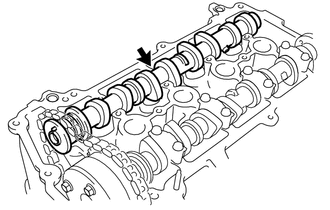
Remove the No. 2 camshaft from the cylinder head sub-assembly.
13511
14.REMOVE CAMSHAFT
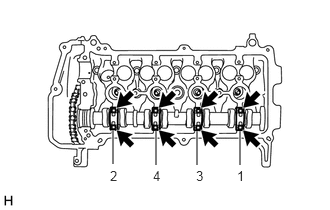
Using several steps, loosen and remove the 8 bolts uniformly in the sequence shown in the illustration, then remove the 4 No. 2 camshaft bearing caps.
- NOTICE:
-
Loosen the bolts uniformly while keeping the camshaft level.
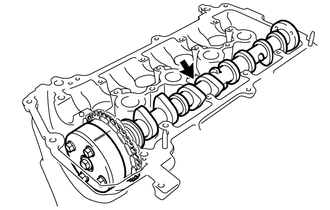
Hold the chain sub-assembly by hand and remove the camshaft with camshaft timing gear assembly from the cylinder head sub-assembly.
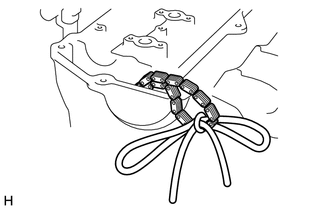
Tie the timing chain sub-assembly with a piece of string to prevent it from falling down between the oil pump assembly and cylinder head sub-assembly.
13050
15.REMOVE CAMSHAFT TIMING GEAR ASSEMBLY