DOOR / HATCH HOOD LOCK CONTROL CABLE ASSEMBLY(for LHD) REMOVAL
CAUTION / NOTICE / HINT
The necessary procedures (adjustment, calibration, initialization, or registration) that must be performed after parts are removed and installed, or replaced during front bumper assembly removal/installation are shown below.
| Replaced Part or Performed Procedure | Necessary Procedure | Effect/Inoperative Function When Necessary Procedures are not Performed | Link |
|---|---|---|---|
| Front bumper assembly (Including removal and installation) | ·
Ultrasonic sensor detection angle ·
Ultrasonic sensor detection angle registration |
Parking support brake system | ( ) |
PROCEDURE

 1.REMOVE FRONT WHEEL LH
2.REMOVE FRONT BUMPER ASSEMBLY
16681A
3.REMOVE RADIATOR UPPER AIR GUIDE PLATE
53876A
4.REMOVE FRONT FENDER LINER LH
- HINT:
-
Use the same procedure as for front fender liner RH.
-
Click hereVehicle Exterior>WIPER / WASHER>WASHER MOTOR>REMOVAL
53510
5.REMOVE HOOD LOCK ASSEMBLY
w/ Engine Hood Courtesy Switch:
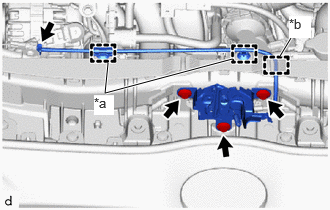
| *a | Clamp |
| *b | guide |
Disconnect the connector.
Disengage the clamps and guide.
Remove the 3 bolts.
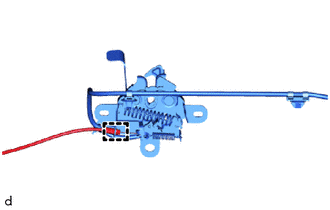
Disengage the guide to disconnect the hood lock control cable assembly, and remove the hood lock assembly.
55606
6.REMOVE NO. 1 INSTRUMENT PANEL UNDER COVER SUB-ASSEMBLY
53601
7.DISCONNECT HOOD LOCK CONTROL LEVER SUB-ASSEMBLY
53601
8.REMOVE HOOD LOCK CONTROL LEVER SUB-ASSEMBLY
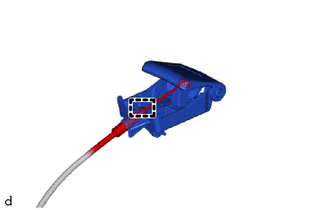
Disengage the guide.
Disconnect the hood lock control cable assembly to remove the hood lock control lever sub-assembly.
53630
9.REMOVE HOOD LOCK CONTROL CABLE ASSEMBLY
Disconnect the hood lock control cable assembly from the clamps.
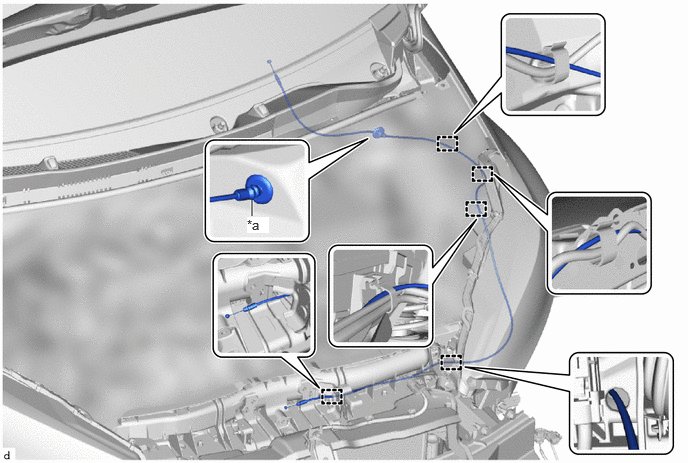
| *a | Grommet | - | - |
Disengage the grommet.
Pull the hood lock control cable assembly from the engine compartment to remove it.