AUDIO / VIDEO RADIO ANTENNA CORD REMOVAL
CAUTION / NOTICE / HINT
The necessary procedures (adjustment, calibration, initialization, or registration) that must be performed after parts are removed and installed, or replaced the during antenna cord sub-assembly removal/installation are shown below.
| Replacement Part or Procedure | Necessary Procedures | Effects/Inoperative when not performed | Link |
|---|---|---|---|
| Disconnect cable from negative auxiliary battery terminal | Memorize steering angle neutral point | Parking assist monitor system | ( ) |
- CAUTION:
-
-
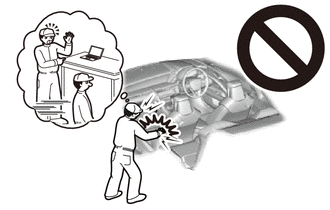
Some of these service operations affect the SRS airbag system. Read the precautionary notices concerning the SRS airbag system before servicing.
-
Click hereVehicle Interior>SUPPLEMENTAL RESTRAINT SYSTEMS>AIRBAG SYSTEM>PRECAUTION
- NOTICE:
-
After turning the ignition switch off, waiting time may be required before disconnecting the cable from the negative (-) auxiliary battery terminal.
-
Click hereGeneral>SETUP>WHEN DISCONNECTING OR RECONNECTING BATTERY TERMINAL>BEFORE DISCONNECTING BATTERY
- HINT:
-
When the cable is disconnected / reconnected to the auxiliary battery terminal, systems temporarily stop operating. However, each system has a function that completes learning the first time the system is used.
- ·
Learning completes when vehicle is driven
Effect/Inoperative Function When Necessary Procedures are not Performed Necessary Procedures Link *1: for Gasoline Model
Lane tracing assist system Drive the vehicle straight ahead at 35 km/h (22 mph) or more for 5 second or more. ( )
Pre-collision system Stop and start system *1 Drive the vehicle until stop and start control is permitted (approximately 5 to 60 minutes) ( )
·Learning completes when vehicle is operated normally
Effect/Inoperative Function When Necessary Procedures are not Performed Necessary Procedures Link Power door lock control system
·Back door opener
Perform door unlock operation with door control switch or electrical key transmitter sub-assembly switch. ( )
Air conditioning system After the ignition switch is turned to ON, the servo motor standard position is recognized. -
PROCEDURE

 55302C
1.REMOVE INSTRUMENT PANEL SUB-ASSEMBLY
55971C
2.REMOVE NO. 1 SIDE DEFROSTER NOZZLE DUCT
55972C
3.REMOVE NO. 2 SIDE DEFROSTER NOZZLE DUCT
86101
4.REMOVE ANTENNA CORD SUB-ASSEMBLY
for Separate Type:
Disengage the claws. (for LHD)
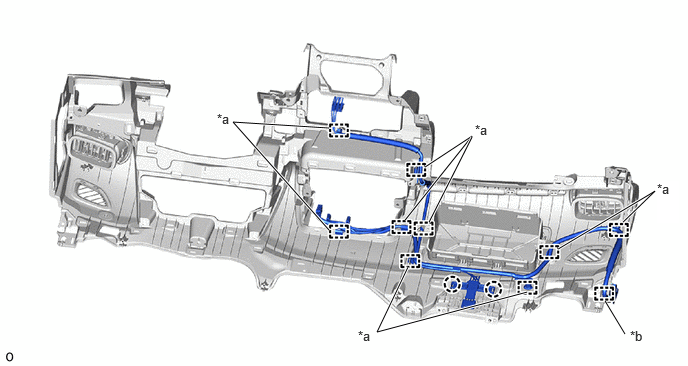
| *a | Clamp | *b | Guide |
Disconnect the connector.
Disengage the clamps and guides to remove the antenna cord sub-assembly.
Disengage the claws. (for RHD)
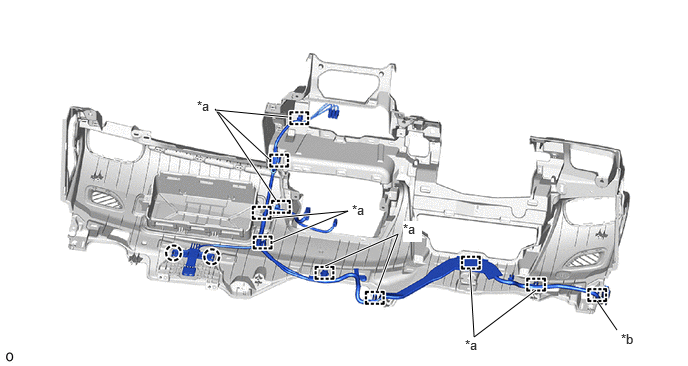
| *a | Clamp | *b | Guide |
Disconnect the connector.
Disengage the clamps and guides to remove the antenna cord sub-assembly.
for Integrated Type:
Disengage the claws.
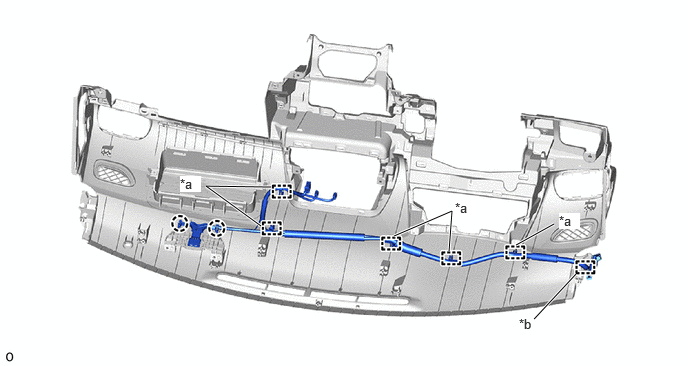
| *a | Clamp | *b | Guide |
Disconnect the connector.
Disengage the clamps and guide to remove the antenna cord sub-assembly.
63310
5.REMOVE ROOF HEADLINING (for 5 Door)
63310
6.REMOVE ROOF HEADLINING (for 3 Door)
86101J
7.REMOVE NO. 2 ANTENNA CORD SUB-ASSEMBLY (for 5 Door Normal Roof)
for TMC Made:
Remove each adhesive tape from the roof headlining.
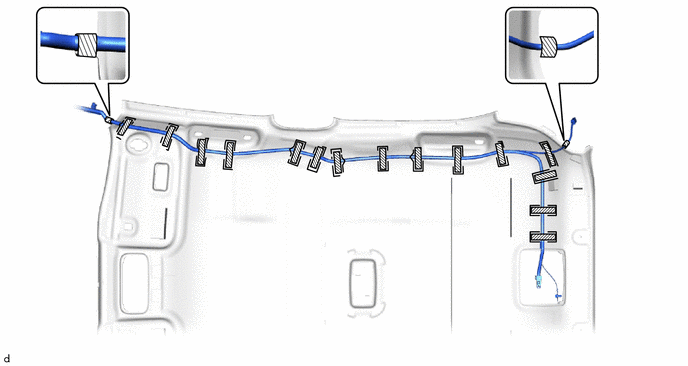

|
Adhesive Tape | - | - |
Remove the No. 2 antenna cord sub-assembly from the roof headlining.
for TMMF Made:
Remove each adhesive tape from the roof headlining.
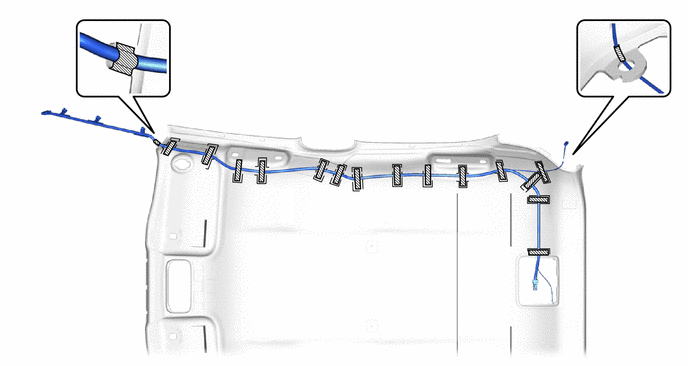
|
|
Adhesive Tape | - | - |
Remove the No. 2 antenna cord sub-assembly from the roof headlining.
86101J
8.REMOVE NO. 2 ANTENNA CORD SUB-ASSEMBLY (for 3 Door Normal Roof)
Remove each adhesive tape from the roof headlining.
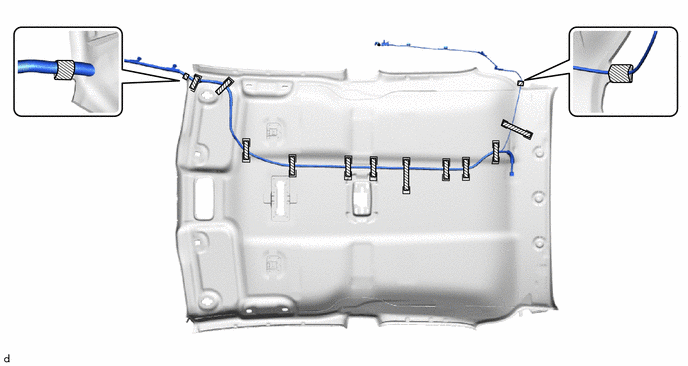
|
|
Adhesive Tape | - | - |
Remove the No. 2 antenna cord sub-assembly by peeling the No. 2 antenna cord sub-assembly away from the butyl tape.
86101J
9.REMOVE NO. 2 ANTENNA CORD SUB-ASSEMBLY (for Panoramic Moon Roof)
Remove each adhesive tape from the roof headlining.
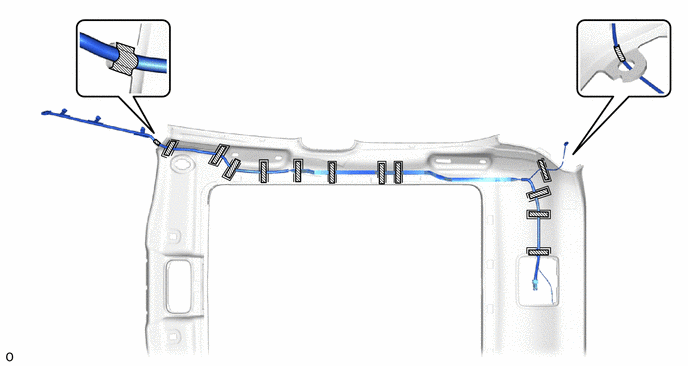
Remove the No. 2 antenna cord sub-assembly by peeling the No. 2 antenna cord sub-assembly away from the butyl tape.
10.REMOVE NO. 8 ANTENNA CORD SUB-ASSEMBLY (for 3 Door Normal Roof)
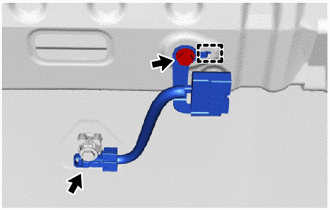
Disconnect the connector.
Remove the bolt.
Disengage the guide to remove the No. 8 antenna cord sub-assembly.
67751
11.REMOVE BACK DOOR TRIM BOARD (for 5 Door)
67761A
12.REMOVE BACK DOOR TRIM COVER (for 5 Door)
86101R
13.REMOVE NO. 5 ANTENNA CORD SUB-ASSEMBLY (for 5 Door)
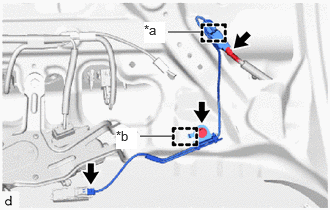
| *a | Clamp |
| *b | Guide |
Disconnect the 2 connectors.
Disengage the clamp.
Remove the bolt.
Disengage the guide to remove the No. 5 antenna cord sub-assembly.
86101V
14.REMOVE NO. 6 ANTENNA CORD SUB-ASSEMBLY (for 5 Door)
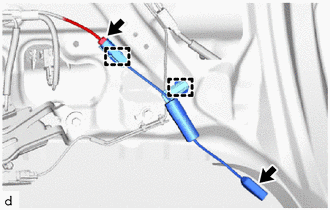
Disconnect the 2 connectors.
Disengage the clamps to remove the No. 6 antenna cord sub-assembly.
15.REMOVE NO. 7 ANTENNA CORD SUB-ASSEMBLY (for 5 Door)
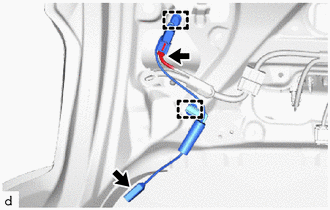
Disconnect the 2 connectors.
Disengage the clamps to remove the No. 7 antenna cord sub-assembly.
86101Q
16.REMOVE NO. 4 ANTENNA CORD SUB-ASSEMBLY (for 5 Door)
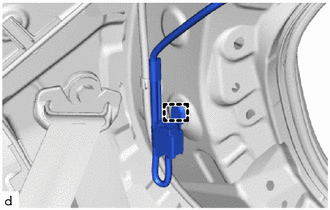
Disengage the clamp.
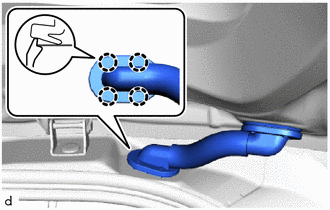
Disengage the claws to separate the grommet.
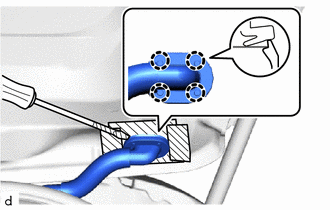
|
|
Protective Tape |
Install the protective tape as shown in the illustration.
Using a screwdriver with its tip wrapped in protective tape, disengage the claws to separate the grommet.
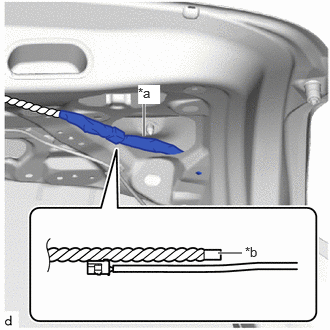
| *a | Nonwoven Tape |
| *b | Rope |
Secure a rope to the No. 4 antenna cord sub-assembly with nonwoven tape as shown in the illustration.
- NOTICE:
- ·
As conduction performance may degrade if adhesive from the nonwoven tape contacts the connecting parts of the connector, cover the connector with a plastic bag or similar before applying the nonwoven tape.
·Make sure that the rope is secured with nonwoven tape to prevent the rope from separating from the No. 4 antenna cord sub-assembly when removing it.
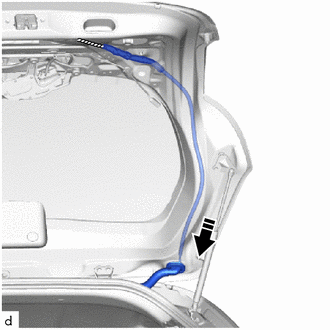

|
Remove in this Direction |
Remove the No. 4 antenna cord sub-assembly as shown in the illustration.
- NOTICE:
- ·
The rope will be used when installing the No. 4 antenna cord sub-assembly. Leave the rope inside the back door panel sub-assembly.
·This step should not be performed with the back door panel sub-assembly removed from the vehicle.