FRONT SUSPENSION FRONT LOWER SUSPENSION ARM(for TMC Made G16E-GTS) REMOVAL
CAUTION / NOTICE / HINT
The necessary procedures (adjustment, calibration, initialization, or registration) that must be performed after parts are removed, installed, or replaced during the front lower No. 1 suspension arm sub-assembly LH removal/installation are shown below.
| Replacement Part or Procedure | Necessary Procedure | Effect/Inoperative when not Performed | Link |
|---|---|---|---|
| Front wheel alignment adjustment | Calibration | ·
DTCs are stored ·
Slip indicator light illuminates ·
VSC disabled or malfunctions |
( ) |
- HINT:
- ·
Use the same procedure for the RH side and LH side.
·The following procedure is for the LH side.
PROCEDURE

 1.REMOVE FRONT WHEEL
51410
2.REMOVE NO.1 ENGINE UNDER COVER ASSEMBLY
48069
3.REMOVE FRONT LOWER NO. 1 SUSPENSION ARM SUB-ASSEMBLY
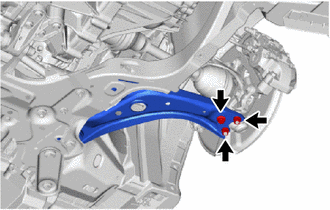
Remove the bolt, 2 nuts and separate the front lower No. 1 suspension arm sub-assembly from the front lower ball joint assembly.
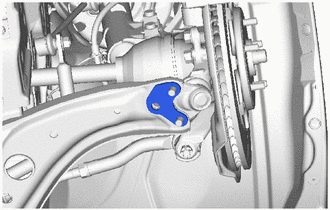
Remove inner No. 1 arm attachment plate from the front lower No. 1 suspension arm sub-assembly.
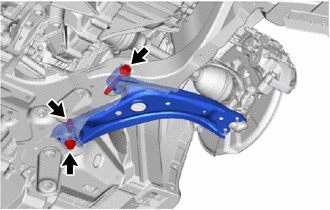
Remove the 2 bolts, nut and front lower No. 1 suspension arm sub-assembly from the front suspension crossmember sub-assembly.
- NOTICE:
-
Do not turn the nut. Loosen the bolt with the nut secured.