AUDIO / VIDEO RADIO RECEIVER REMOVAL
CAUTION / NOTICE / HINT
The necessary procedures (adjustment, calibration, initialization or registration) that must be performed after parts are removed and installed, or replaced during the radio and display receiver assembly removal/installation are shown below.
| Replacement Part | Necessary Procedure | Effect/Inoperative Function when Necessary Procedures are not Performed | Link |
|---|---|---|---|
with TAS Type:
Radio and display receiver assembly (When not replacing telephone tranceiver) |
Register vehicle information | Network service | ( ) |
PROCEDURE

 1. PRECAUTION
55405B
2.REMOVE INSTRUMENT CLUSTER FINISH PANEL CENTER SUB-ASSEMBLY
55670A
3.REMOVE INSTRUMENT PANEL CENTER REGISTER ASSEMBLY
86140A
4.REMOVE RADIO AND DISPLAY RECEIVER ASSEMBLY WITH BRACKET
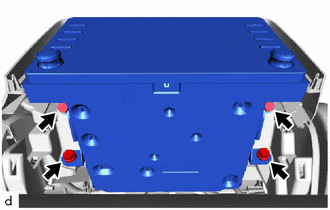
Remove the 4 screws.
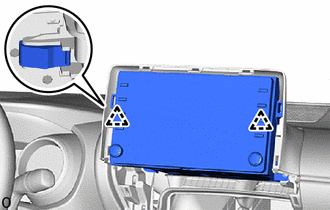
Pull the radio and display receiver assembly with bracket toward the rear of the vehicle to disengage the clips.
Disconnect each connector to remove the radio and display receiver assembly with bracket.
86211J
5.REMOVE NO. 1 RADIO RECEIVER BRACKET
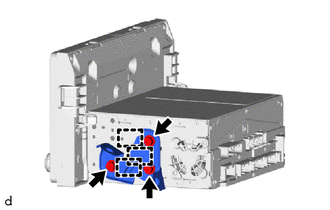
Remove the 3 screws.
Disengage the guides to remove the No. 1 radio receiver bracket from the radio and display receiver assembly.
86212C
6.REMOVE NO. 2 RADIO RECEIVER BRACKET
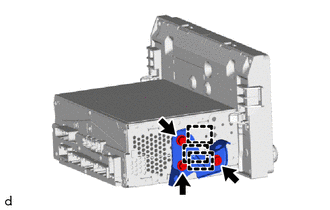
Remove the 3 screws.
Disengage the guides to remove the No. 2 radio receiver bracket from the radio and display receiver assembly.